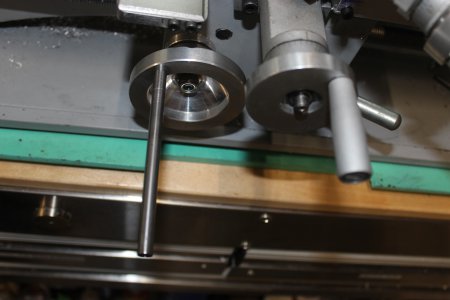
Job 2 is to replace the handle assembly on the handwheel. The carriage handwheel is quite close to the cross slide handwheel, and its handle is very short. This means it is very easy to accidentally pinch the hand between the grips of the two handwheels. The grip is also a bit inconveniently thin, producing an unnecessarily high pressure on the fingers when turning. Finally, it did not run smoothly when moving the carriage.
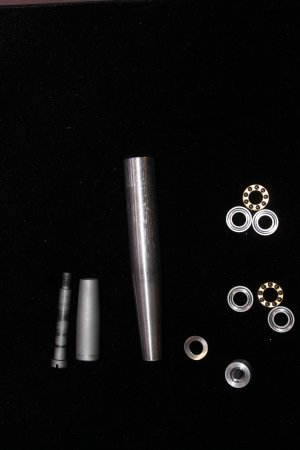
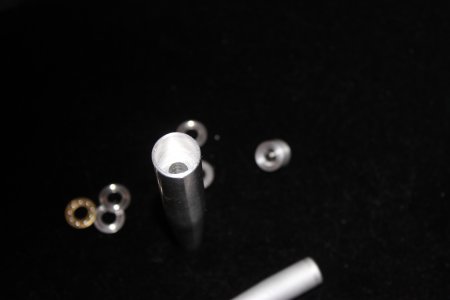
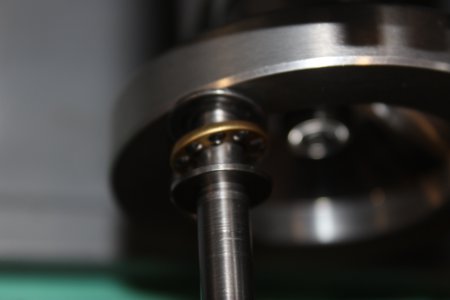
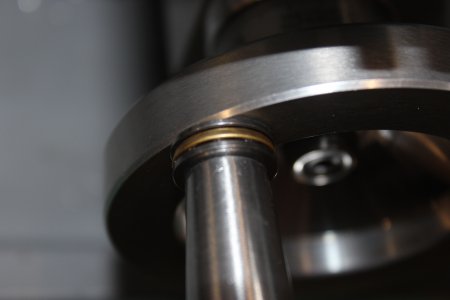
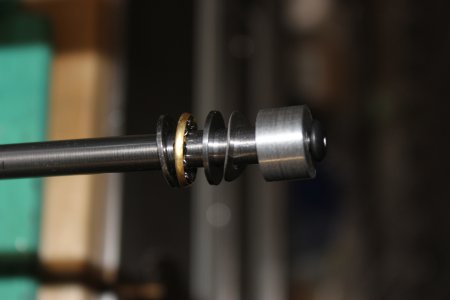
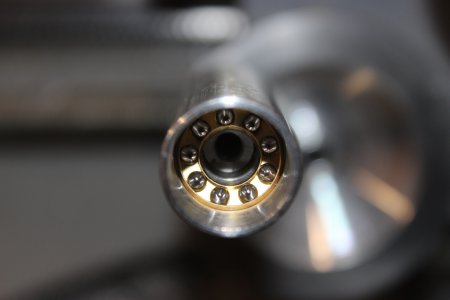
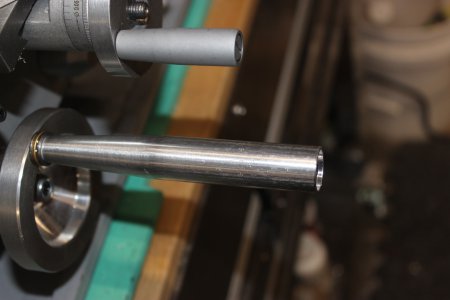
I replaced the 8 x 45 + 10 mm retaining screw with a 5/16" steel drill rod, 112mm long, tapped at both ends. The end facing the handwheel was tapped to 6 x 1 mm, to match the threads in the handwheel. The other end was tapped to 10-32. The rod is well polished to limit friction between it and the Aluminum grip, which is also much longer and fatter (3/4") than the old grip. I considered knurling the grip, but since there will be almost no torque applied to the grip when in use, I decided not to do so. The grip was bored its entire length to 8.0mm and tapered to 0.500" at one end. The other (untapered) end was bored to 16.1mm x 19.0mm deep. I inserted a 6mm x 20mm stainless steel set screw into the 5/16" steel rod and added blue locktite to both sides of the threads, screwing the rod into the handwheel. I slid an 8 x 16 x 5.5 mm thrust bearing over the rod, followed by the grip, which was then followed by another 8 x 16 x 5.5 mm thrust bearing. To maintain a proper pre-load on the thrust bearings, I followed the second thrust bearing with an 8mm x 15mm stainless steel wave washer. I machined a piece of Aluminum to 15.25mm diameter x 9.5mm long. I bored the piece to 5mm and then counter-bored one end to 8.5mm x 5mm deep. This bears against the wave washer. A 10-32 button head allen screw holds the entire assembly together.
Now it runs vary smoothly and with no appreciable wobble or slack. The surface finish of any hand-turned parts is vastly improved. No more bruised knuckles.

![IMG_0945[1].JPG IMG_0945[1].JPG](https://www.hobby-machinist.com/data/attachments/416/416922-f2a1543f264b93af04626c01ca5bafcd.jpg)
![IMG_0952[1].JPG IMG_0952[1].JPG](https://www.hobby-machinist.com/data/attachments/416/416923-455d83e1251b83f3a09f5c754dea98a7.jpg)
![IMG_1023[1].JPG IMG_1023[1].JPG](https://www.hobby-machinist.com/data/attachments/416/416924-ae3eb0baaf7d4bb684c596e9e3e245d9.jpg)
![IMG_1030[1].JPG IMG_1030[1].JPG](https://www.hobby-machinist.com/data/attachments/416/416985-e5cebce9c081ef8ad2828c646fd95d6f.jpg)