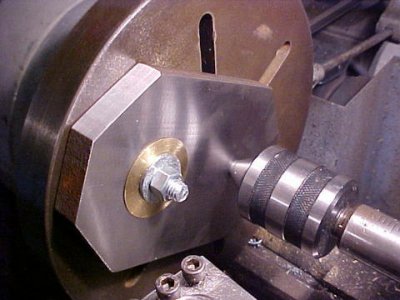
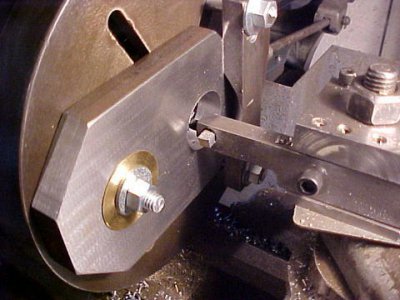
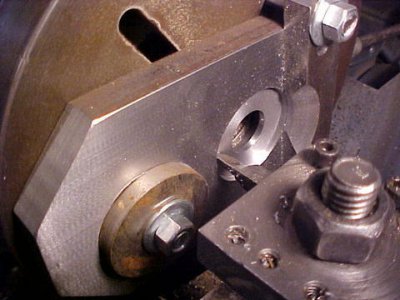
Using the lathe face plate , dogs & turning between centres.

Round in circles

Active User
Registered
Joined
Jul 9, 2014
Messages
613
Would some of the more experienced guys be willing to help build this thread ?
I've had a search in the index and can't find much out about using the face plate to turn larger than the chuck jaws pieces, nor can I find much about turning between centres using face plate & dog.

Have any of you made special parts to enable face plate or dog turning , do you have any pictures ?


I have an exercise that involves two sets of bolting two 200 mm lg x 50 mm square blocks of aluminium bar together with a thin spacer in the middle and turning out two 1& 1/4 inch through holes on the same face ( to clamp two thick wall aluminium tubes in position eventually ) the spacer is to allow me some clamping distance without crushing or nipping the tube too tight once the holes are turned and the spacer is removed.


I'll have to use the face plate for it & am looking for ideas as to what you guys use to make the clamping plates etc to secure large things like this to the face plate.
 
Last edited:
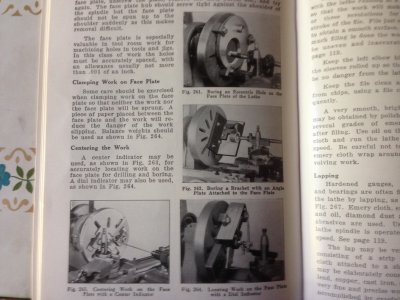
I'm not exactly more experienced, but there is some good info on this in the South Bend How to Run a Lathe. Might give you some ideas until somebody else can give better advice.

-frank

image.jpg
 
I'm not exactly more experienced, but there is some good info on this in the South Bend How to Run a Lathe. Might give you some ideas until somebody else can give better advice.

-frank

That book really lives up to its name.
 
Thanks for the pictures , they are of immense value to me . I now have a better idea of how I may clamp my bits so I don't tear the boring bar & tool post out :lmao: .


I must confess that when I'd enlarged the picture & read as much as I could see , I realized that I'd failed to consider balancing the face plate once the work was securely clamped up.


So it looks like I'll have to turn up five or six 2x 1" thick steel balance washers with a small hole and also several shouldered plate anchoring nuts & bolt them where needed after taking the drive belt off the spindle to find the balance .


All I need to get this project thing of the ground ,up & running is for the aluminium stock to arrive .. told it's on the way and this afternoon I get an email saying, "Sorry it's out of stock , we can supply a bigger size of 2& 1/2 " square bar , do you want it ?" . I've replied , " Yes, if it is at the same price " .
 
Thanks for the mechanical indicator info , I'm going to go another way on that one

I've just been out bid on a cheap red laser pointer , will get one and mount it in a purpose made mild steel taper in the tail stock then to check rough alignment close the jaws on a pin vice chuck set in the lathe headstock chuck the centre pint of the pin vice is exactly that ...... a fraction of a millimetre in dia .a
I will make any micro adjustments on the laser body by judicious use of a two pound engineers ball peine hammer :lmao:

Back to eBay

Laser pointer with a nice sharp dot could be quite handy, i missed an awesome optical centre finder on ebay a while ago, it was a little telescope with cross hairs that fitted in a morse taper.

Stuart
 
Had a play at making a Morse type taper on a bit of bar and counter bored the other end to take a mini laser holder .
Excited as heck putting it together and placing it in the saddle ram ..... only to find that the beam comes out the device at about 1.5 inches 35 mm out of true over 15 inches and because I'd bored the hole as a sliding fit , I could not get it aligned.


Re drilled 1 mm bigger in barely enough metal & tapped bored out the pointer end with three x 5 mm engineers Allen key cap screws hoping to make a it point adjuster system.
Still not quite enough movement , no more meat to play with at that end , so I played at doing the taper on the opposite end a bit better & learnt a few things.
It's not as easy as the books say , unless you have the tools to set the taper accurately ( will have to sleep on that and work out how to accurately transpose 1/8 " Morse taper per foot on to a four inch long section of the new to be made quill .
USA tooling that came with my lathe appears to have a different taper to a Morse taper ( OK I might have got the taper angle wrong :lmao:)

This morning I got six brand new nine inch long full threaded 12 mm coach bolts , the square coach bit shoulder fits in the channels of the face place brilliantly ...no need for chunky "T" nuts . I'll have to cut the bolts to a shorter length once the newly ordered ally bar arrives .

Today is the last day I can play for a while , for I have to sort the caravan out for a500 or so mile round trip to a wedding that kicks off Thursday morning and ends when we get back home on Sunday evening .

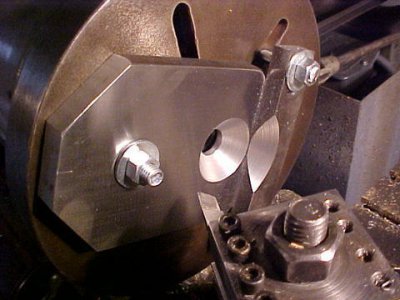
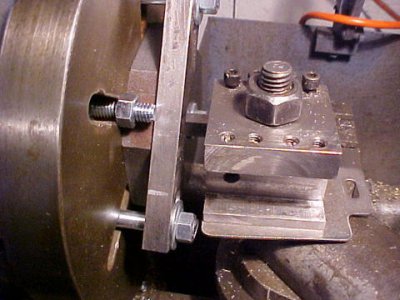
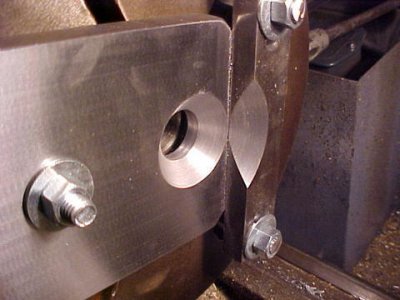
So , for this afternoon I hope to turn some 30 mm hex bar off centre or on a flat to make shoulders in several 60 mm long sections and then bore out the centre to 12.5 mm If i make the step 10 mm wide 20 mm down from the top I'll have a useful clamp bracket that can sit on several different sizes and only need one nut & bolt to secure it
 
Best and simplest device for centering to a punch mark in the lathe is a 60 deg pointed sleeve with concentric outer diameter drilled and reamed in the non pointed end that snugly but freely fits a smaller diameter rod perhaps half the diameter of the larger rod and has a female center drilled in it's back end. A stiff spring fits in the hold in the sleeve and bears against the end of the smaller rod; the center hole is fit over the lathe tailstock center and tensioned as necessary, a dial indicator is held against the sleeve as close as possible to the center point that is resting against the workpiece and the spindle rotated, showing the amount of offset. As far as the length of these parts, for mine, which is sized for 14" plus lathes, the sleeve is 3/4" dia and 6 1/2" long and drilled and reamed 3 1'2" deep; the rod that fits inside is 3/8" dia and 11 1/2" long drill rodthe spring is 1 1/2" long and .045 wire size.
The prototype was made at the Mare Island Naval Shipyard. For smaller lathes, of course it can be made to roughly the same proportions, but smaller to suit your machine. One nice thing about this is that the spring tension temds to hold the work against the faceplate while one fiddles around trying to locate and attach it to the plate.
 
Back
Top