Mark, I'm sure you have found out by now that your CBN wheels are the ultimate for sharpening HSS bits. I have a pair in 180 grit and the list of benefits over traditional grinding wheels is very long. My only regret is they are located in the wood shop area of my split shop and I have to walk around to touch up a tool (bypassing two perfectly good grinders with traditional friable stones) 180 grit is a little fine for shaping, and a 60 grit would be better. That being said, I use them anyway to shape 3/8, and 1/4" HSS bits from scratch.
-
Welcome back Guest! Did you know you can mentor other members here at H-M? If not, please check out our Relaunch of Hobby Machinist Mentoring Program!
You are using an out of date browser. It may not display this or other websites correctly.
You should upgrade or use an alternative browser.
You should upgrade or use an alternative browser.
Tool Grinding and CBN wheels? OK or Not?
- Thread starter BFHammer
- Start date
Until then there are these
https://www.amazon.com/Metal-Grinding-Ceramic-Sanding-Belts/dp/B00H8YWTG4
and these
http://www.china-superabrasives.com/diamond-CBN-sandpaper-belt.htm
https://www.amazon.com/Metal-Grinding-Ceramic-Sanding-Belts/dp/B00H8YWTG4
and these
http://www.china-superabrasives.com/diamond-CBN-sandpaper-belt.htm
Last edited:
- Joined
- Jan 27, 2017
- Messages
- 184
This past weekend I did finally get around to giving the CBN wheels a whirl and attempting my first hand ground HSS lathe bit.
All in all the process went well. On the slow speed grinder with and 80 grit CBN wheel the progress is not lightening fast, but neither is it painfully slow. It took me about 15 minutes to completely grind including time for snapping pictures.
I had my water can at the ready but the tool never really got hot enough to worry about. Many thanks to Mikey and his tutorial as I studied it at great length and even referred back to it during the process. As promised here are some pics.
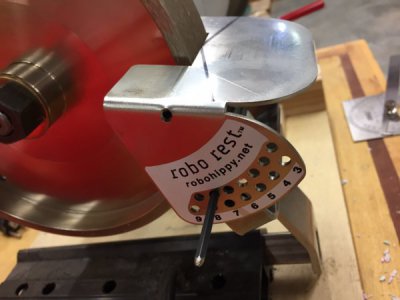
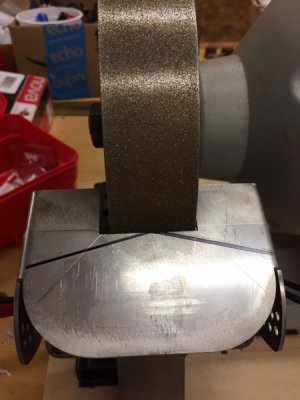
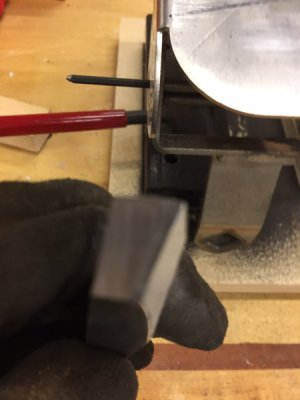
I used my robo rest which is a regular part of my set up for wood lathe tools. I adjusted to 15 degree angle to the wheel and added a couple of 15 degree reference lines as well.
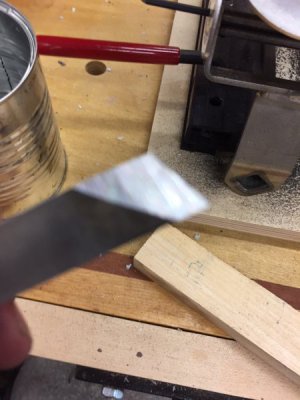
It's difficult to see in the picture but I marked the line on my blank at 15 degrees (note to self - get a fine line sharpie!)
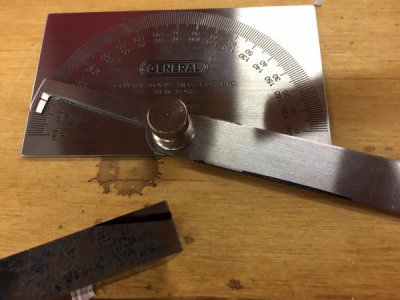
The block was a great idea and made the grinding very easy.
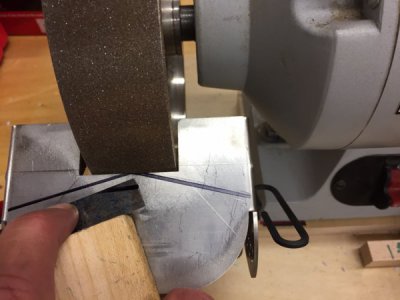
As I mentioned it wasn't lightening fast - I would guess it took about 5 minutes to get the initial side ground. You can see I cheated a little bit as my 15 degree angle doesn't extend the entire ground surface, but I don't think it will effect performance.
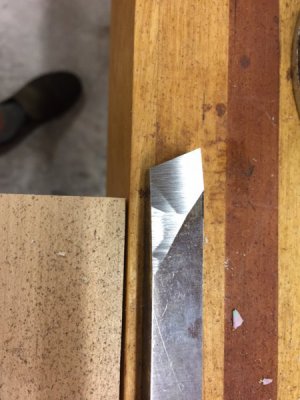
Measured with my protractor which is more accurate than my sharpie. Marked off my second angle to give me an 85 degree included angle.
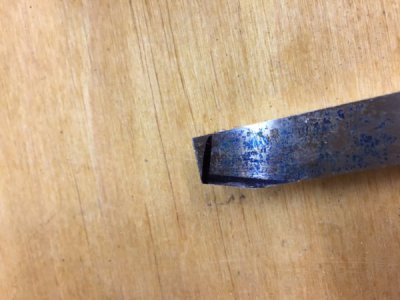
Almost there....
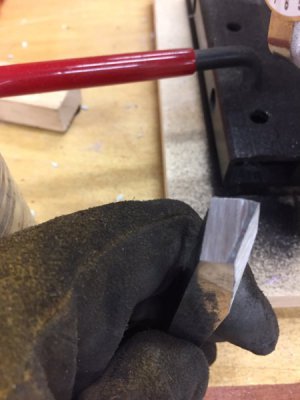
That does it for the face.
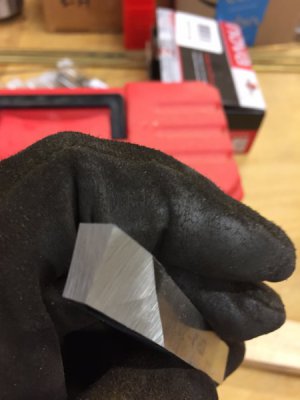
Same thing but with a little better picture.
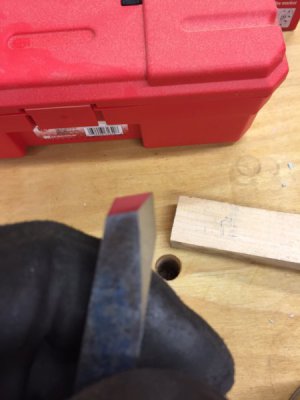
And with the back rake completed.
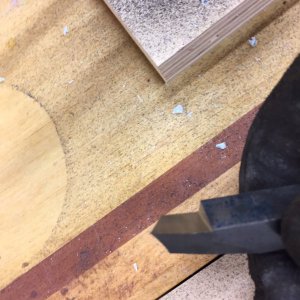
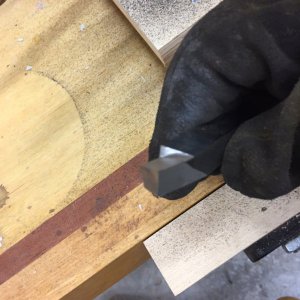
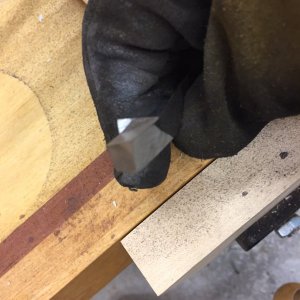
Of course I had to immediately try it out. It certainly faces and cuts, I need some more experimentation to get the best profile, feed and speed. Here is the initial result on a piece of mystery steel. The left 2/3 was cut with my newly finished bit. The final third with my trusty carbide insert - so I have something to shoot for.
The chips I got were of the razor wire variety, have to study up on chip breaking. I did take a quick video with my phone, but I'll have to figure out how to upload that.
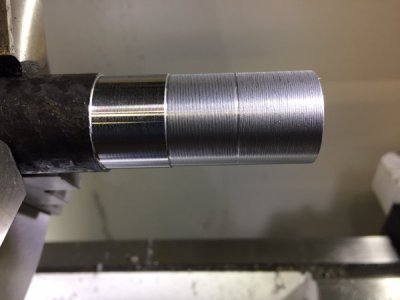
Thanks for all the comments and checking out the results! Any advice is always welcome!
Thanks,
Mark
All in all the process went well. On the slow speed grinder with and 80 grit CBN wheel the progress is not lightening fast, but neither is it painfully slow. It took me about 15 minutes to completely grind including time for snapping pictures.
I had my water can at the ready but the tool never really got hot enough to worry about. Many thanks to Mikey and his tutorial as I studied it at great length and even referred back to it during the process. As promised here are some pics.
I used my robo rest which is a regular part of my set up for wood lathe tools. I adjusted to 15 degree angle to the wheel and added a couple of 15 degree reference lines as well.


It's difficult to see in the picture but I marked the line on my blank at 15 degrees (note to self - get a fine line sharpie!)

The block was a great idea and made the grinding very easy.

As I mentioned it wasn't lightening fast - I would guess it took about 5 minutes to get the initial side ground. You can see I cheated a little bit as my 15 degree angle doesn't extend the entire ground surface, but I don't think it will effect performance.

Measured with my protractor which is more accurate than my sharpie. Marked off my second angle to give me an 85 degree included angle.

Almost there....

That does it for the face.

Same thing but with a little better picture.

And with the back rake completed.


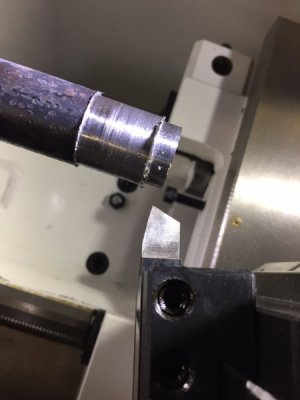
Of course I had to immediately try it out. It certainly faces and cuts, I need some more experimentation to get the best profile, feed and speed. Here is the initial result on a piece of mystery steel. The left 2/3 was cut with my newly finished bit. The final third with my trusty carbide insert - so I have something to shoot for.
The chips I got were of the razor wire variety, have to study up on chip breaking. I did take a quick video with my phone, but I'll have to figure out how to upload that.

Thanks for all the comments and checking out the results! Any advice is always welcome!
Thanks,
Mark


Attachments
- Joined
- Dec 20, 2012
- Messages
- 9,422
For a first tool bit, that is an awesome job! Congrats, BFHammer!
I have a few suggestions:
I have a few suggestions:
- You have side rake but almost no back rake. The tool will cut but it does so with higher cutting forces and all the cutting is at the side cutting edge. Adding back rake will focus forces near the tip of the tool and will improve chip ejection and finish.
- Your tool looks like it has no nose radius, or very little. I would suggest at least a 1/64" nose radius to reduce the chance of breakage and improve the finish.
- You are using the tool with a negative lead angle, meaning the side cutting edge is perpendicular to the work piece. This is fine when cutting to a shoulder but for general turning, try using the tool with the shank of the tool perpendicular to the work. This will improve your finish.
- I suspect the stringers can be changed to chips by using a faster feed.
- Joined
- Jan 27, 2017
- Messages
- 184
Mikey,
Thanks for the tips. I will have to revisit the tutorial and study the back rake.
I did actually put a nose radius on the tool, I did that with a quick pass on my 180 grit wheel and with a diamond stone. In my haste to try it out I neglected to take anymore pictures at that point. Now that I'm over the hurdle of grinding that first tool, I'll go back and experiment with more and less nose radius.
As to the angle of the tool, yes you are right. I was playing around with different angles - also different speeds and feeds - unfortunately my approach would fail scientific method. I'll be a little more measured in my testing going forward.
- Joined
- Dec 20, 2012
- Messages
- 9,422
Mikey,
Thanks for the tips. I will have to revisit the tutorial and study the back rake.
I did actually put a nose radius on the tool, I did that with a quick pass on my 180 grit wheel and with a diamond stone. In my haste to try it out I neglected to take anymore pictures at that point. Now that I'm over the hurdle of grinding that first tool, I'll go back and experiment with more and less nose radius.
As to the angle of the tool, yes you are right. I was playing around with different angles - also different speeds and feeds - unfortunately my approach would fail scientific method. I'll be a little more measured in my testing going forward.
I want to encourage you to work at this grinding thing because once you figure it out, the tool will work well for you. You're doing great and things will only get better as you gain experience.
The tool angle thing is called changing the Lead Angle. The tip of the tool has three cutting surfaces - the side cutting edge, the nose radius and the end cutting edge. As you change the angle of the tool, you bring one or two of these edges into prominence. When the tool is perpendicular to the work, the nose radius does most of the cutting if you have enough back rake. When you angle the tip of the tool back toward the tailstock, you bring more of the side cutting edge into contact with the work and finishes get better but it can chatter on thin work pieces or deep cuts. When you angle the tip toward the chuck, less of the side cutting edge contacts the work and you can take deeper cuts with less potential for chatter.
So, when you're roughing, try positioning the tool so the shank of the tool is perpendicular to the work. When finishing, try angling the tip slightly more toward the tailstock and you will notice the finish improve. When turning into a shoulder or when facing, angle the tool so the side cutting edge just clears the face of the shoulder. You can actually see the width of the chip widen and thin out as you turn the tool toward the tailstock - try it in aluminum so you can see this easier. You will also see the finish improve significantly. Fun to play with but useful, too.
By the way, back rake does several important things. It shifts the cutting forces to the tip of the tool and this can greatly improve finishes. It also helps the tool to penetrate better so cutting forces are reduced. It also helps to improve chip flow and together with side rake, this greatly reduces cutting temperatures.
So yeah, try grinding some back rake and see what happens. Let me know if any of this is confusing or if you have questions.
Mike

