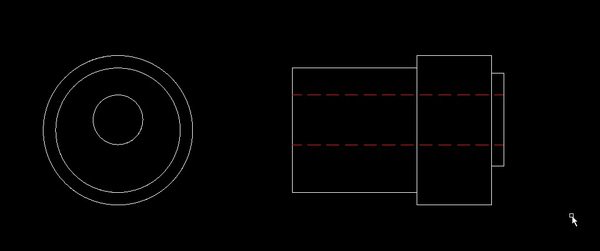
Today's job, cams made from 1018 hot rolled stock 1 1/4" OD, they are 5" overall length, .498" +0 - .003" with a 1/2-13 thread .75" long.
The head diameter is .960" offset by .105" and is 5/8" long. I faced them to length in hard jaws and drilled a center in one end, changed to pocketed soft jaws and a live center then turned the .498-.495 X 4 3/8 shank.
Changed chuck jaws again to 1/2" soft jaws (in order to not mar the finished surface), put the large end inside the chuck against a spindle stop and did the chamfer, undercut and thread.
Then made a fixture in the lathe and drilled and reamed it in a mill with the offset which looked like this:

Changed jaws again to hard jaws to hold the fixture, the shoulder is to give a fixed position in the Z axis when changing parts. Used the thread to hold them and turned the offset diameter of .960".
Used a DCMT insert at 750 RPM's, .032 DOC and .008 IPM feed for roughing, 750 RPM's, .004 DOC and .004 IPM for finishing and the finish and repeatability were excellent, flood coolant is essential. I did 12 parts with one insert.
As a sidenote these parts do not control the wings on aircraft so the typical hobbyist penchant for accuracy to 2 tenths does not apply. I did however use a set of thread ring gauges only because we had them.
You can get a reasonable finish on that material with careful tool choice and practices.
Also machine work is not as hard to learn as you might think, plan ahead a bit and do what works for you and your particular machine and job.
Good Luck


