[How do I?] Thread Crest Override - ???

RJ,

Thank you for your patience and help.

Unfortunately my spindle does not have a groove and there may not be enough space to make one.

BamBam, It's hard to see from your photo but I was thinking of something a long the lines of a set of pins on the face of the spindle with a lock screwed into the hub of the backplate. The drawing below shows the thought. The spindle face (magenta) would have two pins added (e.g., cap screws threaded in 180 deg. apart. The backplate (purple) would have two holes threaded in. Two stops (green) would be screwed to the mounted backplate so they are touch in the pins on the spindle. The holes in the hub would be located after mounting the backplate. Since the mounted position is essentially the same each time the chuck is mounted, very little allowance for variation need be made. The elongated slot should be sufficient.

Bob
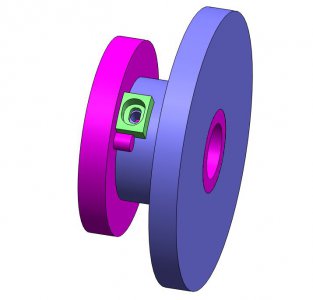
Chuck Lock.JPG
 
RJ,

Thank you for your patience and help.

Unfortunately my spindle does not have a groove and there may not be enough space to make one.

Note: I realize that modifying a lathe spindle is a serious decision and not to be taken lightly. Additionally, If the spindle face is hardened, that could present some machining problems. Finally, the spindle modification would most properly be done by removing the spindle from the lathe; not a trivial task.

Bob
 
Bob,

Thank you for the suggestion as shown in the cartoon, worth pursuing.
 
If you have checked for slop in the top half of the carriage. Then something in the gear train is losing sync with everything. Check all the gears that have keys. Check all gears for any missing teeth. That goes for inspecting the carriage innards too! Check the shear pin in the lead screw. Check the half nuts for excessive slop that could cause it to jump a thread…Good Luck, Dave.


PS: does this lathe have a spring type clutch that with jump gear teeth in the quick change if the lathe is put under too much load?
 
BamBAM, You cannot disengage the gears when threading. Using the thread dial won't help you. If you can't reverse your motor, you will have to wind it back by hand (ugh!).

Having had to cut some metric threads to a shoulder, with no relief cut, that I could not afford to muck up, I decided to fit a crank to the back of the spindle and turn it by hand. Wow, it was so easy and stress free for the operator! It actually seemed to take a bit less time to do the job somehow. Am very happy about having made a crank for this purpose.
Turning the spindle by hand is not as bad an operation as it might seem.
 
Last edited:
Checked the end play, grabbed a piece of leather and clamped it over the lead screw with a large vise grip and tried turning the screw against the bushing trying to find out whether the pin is broke, not it. I grabbed the vise grip and tried to move the screw L and R, no movement.

Checked the end play, grabbed a piece of leather and clamped it over the lead screw with a large vise grip and tried turning the screw against the bushing trying to find out whether the pin is broke, not it. I grabbed the vise grip and tried to move the screw L and R, no movement.
Hi again When I said check end play of leadscrew I should have been more specific. Sorry I am older and assume people know certain things . Anyway the tail end of your lead screw will be a smaller diameter with a thread on the end to accept a locking nut of some sort. This end will go thru a bolster. Set up a test indicator on the very tail end of the lead screw. Use a pry bar or long screw driver and use right and left side of the carriage for the fulcrum point and lightly pry with the pry bar tip in a lead screw tooth. Alternate prying on each side of of the carriage while watching indicator. .oo2 total is acceptable. If excessive, tighten the lock nut (s)., to attain the .002 The half nuts have to be disengaged and will not hurt to disengage feed also. Use common sense not to damage leadscrew teeth or carriage. I use wood blocks on carriage and piece of brass shim on leadscrew tooth. If all is well on the tail end of leadscrew, the other end probably goes thru quick change gear box and ends on opposite side of headstock as the chuck . There will be a gear on the end of the leadscrew. Make SURE there is no missing tooth on this gear and any gear in this train. This gear train is called Quadrant gearing. Then remove the gear on the end of the lead screw. It will be keyed or pinned to leadscrew, most likley keyed. This key sheared is common at wrecks. A sheared key often holds enough for feeding, but will slip threading. I worked for Leblond as field service tec for 10 years. Good luck to you.
 
Last edited:
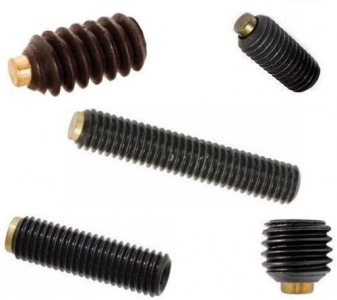
I had a hunch that you were using reverse tumbler witch won't do when threading. An ease mod you can do is drill and tap your back plate 1/4-20 and use a short piece of brass rod or a lead BB and a setscrew to tighten it down on the threads, after you have tighten the chuck down. If you are using a VFD don't use a break while in reverse. And don't thread or try to hog when in reverse. I bore in reverse 90% of the time just take lighter cuts and as always pay close attention at all times weather running in reverse or forward.
 
Hi again When I said check end play of leadscrew I should have been more specific. Sorry I am older and assume people know certain things . Anyway the tail end of your lead screw will be a smaller diameter with a thread on the end to accept a locking nut of some sort. This end will go thru a bolster. Set up a test indicator on the very tail end of the lead screw. Use a pry bar or long screw driver and use right and left side of the carriage for the fulcrum point and lightly pry with the pry bar tip in a lead screw tooth. Alternate prying on each side of of the carriage while watching indicator. .oo2 total is acceptable. If excessive, tighten the lock nut (s)., to attain the .002 The half nuts have to be disengaged and will not hurt to disengage feed also. Use common sense not to damage leadscrew teeth or carriage. I use wood blocks on carriage and piece of brass shim on leadscrew tooth. If all is well on the tail end of leadscrew, the other end probably goes thru quick change gear box and ends on opposite side of headstock as the chuck . There will be a gear on the end of the leadscrew. Make SURE there is no missing tooth on this gear and any gear in this train. This gear train is called Quadrant gearing. Then remove the gear on the end of the lead screw. It will be keyed or pinned to leadscrew, most likley keyed. This key sheared is common at wrecks. A sheared key often holds enough for feeding, but will slip threading. I worked for Leblond as field service tec for 10 years. Good luck to you.


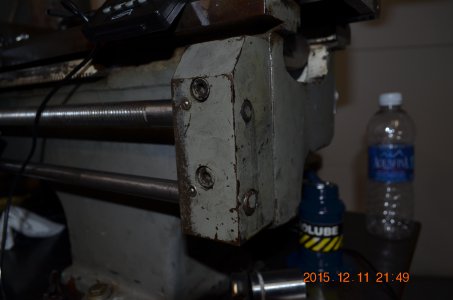
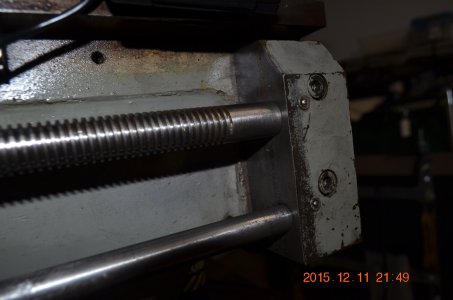
Is this the bolster you are talking about? If so, my lead screw does not have a threaded end for a locking nut. I will take the gear box cover this weekend for inspection.

Thank you for your time, appreciate it.

DSC_4174.JPG DSC_4175.JPG
 
I had a hunch that you were using reverse tumbler witch won't do when threading. An ease mod you can do is drill and tap your back plate 1/4-20 and use a short piece of brass rod or a lead BB and a setscrew to tighten it down on the threads, after you have tighten the chuck down. If you are using a VFD don't use a break while in reverse. And don't thread or try to hog when in reverse. I bore in reverse 90% of the time just take lighter cuts and as always pay close attention at all times weather running in reverse or forward.

Thank you.

The set screw mod sounds like an easy one to implement. Appreciate the tip when running in reverse.
 
Back
Top