Suywp P3a

Status
Not open for further replies.
Nice job on the trailer, and I like the rig for moving it around with the fork lift too. Looks like really nice shop. Have you given a tour here yet? Mike
 
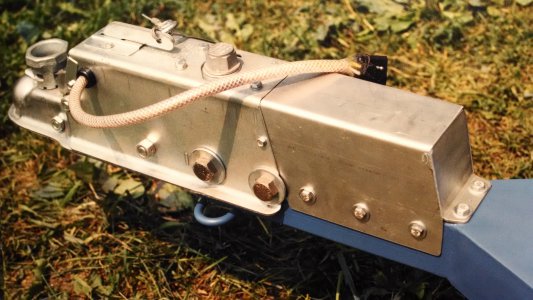
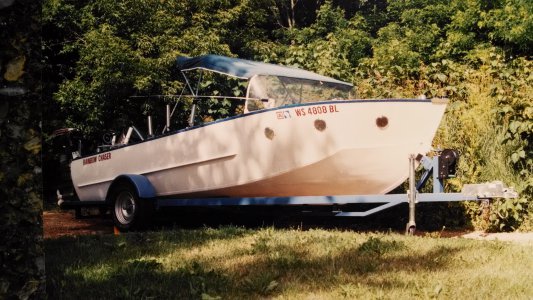
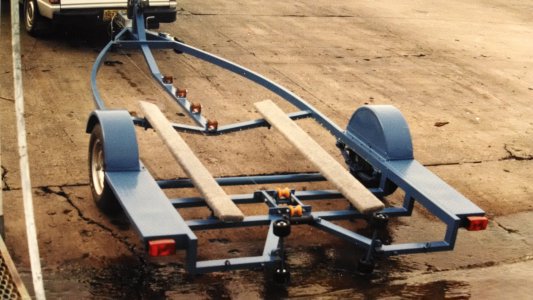
My premier welding project has to be a boat trailer built from the ground up in the 1980's. It was designed to carry an 18' Great Lakes fishing boat. It features a 6" dropped axle, hydraulic Surge disc brakes with an automatic bypass valve for reversing. a combination of roller and bunks for support, and a streamlined frame.

The dropped axle was made using salvaged Pontiac spindles (the wheels were the same as my S10 of the time, eliminating the need for a separate spare). An adapter plate was made for each wheel assembly and welded as well as bolted to the assembly. Alignment prior to weld-up was done using a then new digital level. Leaf spring suspension was used.

A combination of roller support and bunk support was used in the design. Rollers were implemented under the keel to facilitate loading and unloading the boat. The rear rollers are mounted on a pivoting mechanism, controlled by a separate winch, to drop out of the way and transfer the load to the bunks. To permit the use of the dropped axle, a removable cross bar, held in place by pins, was used. The over width clearance lights were mounted to this bar as well. Fenders were purchased from Northern Tool. Re-enforcing diamond plate decks were welded aft of the wheels.

The frame was designed on quadrille ruled paper (no CAD back then) and the curve plotted out with offsets from a reference line every foot or so. These curves were then chalked on the shop floor using a thin strip of flat bar as a French curve. The major build occurred at the welding shop of a close friend and fishing buddy. The main frame was built from 3" structural channel. We would make a bend in the channel and evaluate it on the layout pattern, tweaking when necessary. Once one side was done, we used it as the pattern for making the opposite side. 4" x 1/4" square tube was used for the tongue.

A weekend of work was sufficient to get the trailer to the point where I could tow it home. At home, I welded 3/16 x 3" flat to the 3" channel to create a box. Cross pieces were also boxed in. All joints were then completely welded and ground smooth. 7018 rod was used for the first pass and 7014 for a finish pass. My buddy also had a Diesel engine driven sandblaster and four 55 gallon drums of sand and an afternoon later I had a completely bare metal frame. The frame was primed and painted with a custom mixed implement paint to match the boat trim.

The overall project was a success. Doing it over, I wouldn't have gone with the six inch drop. The back end can bottom out going in and out of driveways. A four inch drop would have been sufficient. I compensated somewhat by modifying the spring shackles. Going to a larger tire would help as well. With the Surge disk brakes and low slung profile, it pulls like a dream. No wind resistance nor any push from the trailer when braking. Even behind my old S10, you could easily forget that it was there.

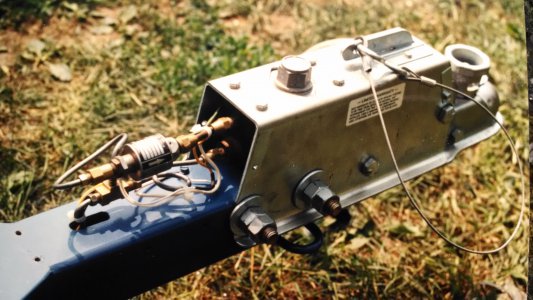
I apologize for the less than ideal picture quality. They are retakes from old pre-digital photos. The two close-ups show the Surge brake system. The bypass valve is a surplus jet engine fuel valve with a rating of 1500 psi. It is a 24 volt valve but, since the valve is never energized under load, it functions well at 12 volts. It is tied into the vehicle backup lights so the hydraulic system is disabled whenever backing the trailer.

The boat and trailer are in dry dock now, awaiting a transom rebuild (replacing the old rotted wood core with a new fiberglassed laminate and raising the transom from 15" to 25" to accommodate a new four stroke engine and anticipated waves on the Great Lakes.
IMG_20150327_110424238.jpg IMG_20150327_110517179.jpg IMG_20150327_110552055.jpg View attachment 98442
IMG_20150327_110604358.jpg
 
Thanks for the comments. RJsakowski, nice boat trailer. I really liked your surge brake set up.
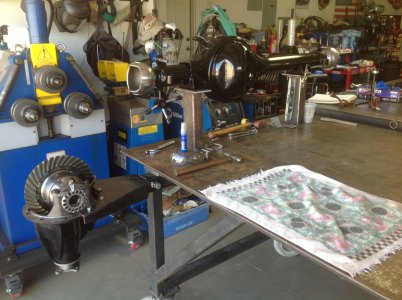
Mike, this is the first larger project I have built in my new shop. The space I have gained is incredable from a production standpoint.
I have not given a tour of the shop and machines. Not really sure where it goes. My old shop (six car attached garage) 25'x50' with 9' ceiling.
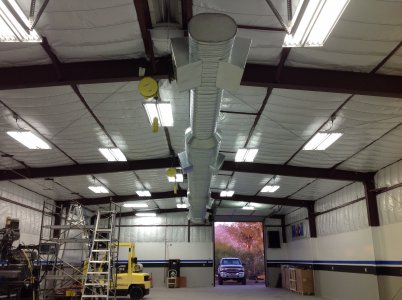
The new shop is 40'x80'x14'eves. (Mueller steel building). Every thing in new shop with the exception go the Lagun CNC mill and Bendpak two post lift use to live in the old shop, a very crowded situation. Fist picture is of old shop, second is new facility a few months back. The old shop will be cleaned and re painted to house the vehicles as this garage has two 18' garage doors (drive though) providing access to the N/E two post lift bay of the new shop.IMG_0132.JPGIMG_0462.JPG
 
So now that the trailer is gone, I can get back to working on the shop. I still have all the steel (inventory) on horses in the old shop as the metal rack sits in the new shop awaiting modification. With the new ceiling hight, I'm compelled to add an overhead plate rack that would be attached to the metal rack.
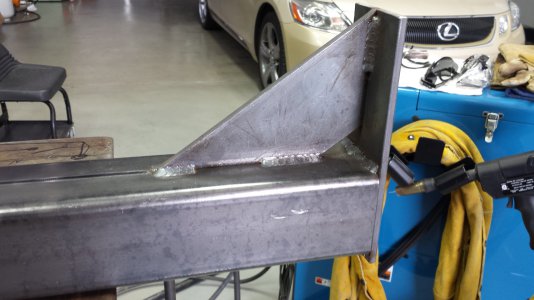
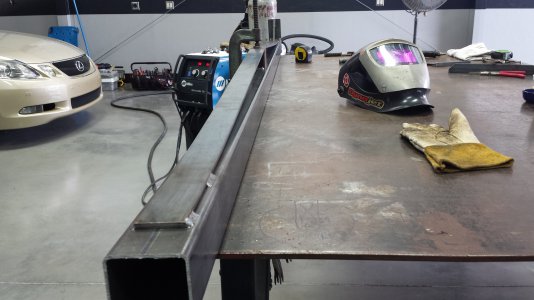
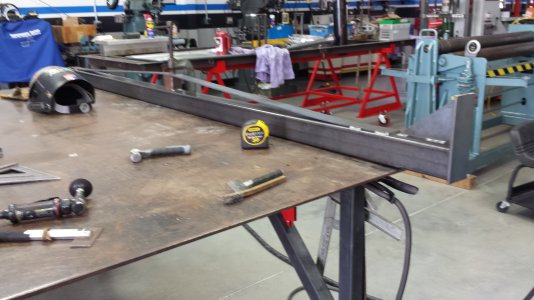
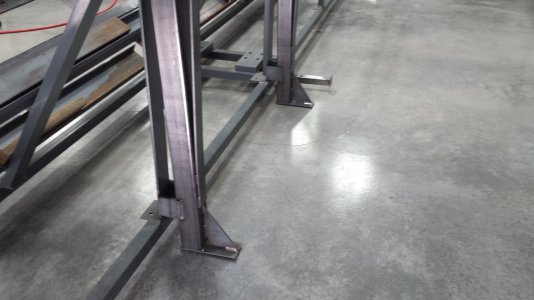
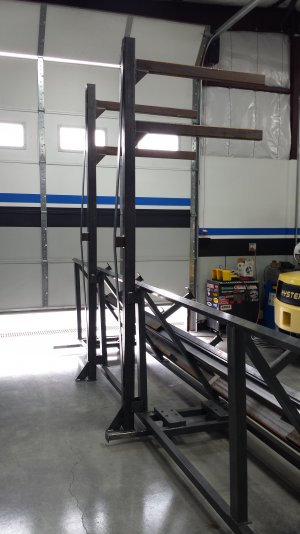
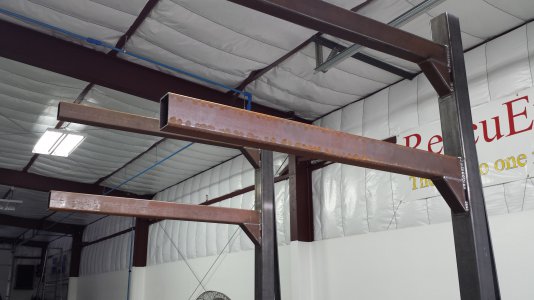
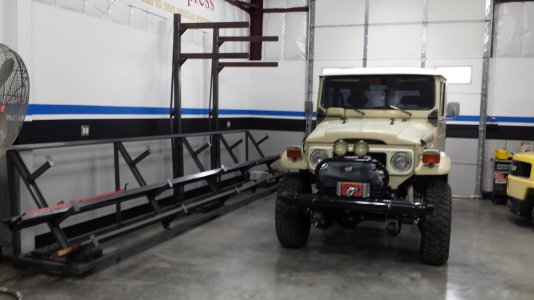
I keep various gauges of 4'x8' sheets for CNC plasma table work. The thickest being 1/4" and most 10 gauge. No more than ten sheets total. Keeping floor space open is paramount as I worked in a cramped shop for way too long. The fork lift is key to pulling this plate storage off. Two upright columns of 1/8" x 3"x 3" nine feet long where laid out and resting feet added using 1/4" x 3" x 8" flat strap and a gusset added. The "backbone" was added using a 2"x 3"x2.5" and trussed with 1/4" x 2" flat strap. This truss should give the columns 3 x the strength to resist flex. The metal rack sits on six HD swivel casters allowing the rack to be moved in to place as well pulling away from the wall to sweep/mop. The columns where shimmed 1/4" off the floor to facilitate rolling. The horizontal arms that will hold the sheets are 1/8" x 2" x 3" x 40 long. The same material was used for gussets. A few more pieces to be added and its ready for paint.
I encourage any input, so lets hear it.
20150329_122431.jpg 20150329_124042.jpg 20150329_124059.jpg 20150329_164632.jpg 20150329_164620.jpg 20150329_164704.jpg 20150329_175955.jpg
 
The steel/plate rack is painted and located. Stocked with 20' sections of various solid stock, round, square tubing etc.
I had to come up with a second rack system to store the remnants to include the solid stock used for machining.
I call this the rib cage vertical storage rack.20150408_142052.jpg20150411_114157.jpg20150411_114624.jpg20150411_124139.jpg20150411_124153.jpg20150411_131708.jpg
 
Thank you Mike,
its been a long process but it's getting there.
 
Here is a roll cage I have been working on for a friend's Miata "soon to be" race car. It is all fit, tacked and partially welded. The design is a combination of class rules, owner preference and the ability to fit under a factory hard top. The tube is 1.5" x .120 wall A513 DOM.
picture.php?albumid=3868&pictureid=50816.jpg
picture.php?albumid=3868&pictureid=50818.jpg
picture.php?albumid=3868&pictureid=50819.jpg
picture.php?albumid=3868&pictureid=50820.jpg
picture.php?albumid=3868&pictureid=50821.jpg
picture.php?albumid=3868&pictureid=50815.jpg
 
I welded up a few race cars for my father before. Fish mouth, fit, grind, repeat!

Sent from somewhere in East Texas JP
 
Status
Not open for further replies.
Back
Top