- Joined
- Feb 2, 2013
- Messages
- 3,916
i got a call from a company that tried to fix it themselves first...☺
to give some background,
the customer has a completely locked up 10Hp Baldor Motor, ( the picture was taken after i removed the offending sprocket)
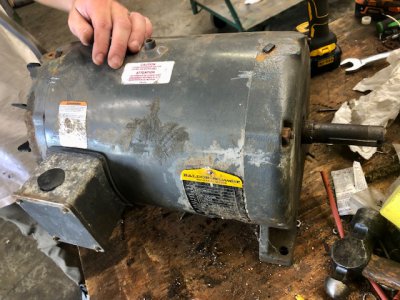
the motor used in an industrial meat grinder (the motor is valued in excess of $3,000 by the manufacturer + 2 weeks lead time)
in other words, he wanted this fixed yesterday and was not ready to wait 2 weeks to start producing grind again- an emergency, on his part.
in desperation he shot himself in the foot by removing only one of the set screws and breaking the other , then trying to use an in sufficient puller to attempt removal of a really stuck sprocket
there was a #35-4 Chain sprocket rusted to the motor shaft
due to the fragile nature of the sprocket and the level of oxidation between the shaft and sprocket, i decided to construct a heavy duty puller
thankfully, i have lots of materials around the shop to make things from.
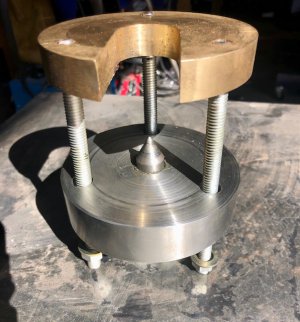
after searching for a few minutes i came across a 4.24"OD x 3/4" long slug of aluminum bronze, a 3/4"x 10tpi x 4-1/2" bolt, a 5" OD x 2" Long slug of unknownium , some 3/8" all-thread and nuts, washers, and a short piece of 12L14 to make a sacrificial center nosepiece.
all the makings for a formidable puller.
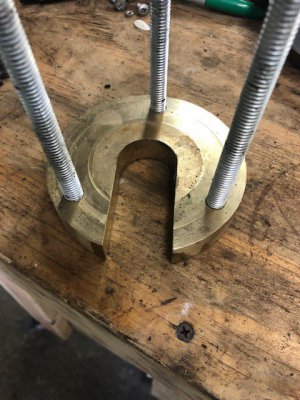
i first chucked up the slug of aluminum bronze in the Victor2040,
faced and drilled the center to 1-1/8" (the largest drill i have), and then bored the center to 1-1/4".
i lightly trepanned a groove to use for the spacing the all-thread pillars.
i faced the slug to have a 1/8" protrusion in the center (to pull on the center of the sprocket, not the outer edges)
i laid out the 3 points for the pillar placements and drilled and tapped for 3/8"-16 tpi
i took an angle grinder and roughly cut a 1" slot in the slug, then slotted to 1-1/4" on the Bridgeport Mill
i installed the 3/8" x6" long pillars and went to the next step...
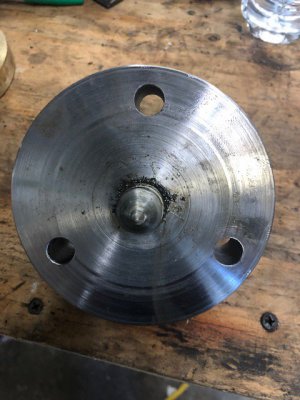
the next step was to shuck up the 5" chunk of unknownium, face both sides and drill the center to 21/32", tap to 3/4"-10tpi
i again trepanned a groove (to match the groove in the aluminum bronze) and drilled oversize clearance holes
i took a grade 5 3/4"10tpi x4-1/2' long bolt and faced the threaded end, drilled to 5/16"
i made a sacrificial 60° center out of some 5/8" 12L14 and turned one end to .310" , to be inserted into the 3/4" bolt as a revolving center.
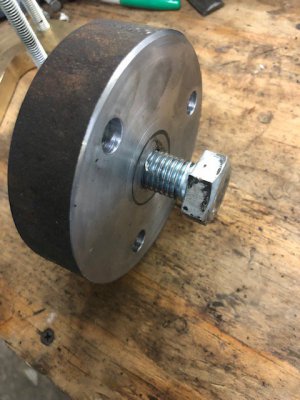
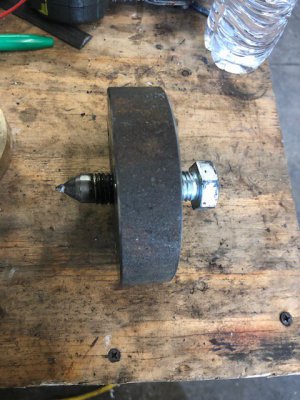
then, i assembled the puller and i used it to remove the very stuck sprocket.
i attempted extraction of the broken hardened set screw, but it kept eating my small carbide endmills.
i decided that heat, penetrating fluid, and brute force was going to have to prevail.
even though i had to leave the broken set screw in place, the puller overcame the resistance like a champion!!!
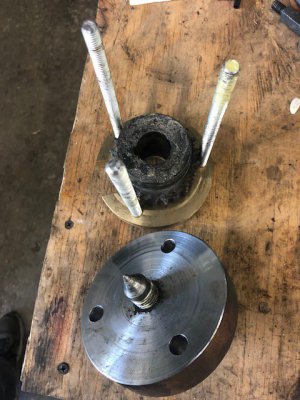
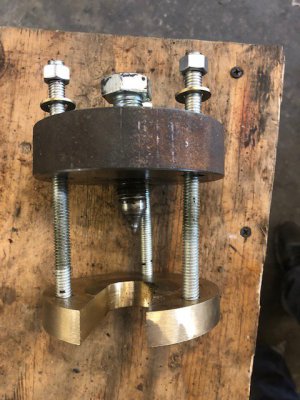
but i though it wasn't done until i skimmed the OD of the 5" unknownium
Here is the offending sprocket, previously damaged by the customer...
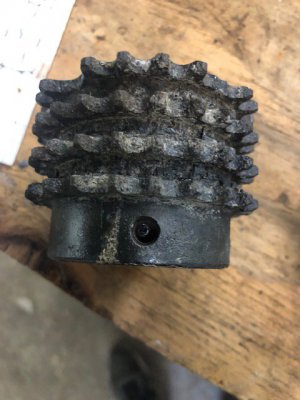
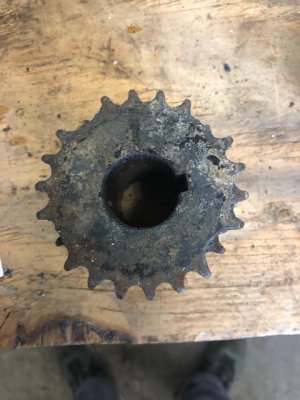
after removing the sprocket i was able to disassemble the motor, swap out the bearings, smack on a new sprocket and restore operation.
the customer was ecstatic that i was able to fix his blunder-it wasn't cheap for him, but it put him back in business- fast
as always thanks for reading!
to give some background,
the customer has a completely locked up 10Hp Baldor Motor, ( the picture was taken after i removed the offending sprocket)

the motor used in an industrial meat grinder (the motor is valued in excess of $3,000 by the manufacturer + 2 weeks lead time)
in other words, he wanted this fixed yesterday and was not ready to wait 2 weeks to start producing grind again- an emergency, on his part.
in desperation he shot himself in the foot by removing only one of the set screws and breaking the other , then trying to use an in sufficient puller to attempt removal of a really stuck sprocket
there was a #35-4 Chain sprocket rusted to the motor shaft
due to the fragile nature of the sprocket and the level of oxidation between the shaft and sprocket, i decided to construct a heavy duty puller
thankfully, i have lots of materials around the shop to make things from.
after searching for a few minutes i came across a 4.24"OD x 3/4" long slug of aluminum bronze, a 3/4"x 10tpi x 4-1/2" bolt, a 5" OD x 2" Long slug of unknownium , some 3/8" all-thread and nuts, washers, and a short piece of 12L14 to make a sacrificial center nosepiece.
all the makings for a formidable puller.
i first chucked up the slug of aluminum bronze in the Victor2040,
faced and drilled the center to 1-1/8" (the largest drill i have), and then bored the center to 1-1/4".
i lightly trepanned a groove to use for the spacing the all-thread pillars.
i faced the slug to have a 1/8" protrusion in the center (to pull on the center of the sprocket, not the outer edges)
i laid out the 3 points for the pillar placements and drilled and tapped for 3/8"-16 tpi
i took an angle grinder and roughly cut a 1" slot in the slug, then slotted to 1-1/4" on the Bridgeport Mill
i installed the 3/8" x6" long pillars and went to the next step...

the next step was to shuck up the 5" chunk of unknownium, face both sides and drill the center to 21/32", tap to 3/4"-10tpi
i again trepanned a groove (to match the groove in the aluminum bronze) and drilled oversize clearance holes
i took a grade 5 3/4"10tpi x4-1/2' long bolt and faced the threaded end, drilled to 5/16"
i made a sacrificial 60° center out of some 5/8" 12L14 and turned one end to .310" , to be inserted into the 3/4" bolt as a revolving center.


then, i assembled the puller and i used it to remove the very stuck sprocket.
i attempted extraction of the broken hardened set screw, but it kept eating my small carbide endmills.
i decided that heat, penetrating fluid, and brute force was going to have to prevail.
even though i had to leave the broken set screw in place, the puller overcame the resistance like a champion!!!


but i though it wasn't done until i skimmed the OD of the 5" unknownium

Here is the offending sprocket, previously damaged by the customer...


after removing the sprocket i was able to disassemble the motor, swap out the bearings, smack on a new sprocket and restore operation.
the customer was ecstatic that i was able to fix his blunder-it wasn't cheap for him, but it put him back in business- fast
as always thanks for reading!
