- Joined
- Nov 27, 2012
- Messages
- 7,912
Most of you have probably seen this already but a few have asked about it so I'll repost this in it's own thread so it's not so hard to find.
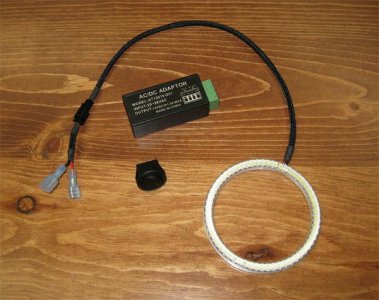
My LED spindle light made from an angel/halo eye for automotive applications (you know, like those that first appeared on the 5 series E39 Bimmers).
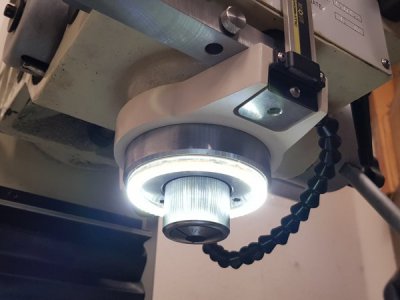
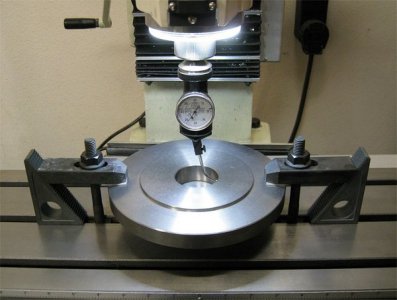
I got the idea from xalky in a different thread. For the LED ring, I used a 90mm (OD) ring that has 60 SMD (surface mount) LEDs. I purchased mine from ebay seller three-tech which is JLC Lighting. There are many others on ebay that sell them for varying prices & in different prices, I choose this seller only cause they were closer to me. Search "LED angel eyes" or "LED halo" (they're used for headlight conversions to mimic early 2000s BMW headlights). Super Bright LEDs also sells them but they did not have the size I needed.
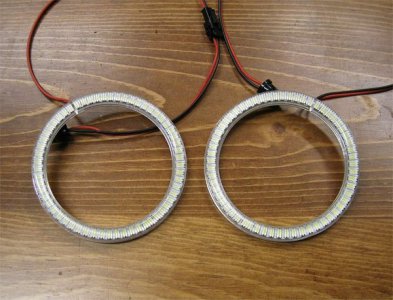
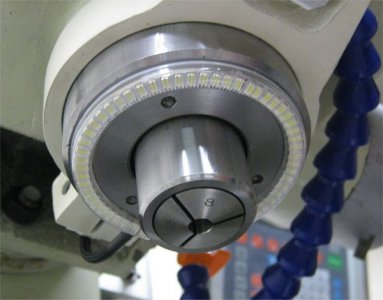
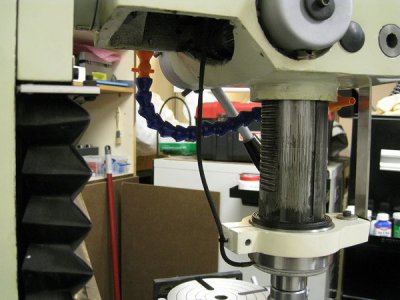
I choose the 90mm ring so it would fit just over the bottom ring on my quill. Had to remove just a bit of the ID to fit & it snaps right into place. Although I didn't need it I added a bit of double sided tape just in case. Couldn't have asked for a better fit!
For the AC-DC converter, I purchased this one from Amazon. Also can be found on ebay, search "24 VAC to 12 VDC". You can use any 12V DC power source such as a wall wart like this. It doesn't need to be 1A, I believe my ring runs on just under 300ma. The LED ring has resistors already so you can just hook it up (making sure polarity is correct) to any 12V DC power source & that's it.
The reason I used the AC to DC converter is cause I did not want to power it off an external source like plugging it into an outlet. The stock halogen lamp on the PM45 is 24V AC so I choose to power it off that. That way it's powered off the mill & when I shut off power to the mill the light turns off as well without having to turn of the switch.
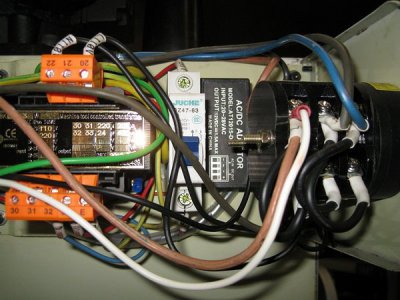
Here's a pic of my control panel below. To the left you'll see a transformer with a gold name plate. On it you'll see that terminals 32 & 33 is 24 VAC which again is for the stock lamp. Directly under the transformer is an orange terminal block with terminals 32 & 33 (the blue & red wires) is what you want to wire up the AC to DC converter to. However if you follow the red wire on terminal 33, it leads to the white circuit breaker that's to the right of the transformer. So I hooked up 1 wire from terminal 32 directly to the converter for AC input. Then I hooked up another wire from the output end of the white circuit breaker to the converter for the other AC input.
Then you would run 2 wires for the DC output from the converter to the LED ring and a switch (polarity matters for the LED ring since it's DC). Negative from the converter runs directly to the black wire on the LED ring, do not use the common ground on the machine for negative. Positive from the converter runs to a SPST switch, then another wire from the switch to the red wire on the LED ring.
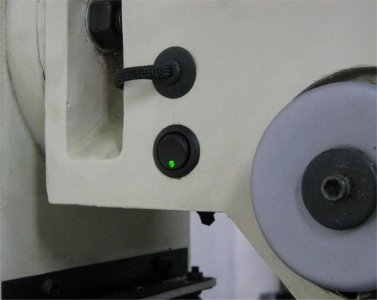
I used a lighted rocker switch that has an LED indicator that runs off 12 VDC so I had to run an additional ground wire to the switch coming of the negative of the converter. This is the switch that I used, they're local to me but it can also be ordered online & they have other color indicators. It fit right into the hole on my mill's head, no modifications or mounting hardware needed.
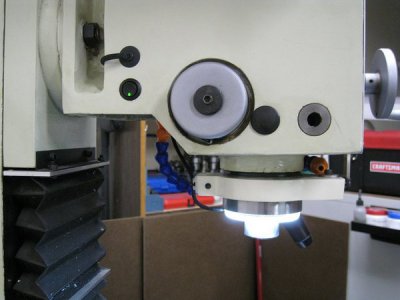
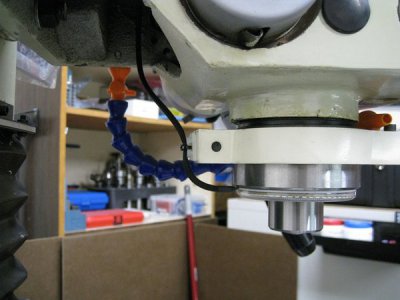
Quill fully retracted to 5"
My LED spindle light made from an angel/halo eye for automotive applications (you know, like those that first appeared on the 5 series E39 Bimmers).


I got the idea from xalky in a different thread. For the LED ring, I used a 90mm (OD) ring that has 60 SMD (surface mount) LEDs. I purchased mine from ebay seller three-tech which is JLC Lighting. There are many others on ebay that sell them for varying prices & in different prices, I choose this seller only cause they were closer to me. Search "LED angel eyes" or "LED halo" (they're used for headlight conversions to mimic early 2000s BMW headlights). Super Bright LEDs also sells them but they did not have the size I needed.

I choose the 90mm ring so it would fit just over the bottom ring on my quill. Had to remove just a bit of the ID to fit & it snaps right into place. Although I didn't need it I added a bit of double sided tape just in case. Couldn't have asked for a better fit!

For the AC-DC converter, I purchased this one from Amazon. Also can be found on ebay, search "24 VAC to 12 VDC". You can use any 12V DC power source such as a wall wart like this. It doesn't need to be 1A, I believe my ring runs on just under 300ma. The LED ring has resistors already so you can just hook it up (making sure polarity is correct) to any 12V DC power source & that's it.
The reason I used the AC to DC converter is cause I did not want to power it off an external source like plugging it into an outlet. The stock halogen lamp on the PM45 is 24V AC so I choose to power it off that. That way it's powered off the mill & when I shut off power to the mill the light turns off as well without having to turn of the switch.

Here's a pic of my control panel below. To the left you'll see a transformer with a gold name plate. On it you'll see that terminals 32 & 33 is 24 VAC which again is for the stock lamp. Directly under the transformer is an orange terminal block with terminals 32 & 33 (the blue & red wires) is what you want to wire up the AC to DC converter to. However if you follow the red wire on terminal 33, it leads to the white circuit breaker that's to the right of the transformer. So I hooked up 1 wire from terminal 32 directly to the converter for AC input. Then I hooked up another wire from the output end of the white circuit breaker to the converter for the other AC input.
Then you would run 2 wires for the DC output from the converter to the LED ring and a switch (polarity matters for the LED ring since it's DC). Negative from the converter runs directly to the black wire on the LED ring, do not use the common ground on the machine for negative. Positive from the converter runs to a SPST switch, then another wire from the switch to the red wire on the LED ring.

I used a lighted rocker switch that has an LED indicator that runs off 12 VDC so I had to run an additional ground wire to the switch coming of the negative of the converter. This is the switch that I used, they're local to me but it can also be ordered online & they have other color indicators. It fit right into the hole on my mill's head, no modifications or mounting hardware needed.


Quill fully retracted to 5"

