Reconditioning The Champion Forge Camel Back Drill Press

Old Iron

Active User
Registered
Joined
Sep 29, 2010
Messages
1,558
This thread will take awhile cause theres just to much to do. I've had to weld a broken part and the clean up takes a lot of time.

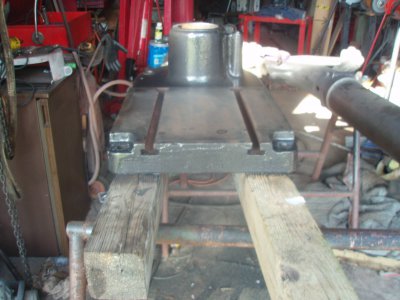
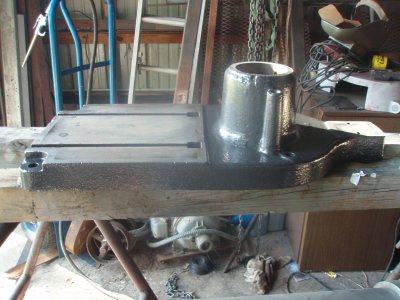
I painted the base this morning and next I need to do the bracket that holds the table. Then I'll be able to stand the rest up in place to paint the rest of it.

Pictures of the base before and after.

Paul
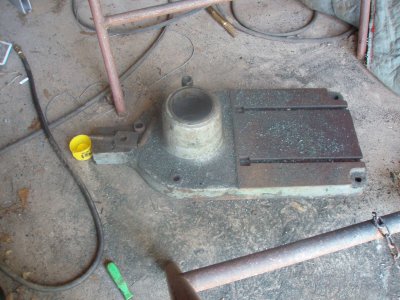
Base.JPG Front.JPG Side.JPG
 
You are off to a good start Paul. I will let Mike know his old drill press is happy in it's new loving home.

You talk about welding the broken cast iron like there is nothing to it. Sounds like you have welded cast iron before. I may have to talk with you about how to repair the broken motor bracket for my old Brown & Sharpe mill. I have never welded cast iron.

Keep up the great work. We love to see old machines brought back to life.

Benny

Benny
Others may disagree but get some NICAD 55 I use 3/32 because I don't have anything big to weld anymore. Theres no pre or or post heat needed.

Clean up your parts grind a bevel on both sides. Clamp it down or clamp some strong backs on one side. Tack both ends then the middle weld know more than 2" and move to another spot.

Also there is know reason to peen the weld, The 55 doesn't shrank like 99 or others it is also machinable. Need anymore help give me a call.

Paul
 
I'll be following this post closely so please keep the pictures coming. I have a WF & J Barnes Camel back drill press that I will be working on this winter.

Shawn

Shawn will do I've got some of the other parts painted, But not sure if I'm going to repaint them or not. The paint doesn't match it is blacker and shines a lot more. It mite be a good contrast through.

Paul
 
......................not sure if I'm going to repaint them or not. The paint doesn't match it is blacker and shines a lot more. It mite be a good contrast through.

Paul

Paul,
What is the color you used on the drill base called? It looks like a dark gray on my computer, kind of like the Massey tractor color. I like it. However pure black would look good too.

Benny
 
It is rustoleum hammered black I got a Quart at Wal-Mart, The spray cans look a lot different than the stuff I put on the base.

It looks gray but it is black, If all goes well I should have it standing by the end of the week. Then I'll add some of the other parts to see what every one thinks.

Paul
 
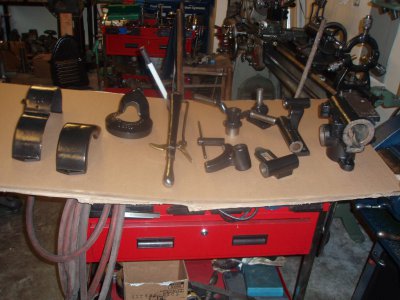
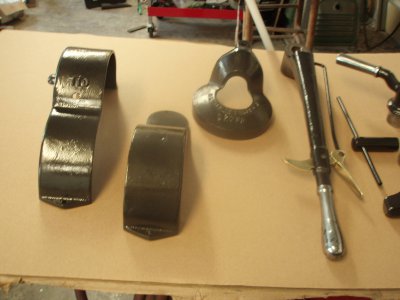
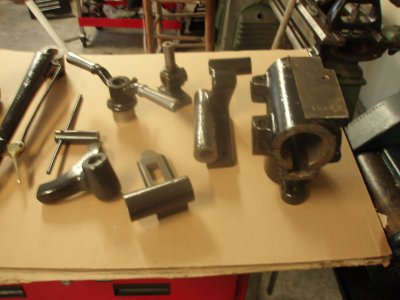
Heres some pictures of the other parts I have ready.

Paul

Parts 1.JPG Parts 3.JPG Parts 4.JPG
 
good job all the parts are really looking nice
steve
 
It is rustoleum hammered black ........................see what every one thinks.
Paul

Don't know if you recall but the cabinet and shelves next to my vertical mill were painted with the Rustoleum siver hammer tone paint. I liked it because it dried quickly and was not too "glossy". The cabinets came out of the scrap yard and had some rough handling and the hammer finish/reduced gloss paint did a fair job of hiding the scars without fill and sanding. I may have to get some of the black hammer finish paint and give it a try.

I for one think you color choice is looking great.

Benny
 
Back
Top