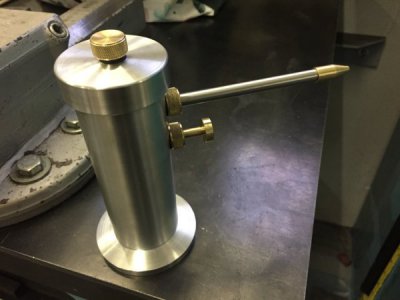
Pump Oil Can Prints

Here are the plans of Roberts pump oil can as drawn by Bill, but now with darker lines. I hope printing will result in clear and readable prints for everyone. Please let me know if it works (or not).

Next step for me, let's see if I can build one !
 

Attachments

  • Oil Can Rev 3-14-2015 black lines.pdf
    5.9 MB · Views: 177
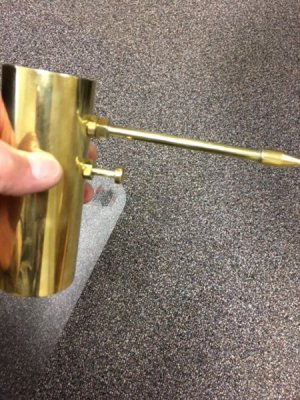
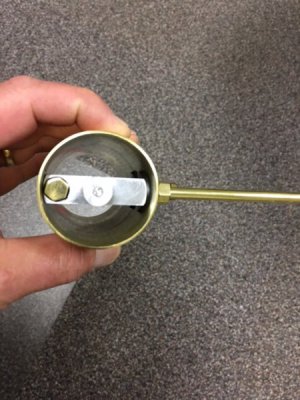
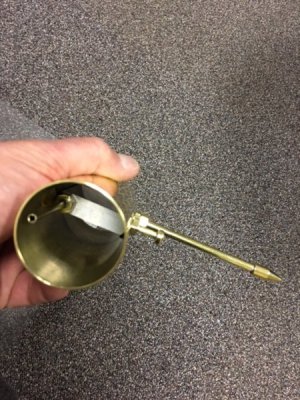
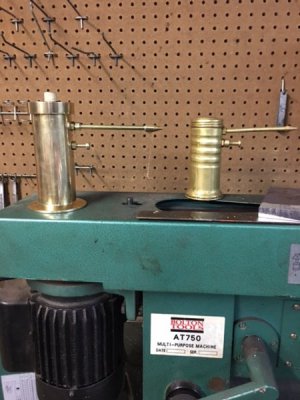
Thank you for the plans, I just finished mine. I love it more pressure than my real 66 has less trigger force required to achieve that pressure as well. fits the ball oilers on my lathe just perfectly.

thanks again for sharing those plans

IMG_0120.JPG

IMG_0121.JPG

IMG_0122.JPG

IMG_0130.JPG
 
Just as a note. You may notice some of the text in the lower blocks of the print border do not look right. That happened when I converted to pdf for some strange reason. But if there is anything not legible on any print let me know and I can get you the information needed.
Thanks Bill hope your feeling better. I'm getting things lined up back to the surgeon on the 21 of Sept. Then he,ll remove an old stimulator that's been dead for ten years. Mri then back to see what he can do . I'm praying for my fellow machinist in need.
 
Hi Robert

Thanks for the drawings. I’m new to the site and I think that this may be one of my first projects. I’m sure it will be a slow build for me but I’ll let you know how it turns out.

Thanks again

Wes
 
  • Like
Reactions: rwm
Hi Robert,
I'm from Switzerland.
Thanks a lot for the drawings.
A subscriber of my YouTube chanel asked me if I could make an oil Can. Having no idea how to do it, I looked on YouTube where I found the video of Mr. Halligan142 who gave the link of this very good forum where I registered. As the plans are in Inches, I took the initiative to make them in metric.
I hope this can help some of you.
Maybe some of you guys can use them.
Here are the links to download them on fusion.

http://a360.co/2iw48XX 3D view
http://a360.co/2zeIkKA General view and my source :encourage:
http://a360.co/2iwns7u The valve
http://a360.co/2iv3qdo The body
http://a360.co/2l9iXAX The top
http://a360.co/2Dd46wy The screws
http://a360.co/2DaiAgO The piston and nose
http://a360.co/2kUrZCF The bottom

I wish you all, health and happiness for the year 2018 to come.

Marco

Here are some videos I made during the production, only in French sorry guys!:frown:

https://www.youtube.com/playlist?list=PLs_0BuC9kb__nb8-M3lv4MMMtSwIEjvFq

Fichier 25.12.17 21 40 06.jpeg
 
Edit
 
Last edited:
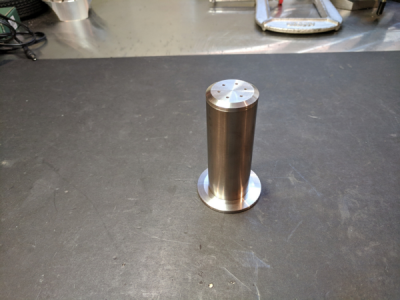
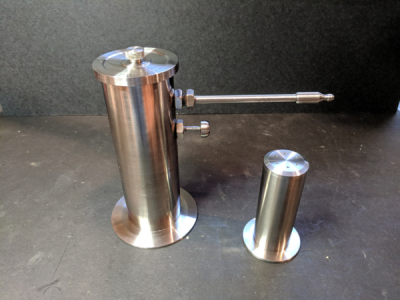
My wife uses the stainless version in the kitchen for cooking oil. She loves it. Just for fun here is the matching salt shaker for cooking:

1514403782223.png

1514474108512.png

Robert
 
Last edited:
I also have a bunch of brass that I have collected, Some I have melted down into small ingots, I have done some alum also but that had a bunch of air bubbles in it, Thus unable to use it for much of anything. I figured I could do a few of the parts by making molds for them, But have to come up with the brass tubing for the body etc.
I was thinking the red brass for the top, and bottom at least, (actually though about making some brass ones for wife's cooking oil as well)
If I have to purchase everything I am thinking Stainless but I have not worked with it before.
I think you should use stainless in the kitchen. Also, the reason you have air bubbles in you alum is that it needs a top cover of lite salt when you melt it to keep the alum from oxidizing. make sure it is lite salt, don't remember why but regular salt will not work.
 
Back
Top