POTD- PROJECT OF THE DAY: What Did You Make In Your Shop Today?

I finished a project from grade nine in public school. Apparently, I have never done anything normally. The projects (if I recall) were for a one-piece chess board, and for my first wood project, I made a folding one. It was terrible (how about those mitre joints on the corners)! My parents had kept it all these years and my father gave it back to me recently. I had glued squares together skewampus, and the hinges were not straight. Some of the pieces had broken off from the board when making it and I didn't get them glued back together at the same plane.... but, it is still "usable", and brought some memories back from when it was made.

I decided to cast some chess pieces to go with it. I could find no molds that were small enough (1" squares), so I found a travel chess set I had stowed away that seemed to be the right size, and used that to create silicone molds. A lot of resin casting and color mixing later I had a finished set.

20220325_125327.jpg

20220325_125333.jpg

20220325_125517.jpg

I even managed to preserve the original parting lines on the pieces from when the originals were injection molded. Nice to finally have this little memento completed (it fits in with my chess set collection).

As a note, the tape on the side is for my father. He set up a chess set himself, and I have to have the same alignment on mine. It allows us to play chess games from a distance. Our games sometimes go for months.
 
I finished a project from grade nine in public school. Apparently, I have never done anything normally. The projects (if I recall) were for a one-piece chess board, and for my first wood project, I made a folding one. It was terrible (how about those mitre joints on the corners)! My parents had kept it all these years and my father gave it back to me recently. I had glued squares together skewampus, and the hinges were not straight. Some of the pieces had broken off from the board when making it and I didn't get them glued back together at the same plane.... but, it is still "usable", and brought some memories back from when it was made.

I decided to cast some chess pieces to go with it. I could find no molds that were small enough (1" squares), so I found a travel chess set I had stowed away that seemed to be the right size, and used that to create silicone molds. A lot of resin casting and color mixing later I had a finished set.

View attachment 401782

View attachment 401783

View attachment 401784

I even managed to preserve the original parting lines on the pieces from when the originals were injection molded. Nice to finally have this little memento completed (it fits in with my chess set collection).

As a note, the tape on the side is for my father. He set up a chess set himself, and I have to have the same alignment on mine. It allows us to play chess games from a distance. Our games sometimes go for months.
congratulations on your persevering. I guarantee you that if you did that now, you would be amazed at how well you would make it. The pieces came out good.
 
I made a lathe carriage/bed stop for my mini-lathe which I sorely needed. Getting the bed dimensions off the lathe were a little tricky, but I think I nailed it. FreeCAD modelling helped a lot.

I'm trying to decide if I should replace the stock screws with custom ones. The two clamping screws could have knobs/handles on them, but I'm thinking I want to keep these low as possible. The screw on the end could probably be customized for ease of adjustment.


View attachment 401711

View attachment 401712

View attachment 401713
If you want the screw heads lower, apart from counterboring the holes, you could tap the top block the next size up and open out holes in the underside, then the larger screw heads would be underneath.
 
Or just use some 3/8" drill rod with a flat, and make a lock screw stout enough to lock it in place as a stop.
You could then tap a #6-40 or similar in the end of the 3/8 rod, for fine adjust on the stop...
Could the stop be fixed and fine adjustment made using the compound slide?
 
Today i have few hours to spare and a full yard of broken cars to fix. Easiest was the white elephant No:2 with a rough running engine. From experience i could tell it was fuel supply so i started at the fuel filter and it was leaking. I changed O rings, used bailing wire and zip ties but could not get it to seal. So went to the parts store bought an golf mk2 filter which is without that plastic return and that fixed it. With it fixed and the weather nice i went for a long walk to the nearby mountains The fresh air and nice view are a nice change, i've been working way too much lately.
IMG_20220320_170539_1.jpgIMG_20220320_170658_2.jpgIMG_20220319_142809.jpgIMG_20220319_143437.jpgIMG_20220319_143424.jpg
 
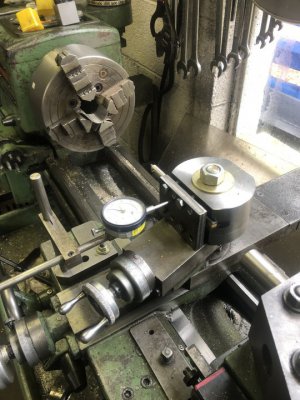
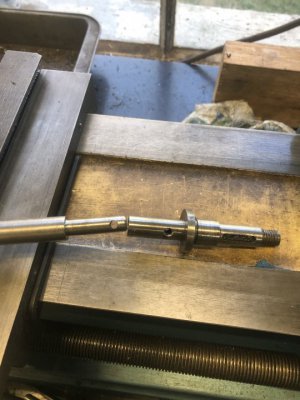
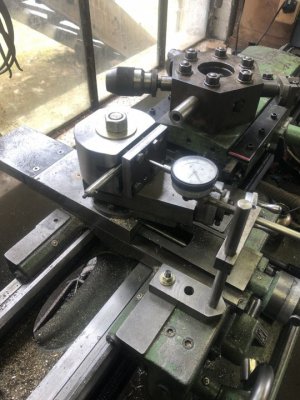
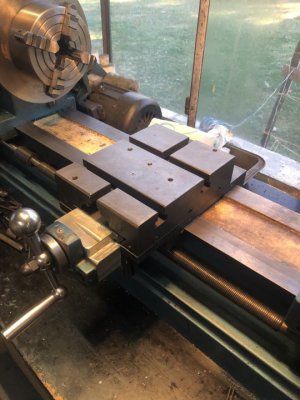
Worked some more on my little bench lathe . Finished the cross slide nut , forgot to take a picture but did of the set up. Cut the old screw bored , reamed . On the new shaft it got turned for clearance and turned to fit the old shaft . Then drilled for a roll pin . Not quite done but getting closer . Need to figure out what I want to do for the dial at the minimum will need to be marked for the 5/8-10 screw
 

Attachments

  • C98D9545-BC71-4290-A3D3-9F22426215C3.jpeg
    C98D9545-BC71-4290-A3D3-9F22426215C3.jpeg
    100.6 KB · Views: 30
  • 874DC1CD-4ED2-418C-B83F-2D006F3FA3BB.jpeg
    874DC1CD-4ED2-418C-B83F-2D006F3FA3BB.jpeg
    77.3 KB · Views: 30
  • 70E0AC1F-94C4-4B6B-B24C-ADC135FAC477.jpeg
    70E0AC1F-94C4-4B6B-B24C-ADC135FAC477.jpeg
    94.9 KB · Views: 29
  • C6678703-A2FD-4F1F-8B64-19209C57C07D.jpeg
    C6678703-A2FD-4F1F-8B64-19209C57C07D.jpeg
    82.3 KB · Views: 33
A while back I bought a Makita track saw so I could more easily break down sheet goods.
I wanted a set of parallel guides to make repeatable cuts. Looked around and darn near fell over at the cost. Delivered to my house a 30” pair of TSO guides would have been almost $425.
Decided to make my own.
Bought a pair of 48” Incra T-tracks for $22. A pair of adjustable stops for $12, four 5/16” knobs and a pair of T brackets will get me sorted.
Only problem was the T-nuts on the stops were a very loose fit in the track.
So I made a new set that are a slip fit in the track so they lock the stop square.
054bb1b508b85b3f31eee513cbd015b8.jpg


Sent from my iPhone using Tapatalk
 
Last edited:
Back
Top