Pinched oil line on Harig 618

Pevehouse

H-M Supporter - Gold Member
H-M Supporter Gold Member
Joined
Oct 27, 2023
Messages
659
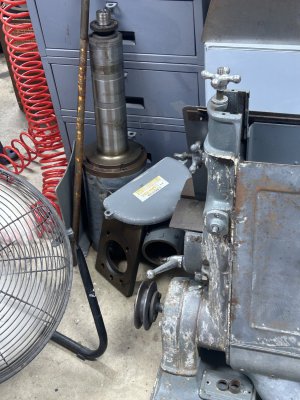
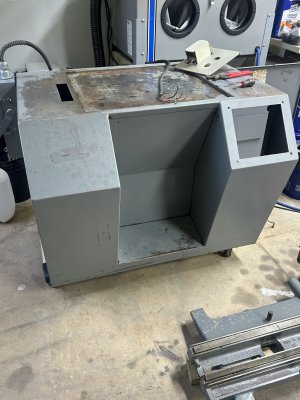
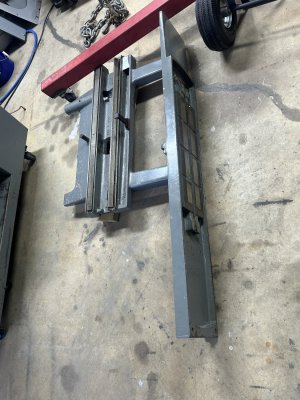
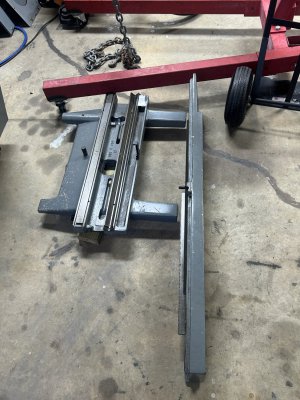
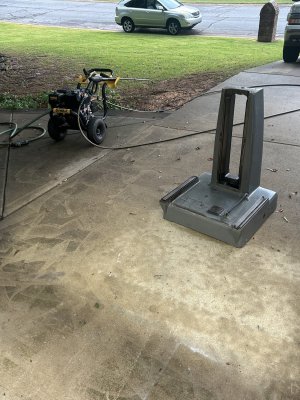
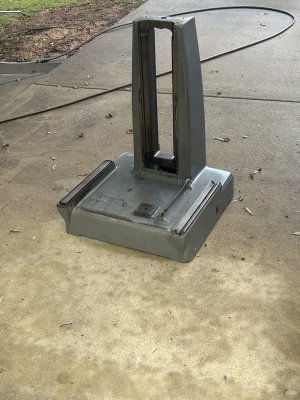
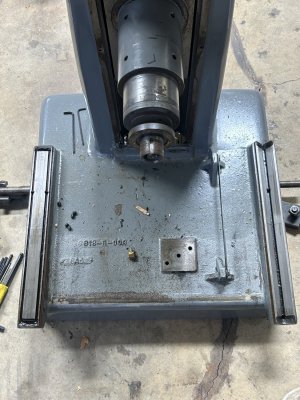
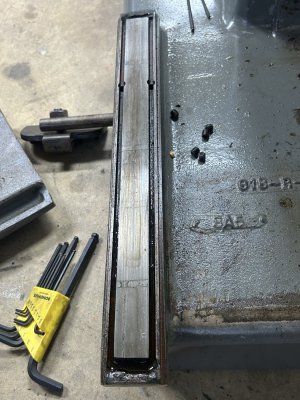
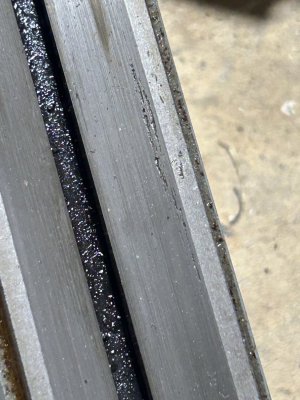
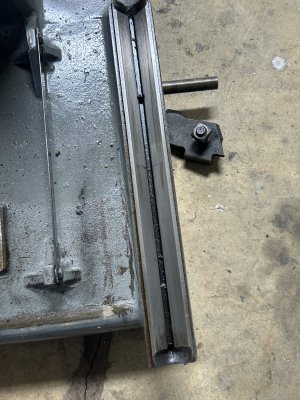
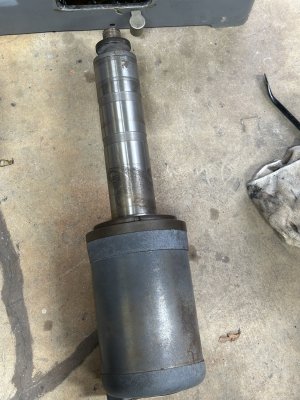
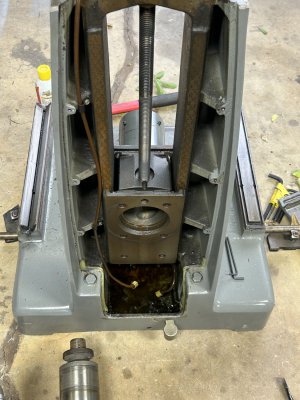
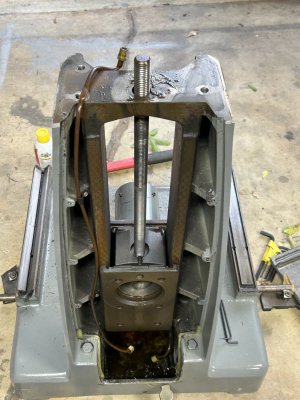
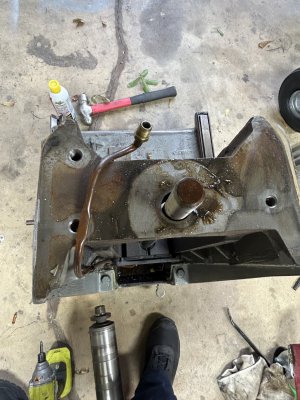
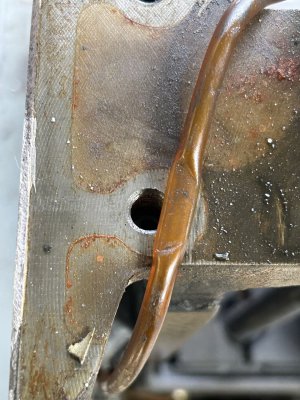
Hello all. I have been working on the resto on the surface grinder that I’m keeping out of the last hall of machines. She’s a Harig 618 that had some funny wear on a couple of the ways but nothing too serious I believe. Decided to take her down and check and replace the oil lines, and give her some fresh paint. Well I ran into an issue pulling the upper oil line out so I remove the motor and covered and still to no avail the oil line would not pull through. That left me with only one option and not one I really wanted to deal with and that’s was removing the top hat of the machine which is bolted to the vertical ways and then all the seams filled with hard plastic filler. So I bit the bullet and popped the top hat off and lo and behold there was my issue. The oil line was completely pinched off. Blows my mind. It had to be that way when it left the factory. Anyway, I just thought I would share my story and my progress and a few pictures as well. Would love to hear your thought on this
 

Attachments

  • IMG_1912.jpeg
    IMG_1912.jpeg
    406.3 KB · Views: 47
  • IMG_1916.jpeg
    IMG_1916.jpeg
    425.9 KB · Views: 39
  • IMG_1917.jpeg
    IMG_1917.jpeg
    276.4 KB · Views: 35
  • IMG_1918.jpeg
    IMG_1918.jpeg
    477.8 KB · Views: 30
  • IMG_1919.jpeg
    IMG_1919.jpeg
    446.2 KB · Views: 27
  • IMG_1920.jpeg
    IMG_1920.jpeg
    218.3 KB · Views: 30
  • IMG_1921.jpeg
    IMG_1921.jpeg
    333.6 KB · Views: 30
  • IMG_1922.jpeg
    IMG_1922.jpeg
    310.7 KB · Views: 34
  • IMG_1923.jpeg
    IMG_1923.jpeg
    388.4 KB · Views: 32
  • IMG_1924.jpeg
    IMG_1924.jpeg
    382.1 KB · Views: 46
You man not need to replace the oil line. If you have a hydraulic pump, even a hand pump. Simply cap the end then force enough oil to inflate pintch point. Then re-connect and assembly the head unit gently.

Otherwise the flare connections are easy enough to replace. Or solder in a tube section patch connection. The pressure is low with only a 3-foot head.

It's is promising to see the flaking markings still visible on the column. My harig had them mostly rubbed off.
The lines are cheap to replace so I figure I will just replace them while I’m there. Gonna reuse the good brass fittings. It is amazing that the flaking is still there with that oil line the way it was. I just hated that I had to cut through the filler to get the top hat off but oh well. Gonna be re applying that filler anyway when I get it ready for paint. Thank you for your response
 
You should have another oil hole in towards the front of the inverted v way.
 
I also have a Harig 618 and am glad to see the photos that you provided of the innards. That pinched tube is crazy. Is that the oil line that feeds the sight glass at the top front of the vertical structure?
Seeing that oil is present in that sight glass is a fundamental responsibility of any inspector/operator.

In the picture of the Y axis ways on the base, what is the function of the piece of steel extending front to back, between the two bosses (toward the right side of the photo)?

Also, I need a replacement for the plastic "spire" cover for the vertical adjusting screw. Is there a commercial source for such parts or am I going to have to make something?
 
In the picture of the Y axis ways on the base, what is the function of the piece of steel extending front to back, between the two bosses (toward the right side of the photo)?
The saddle lock.
 
I also have a Harig 618 and am glad to see the photos that you provided of the innards. That pinched tube is crazy. Is that the oil line that feeds the sight glass at the top front of the vertical structure?
Seeing that oil is present in that sight glass is a fundamental responsibility of any inspector/operator.

In the picture of the Y axis ways on the base, what is the function of the piece of steel extending front to back, between the two bosses (toward the right side of the photo)?

Also, I need a replacement for the plastic "spire" cover for the vertical adjusting screw. Is there a commercial source for such parts or am I going to have to make something?
Yes that is the main oil line that feeds the site glass. The long section of steel is there to lock the table. They went to great lengths to design that clamping device from the looks of it. I will have to get back to you but yes there’s a company and one guy in particular that handles the harig replacement parts. His name is Jim. I will get you the specifics in a few. From what I hear you can get anything as long as your willing to pay,lol
 
I also have a Harig 618 and am glad to see the photos that you provided of the innards. That pinched tube is crazy. Is that the oil line that feeds the sight glass at the top front of the vertical structure?
Seeing that oil is present in that sight glass is a fundamental responsibility of any inspector/operator.

In the picture of the Y axis ways on the base, what is the function of the piece of steel extending front to back, between the two bosses (toward the right side of the photo)?

Also, I need a replacement for the plastic "spire" cover for the vertical adjusting screw. Is there a commercial source for such parts or am I going to have to make something?
Talk to Jim at JDS tech support. They are the tech and parts people for Harris grinders now. Also search here for New to me Harig 618 and views that post. Has tons of info and the guy does an amazing job of rebuilding a 618. He will also help you with anything you need. He helped me get the motor out of mine. It was a little seized and he suggested letting it soak in some PB Blaster which did the trick. Let me know if you need anything as well. I will be posting more as I go along with this rebuild. Should be very interesting and loaded with information
 
Talk to Jim at JDS tech support. They are the tech and parts people for Harris grinders now. Also search here for New to me Harig 618 and views that post. Has tons of info and the guy does an amazing job of rebuilding a 618. He will also help you with anything you need. He helped me get the motor out of mine. It was a little seized and he suggested letting it soak in some PB Blaster which did the trick. Let me know if you need anything as well. I will be posting more as I go along with this rebuild. Should be very interesting and loaded with information
Just a quick update on where I’m at with the grinder. Got it completely stripped down and started pressure washing the larger sections. Next will be some filler and sanding and primer on the large parts
 

Attachments

  • IMG_1934.jpeg
    IMG_1934.jpeg
    352.6 KB · Views: 13
  • IMG_1933.jpeg
    IMG_1933.jpeg
    233.5 KB · Views: 11
  • IMG_1932.jpeg
    IMG_1932.jpeg
    286.9 KB · Views: 11
  • IMG_1931.jpeg
    IMG_1931.jpeg
    365.3 KB · Views: 12
  • IMG_1930.jpeg
    IMG_1930.jpeg
    370.3 KB · Views: 13
  • IMG_1929.jpeg
    IMG_1929.jpeg
    350.5 KB · Views: 12
  • IMG_1928.jpeg
    IMG_1928.jpeg
    471.7 KB · Views: 12
  • IMG_1927.jpeg
    IMG_1927.jpeg
    466.4 KB · Views: 15
Back
Top