Order of Operations

epanzella

Active User
Registered
Joined
Apr 8, 2013
Messages
2,041
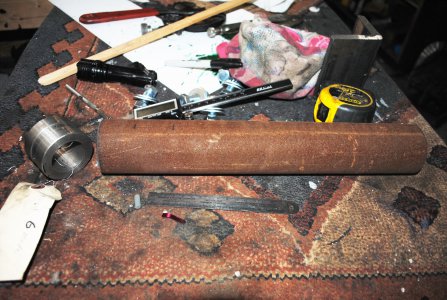
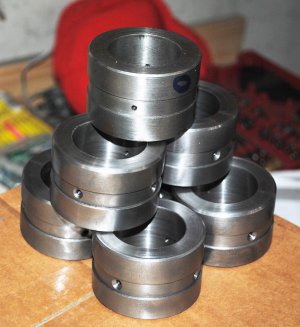
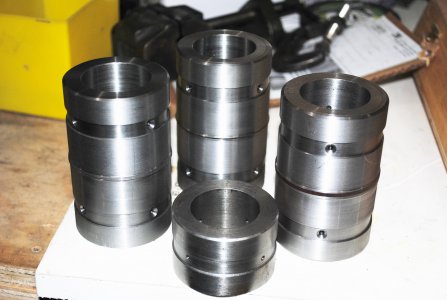
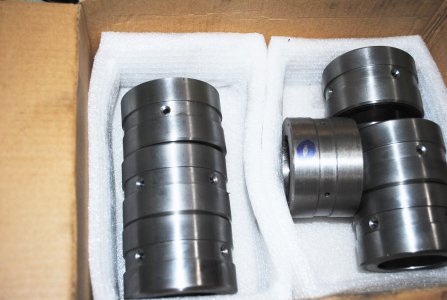
My friend asked me to make some parts for a machine that broke down in the middle of a paving job. When he comes to me it's an emergency and I would never even consider saying no. He needed 6 bushings and it took me 20 hours which is the reason for this thread. I have only manual lathe and mill but there's gotta be a more efficient way to do this than the way I did it. When I retired I was a house builder so I don't have the experience of working in a machine shop. He have me a sample bushing to copy but had no dimensions or tolerances as the machine was no longer made. So he handed me one leftover bushing that home made by some body and the ID was supposed to be a slip fit over something? The OD was to be a press fit into something? I had no idea what that something was. Here's some pictures of the sample and my finished bushings. The top one with the blue marker is the sample I had to copy. I'll cover my order of operations in the next post and hopefully someone can suggest improvements.
 

Attachments

  • DSC_1088.JPG
    DSC_1088.JPG
    1.4 MB · Views: 60
  • DSC_1099.JPG
    DSC_1099.JPG
    702.5 KB · Views: 57
Has he tried them yet?
Looking forward to the discussion and your next post.
 
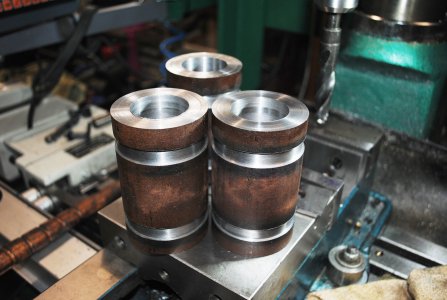
My biggest problem was that I was copying a home made part for a machine I have never seen. For that reason I decided to do the (slip fit) bore plus .001 minus 0 in relation to the sample. For the OD which had to be a press fit in "something" I went with plus .0005 minus 0 in relation to the sample. I was not confident that I could maintain these tolerances over much more than 2 inches I decided to cut the stock into 3 pieces each 4 inches long. The idea here was to have three attached "pairs" so I could hold one and machine it's mate only separating them at the end. Each bushing also had a lube channel with 4 holes to the ID but this dimension was not critical. My order of operation was as follows;
(every step done to all 3 pieces before proceeding to next step)
1. Rough bore all the way thru staying .050" under
2. Turn lube channel, flip part 180 deg and turn the other lube channel (parting tool)
3. Go to mill and drill the four lube holes
4. Back to lathe, Bore to final size 2 inches deep (slip fit)
5. Flip part 180 deg and bore other end to final size 2 inches deep.
6. Turn half of OD to final size (press fit I hope)
7. Flip part 180 deg and turn other end to final size
8. Part off each bushing using home made dead center (was also plug gauge for bore)
9. Face each bushing to final width and chamfer
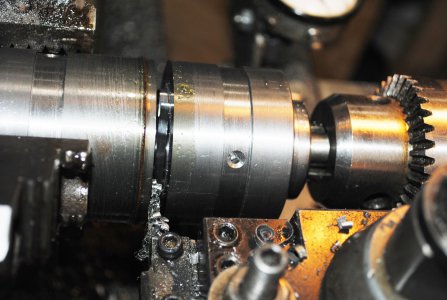
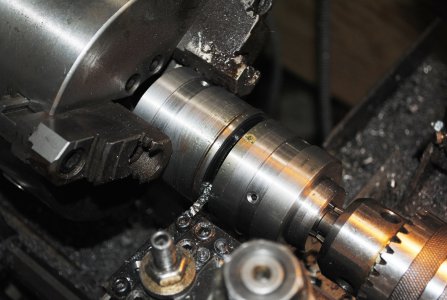
The 6 bushings came out exactly how I had intended but it took forever. This was a one shot deal (I hope) but I'm hoping some constructive criticism will help me to plan jobs more efficiently. Below are some pics of the job. (in the 2nd pic the pairs are mostly machined but are not separated yet. the original sample has the blue "O" on it)
 

Attachments

  • DSC_1089.JPG
    DSC_1089.JPG
    1.1 MB · Views: 46
  • DSC_1090.JPG
    DSC_1090.JPG
    992.7 KB · Views: 30
  • DSC_1092.JPG
    DSC_1092.JPG
    1.1 MB · Views: 29
  • DSC_1093.JPG
    DSC_1093.JPG
    1.1 MB · Views: 29
  • DSC_1095.JPG
    DSC_1095.JPG
    1 MB · Views: 44
a turret lathe would make quick work of those bushings.
i have a turret lathe with 8 stations on the turret.
i make a few hundred custom bushings a year.
the turret lathe is a time saver and has paid for itself 10 fold in the short time is has been in operation

all your drilling would still be a secondary operation unless the turret lathe had a crossdrilling attachment
 
I think 20 hours isn't bad considering all the factors. They ought to pay you a bundle for that (but I suppose they won't)
Perhaps it's mainly the size and power of your lathe that's the real limiting factor in speed? Breaking down the job, how much time would a bigger lathe have saved you?
-Mark
Production guys have all kinds of expensive tooling that saves time so they can make money, which a hobby guy often does not have
It probably would have taken me twice as long as you spent- I don't have jack as far as tooling but then I'm not trying to beat the clock
 
Last edited:
I think 20 hours isn't bad considering all the factors. They ought to pay you a bundle for that (but I suppose they won't)
Perhaps it's mainly the size and power of your lathe that's the real limiting factor in speed? Breaking down the job, how much time would a bigger lathe have saved you?
-Mark
Production guys have all kinds of expensive tooling that saves time so they can make money, which a hobby guy often does not have
It probably would have taken me twice as long as you spent- I don't have jack as far as tooling but then I'm not trying to beat the clock
I have a 12x36 gear head lathe. It plenty big enough for this project. My time went into so many setups to do this job. Being as I was provided no extra material, I was sneaking up on final sizes so that also killed some time. I was hoping that someone with more experience could help me to combine or eliminate steps. There's so much to learn with machining.
 
if you can make or buy a set of stops to set on the ways and cross slide, they can greatly aid sneaking up on tolerances
 
Would a DRO have helped? Your order of operations seems pretty much like I would have done it
Maybe making a mandrel to hold the ID would have saved some time after boring- drill the lube holes at the very end
Making only a few parts sometimes it's hard to decide whether to make special fixturing or not
 
Last edited:
not sure how much you had spare on the OD, but here's how I would have done it:

1. center drill one end, in the drill press if necessary
2. mount with a center in the far end and machine a series of "pads" for a steady rest to ride on
3. remove center and install steady rest
4. turn OD, face end (same tool if poss.), cut groove and then use a 45deg tool to chamfer end and edges of groove
5. drill cross holes using a tool post mounted live drill chuck - index of spindle gear or 4 jaw chuck jaws
6. drill out as much of the ID as you can, go past the depth of a single bushing
7. bore to size, but don't go much beyond the depth/ length of a single bushing
8. part slighly over length
9. move steady rest to next pad, repeat
10. once you have all the bushings parted off, face each to length and chamfer

The bulk of the work will be in getting the ID to size.

Bushings look great btw, nice work!
 
Back
Top