........It only just now dawned on me that both of the lathes that you had were originally 101.07403's, not craftsman equivalents to the Atlas 3900 Series.
Yah, converting an older lathe takes some doing and isn't just collecting parts and twisting wrenches.
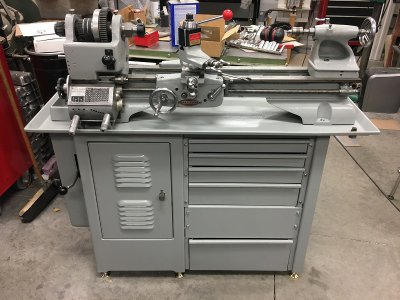
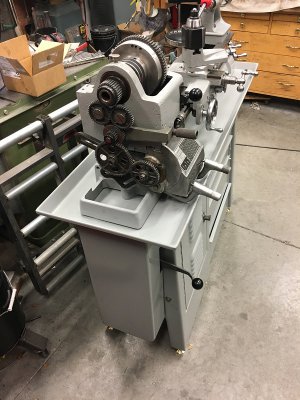
In order to mount one of them on the under-drive cabinet, you need to replace the 4-step cone pulley on the spindle with the same length one that has a smaller diameter two-groove A-section pulley with both grooves the same diameter. The 4-groove cone pulleys for spindle speed selection are both mounted to the external face of the left wall of the main cabinet and are covered by the rectangular hinged sheet metal cover except while changing speeds. The cutout with the wall around it for passing the two spindle belts through the oil pan is nether long enough nor wide enough for the original 4-step cone pulleys. And I would recommend leaving the back gears and the top cover just as they were.
Thanks wa5cab, I figured that out early on and probably should have been more clear about that when I mentioned I had collected the parts to do the conversion. The pieces to convert an older head stock are:
Headstock Casting 383-003
Eccentric Back 271-006, 700-074, 271,005
Back gear Mechanism – Bunch of Parts in this, can be bought as assembly on auction sites.
Spindle Pulley 560-050
Reverse Tumbler Assembly 3980-84
Spindle Guard (342-033) & Bracket (041-130) Change Gear Guard (342-030) and Bracket (041-117)
In addition to the headstock, the rear bed riser/foot will need to be modified or replaced with the 294-004 version that has belt opening provisions and the lathe bed itself will need the mods per my post above. There's may be more parts in the banjo and change gear/QCGB assemblies depending on what you have, but since my lathe had already been modified to accommodate the O'Brien aftermarket QCGB, I didn't delve into that.
I had scoped out all those parts and had the pulley and eccentric mechanism for $20 each when I found a complete headstock assembly for $175. After reassembly I figured I could sell my old headstock assembly for that making the head stock part of the swap essentially free.
I would also recommend using the factory rubber seals and mounting arrangement to connect the bed legs to the oil pan. If you don't, you are going to have four constant oil leaks. The factory method works just fine.
Roger that. I was going to use some sealant and wax one side so it all seals yet comes apart easily if needed. I added some features for positive registration and mounting. As near as I could tell from what was left of those seals on my cabinet, and from the parts illustration in the manual, the chip pan just sat on seals with a washer on each side and the lathe mounting bolts compressed the stack in an uncontrolled manner as far as height goes.
I would recommend shimming and anchoring the six corners in the original manner. Mine is and it has given no trouble in the past almost 40 years. If you must keep the six leveling legs, you need to make six tie-down anchors out of maybe 2" steel channel with about a 1" diameter hole in the center and anchor holes at each end. If you do neither, the lathe will walk all over the place.
After I get it settled in and running in it's permanent location I'll be sure to attend to that.
Thanks again, much appreciated.
Kelly


