Need help with boring on the lathe

I find that boring bars cut best when they're on or just above center. If you're getting better results below center, I wonder if you're rubbing a little, burnishing the surface so it "appears" like it's cutting better... Surface finish with a tool hung way out like that is always an issue to manage as you're going.
Yes, I was taught to make the BB ever so slightly above center. Reason is that during a cut, it will flex downward, depending on the bar. It helps avoid the tip flexing to below center. If it starts out below, the situation only gets worse.
 
Yes, I was taught to make the BB ever so slightly above center. Reason is that during a cut, it will flex downward, depending on the bar. It helps avoid the tip flexing to below center. If it starts out below, the situation only gets worse.
All bars will flex downward, it's just a matter of how much. Carbide bars are about 3x stiffer than steel, but are expensive (and brittle).

Bar diameter matters a lot, one should use the biggest bar that will fit in the hole for minimum deflection. Since the deflection is inversely proportional to r^4, a bigger bar has a lot less deflection. So a 19mm bar (about 3/4") deflects 4.5x less than a 13mm bar (about 1/2") under the same cutting load. ((19/2)^4) / ((13/2)^4) = 4.56
 
I just calculated the relative stiffness for bars, stepping by 1/8" compared to a 1/2" boring bar. Kind of eye opening. R^4 does a lot!

1/2, 5/8, 3/4, 7/8, 1
1x, 2.4x, 5.1x, 9.4x, 16x

A 5/8" bar is 2.44x stiffer than 1/2"
A 3/4" bar is 5.06x stiffer than 1/2"
A 7/8" bar is 9.38x stiffer than 1/2"
A 1" bar is 16x stiffer than 1/2".

This also means that a 3/4" steel bar is stiffer than a 1/2" solid carbide bar. It's worth your while to step up in size.
 
I find that boring bars cut best when they're on or just above center. If you're getting better results below center, I wonder if you're rubbing a little, burnishing the surface so it "appears" like it's cutting better... Surface finish with a tool hung way out like that is always an issue to manage as you're going.
Agreed. I go above center and most times well above center.


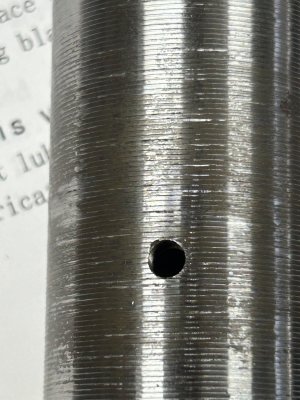
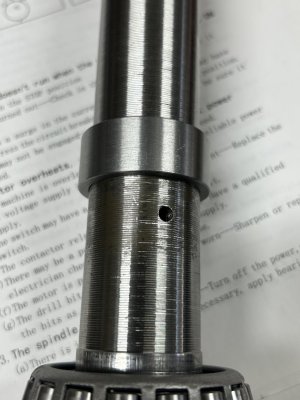
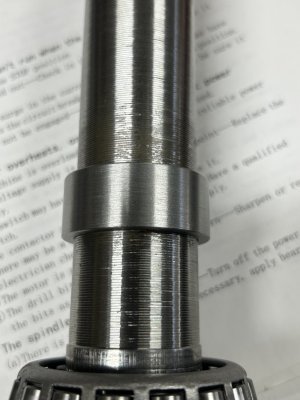
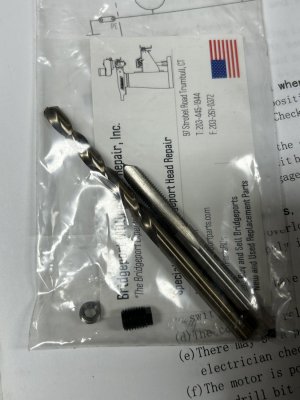
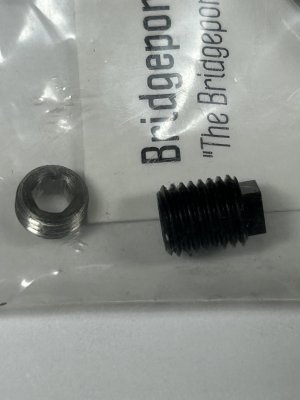
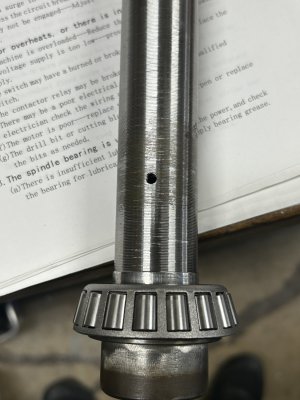
Well, I hit the mark. It’s a slip fit. Just about perfect. Did not want a press fit due to the fact it’s going on my milling machine spindle. It’s a collar that slips around the spindle, where the collet alignment pin threads into the spindle. This will allow me to use the square Bridgeport style alignment pin that has a backup set screw that kind of jambs the alignment pin tight if you follow what I’m saying


Do what now?

Why would you want the key to jamb the collet to one side? The key is there to keep the collet from rotating when you tighten it.

As a matter of fact, I don't think any of out Bridgeport's at work even have the key anymore.
 
Since this has always interested me, I ran through some rough numbers on deflection using a Widia boring bar deflection calculator. https://www.widia.com/qa/en/resources/engineering-calculators/turning/boring-bar-deflection.html

For the same load and material, deflection for various steel boring bar diameters.
5/8" 0.0055"
3/4" 0.0026"
7/8" 0.0014"
1". 0.0008"

This is roughly 1/2 the amount of deflection for every 1/8" increase in bar size (for the same load and extension).
 
Is your DRO set to radius mode (tool movement) or diameter mode (half of tool movement)? You do have to keep track of those for various operations...
I’m guessing it is not set to diameter mode. Because I got to diameter way before I expected to. About half of what I zeroed the dro on. I will have to find a manual on the dro. It’s a star, so I should be able to find one. It’s set to what it was set on when I got the machine from the gunsmith shop
 
Agreed. I go above center and most times well above center.


Do what now?

Why would you want the key to jamb the collet to one side? The key is there to keep the collet from rotating when you tighten it.

As a matter of fact, I don't think any of out Bridgeport's at work even have the key anymore.
You misunderstood what I was saying. The key has another set screw that threads in behind it. To lock the key so it doesn’t move once you set the depth on the key
 
You misunderstood what I was saying. The key has another set screw that threads in behind it. To lock the key so it doesn’t move once you set the depth on the key
Problem with my spindle is it’s too thin to get both the key and a set screw behind it. Therefore I machined a collar to go around where the old key used to go. I will then drill both the collar and spindle to the larger Bridgeport key. I will use a couple set screws and some retaining compound to hold the collar stationary. The collar will give me more thickness at that spot on the spindle. Enough to get the new Bridgeport key and the set screw lock in behind the key. I will post a couple pictures when I get back to the house. That way you guys can see what I’m doing and stop me if I’m screwing up,haha. I believe I have this planned out accordingly however I wouldn’t mind some input
 
Here’s a few pictures of what I’m doing
 

Attachments

  • IMG_2288.jpeg
    IMG_2288.jpeg
    232.2 KB · Views: 5
  • IMG_2289.jpeg
    IMG_2289.jpeg
    285.5 KB · Views: 5
  • IMG_2290.jpeg
    IMG_2290.jpeg
    212.5 KB · Views: 5
  • IMG_2291.jpeg
    IMG_2291.jpeg
    210.4 KB · Views: 6
  • IMG_2292.jpeg
    IMG_2292.jpeg
    203.9 KB · Views: 5
  • IMG_2293.jpeg
    IMG_2293.jpeg
    142.5 KB · Views: 6
You misunderstood what I was saying. The key has another set screw that threads in behind it. To lock the key so it doesn’t move once you set the depth on the key
Yeah, I thought you meant jamb it tight on the collet.;)
 
Back
Top