Need Help to Improve Surface Finish

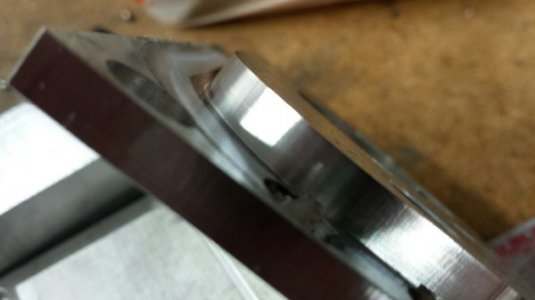
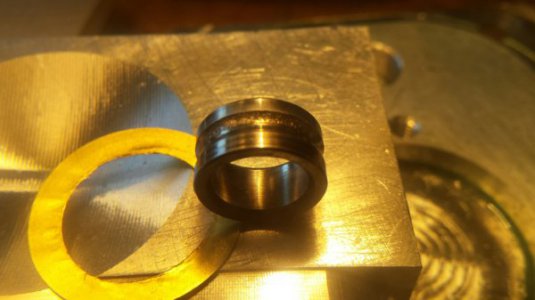
The bearings arrived in yesterday's mail which was two days early. Thank you VXB! Headed to the shop first thing this morning and got them installed and preloaded. Ran some test cuts and the surface finish is much better. Not absolutely smooth but my mill isn't a Haas either. It's smooth enough and the arc faceting is the same as the straight run faceting which is at an acceptable level. Haven't done a pocket yet to check for roundness but will do so in the next couple of days. The motors are much quieter or more likely the bearings are quieter. Here's a few pictures of the surface finish and failed bearings.

If it wasn't for my recent VFD/belt drive conversion and electronics upgrade it might have been a bit easier to find the problem. What a journey!! Thank you Spumco, Jbolt and Homebrewed for helping me through this ordeal.
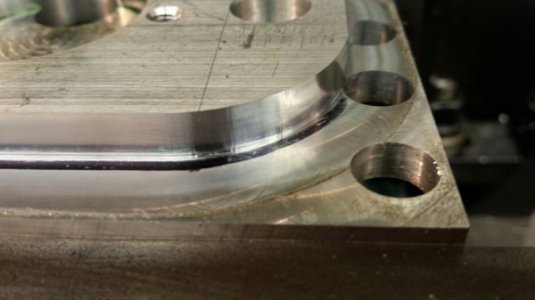
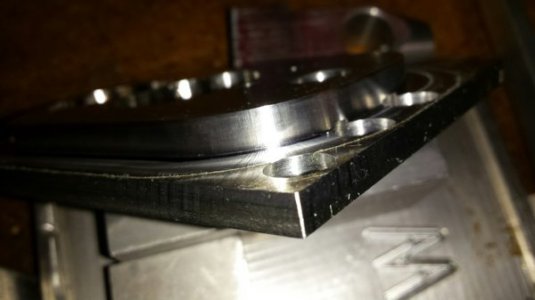
20170824_120210_resized.jpg

20170824_120315_resized.jpg

20170824_120434_resized.jpg

And some pictures of the bad AC bearings.
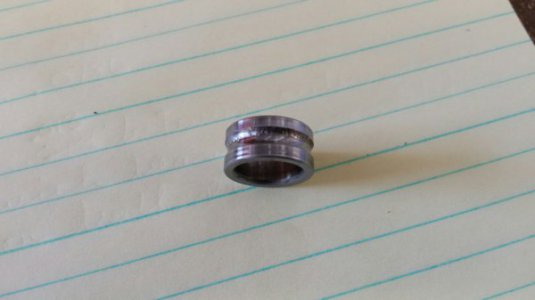
20170823_122507_resized.jpg

20170823_122648_resized.jpg
 
SWEET!

Frankly, you figured this one out - but I'm happy to have helped by suggesting a few incorrect theories.

I love it when unrelated variables send you down the wrong rabbit hole when troubleshooting. I spent two days researching process conditions and chemistry upsets when diagnosing a pressure vessel nozzle that corroded though. On the third day I noticed a dirty old sledgehammer about 20 feet away from the vessel tucked in to some angle iron. For some reason I decided to ask the area operator why a mechanic left it there. Turns out the operators frequently used it to 'massage' the connected piping to clear fouling, and one of them apparently decided to hit the ceramic-lined vessel nozzle when the pluggage was particularly stubborn. Further inspection revealed they had hit it so enthusiastically that they rolled the edge of a 16" class 300 nozzle flange, but you couldn't see it until after the goop was cleaned off.

Turns out ceramic corrosion-barrier sleeves are not particularly impact resistant, and process conditions don't matter when a gorilla is having his way with the equipment.

Now it's my turn to figure out why a ball spline groove I'm trying to mill in a tool shank isn't coming out quite the right size. Cam path wrong? Tool undersized? Steps/inch not quite right? Gremlins?

We'll see.

-S

Yeah, this one had a few twists and turns in it. That's the way it goes sometimes. Besides curing the finish problem I did learn quite a bit about the inner workings of Mach3 and post processors. All in all it was a frustrating road trip but the end result was worth it.

Thanks again for your help.
 
To quote Sherlock Holmes, "when you have eliminated the impossible, whatever remains, however improbable, must be the truth". You went through quite an exercise but found the problem, despite my efforts to distract you :rolleyes:. Now you can go back to making stuff again!
 
As long as the brain trust is still paying attention to this thread, I might as well throw up my problem and see if anybody has some good ideas.

Pocketing a .1255" radius groove in a 12mm shaft along the long axis (ball spline drive). Groove is not to full radius depth - C/L of the radius is 0.025" above the top surface. A 0.250" ground bearing ball is supposed to drop in the groove and sit on the bottom with just enough clearance for free movement along the groove.

Groove length is good enough (I have no way of measuring accurately). Max groove depth in the G-code is supposed to be 0.0998" but it's coming out at 0.0972" deep when measuring with a .1875" bearing ball down in the groove. This means my .250 bearing ball doesn't sit in the bottom of the groove but is riding up on the edges of the groove by about 0.010". It looks like the groove was cut to a smaller radius than desired.

Using Fusion 360 CAD & CAM, 3D adaptive for the first two ops (3/16" & 1/8".030"R bullnose carbide), and morphed spiral for the cleanup with a 3/16" ball. (No, I didn't want to just plow in with a 1/4" ball mill and take my chances.) I turned off "stock to leave" on the finishing op and did a 0.0025 step-over.

Tool offsets set using a 1-2-3 block, and stock Z-height set using a ground pin between the tools and the stock. Double checked axis calibration tonight and I'm within .0004" over 12" in Z, and .0003" over 9" in Y. Pocket/groove is along the X axis, so I'm not concerned with X right now.

The finish looks superb, and I lucked out on the feeds & speeds - it sounded great with no squealing or chatter. I'm discounting tool deflection because the finishing op tool pressure should be extremely low - it's only taking .001" to 0.002" from the adaptive clearing ops.

I could solve this pretty quickly by changing the CAD model to a .126" or .127" radius (or forcing a negative "stock to leave" in CAM), but I'd like to figure out why it's not coming out right before brute-forcing a solution.

Any ideas? 3/16" ball mill not actually to size? I don't have a good way of measuring the ball mill radius, but the shank and flutes are spot on published diameter.

Thanks,
Spumco
 
Never mind. CAM user fail.

Cutting strategy was inappropriate for the pocket geometry - switched to 3D scallop and the simulation is now cutting all the way to the edge. Previous strategy was going to depth, but not cutting the full width so I wound up with a narrower than desired groove top.
 
To quote Sherlock Holmes, "when you have eliminated the impossible, whatever remains, however improbable, must be the truth". You went through quite an exercise but found the problem, despite my efforts to distract you :rolleyes:. Now you can go back to making stuff again!

No distraction at all. I asked for help and you offered up your opinion, and I appreciate that. This kind of interaction among our members is what makes this forum so good.
 
Never mind. CAM user fail.

Cutting strategy was inappropriate for the pocket geometry - switched to 3D scallop and the simulation is now cutting all the way to the edge. Previous strategy was going to depth, but not cutting the full width so I wound up with a narrower than desired groove top.

Glad you got it sorted out. Usually it's a simple fix. Ask me how I know.
 
Just cut it with the new code and there's no daylight between the ball and the pocket. Lesson learned - scrutinize the tool path simulation. Had I done that, I would have seen it wasn't going all the way to the outer edge of the groove with the first attempt.

Tomorrow we do it for real in the 4th axis and cut three of them around the circumference. Making a spring-loaded engraving tool holder and Mr. Cheapo here won't spend money on a broach to cut some internal splines.

So we'll see if my shiny balls will transmit torque without too much slop between the shaft and the bore...

This kind of interaction among our members is what makes this forum so good.

No Kidding.
 
Last edited by a moderator:
Tom, I'm glad to hear you figured it out. Good catch on the bearing. Based on what you were seeing it didn't seem likely to be a mechanical issue. With a motor driven system it is really hard to "feel" these kinds of things. I'll bet you could write a paper on Mach3 and cutting arcs.
 
Back
Top