-
Welcome back Guest! Did you know you can mentor other members here at H-M? If not, please check out our Relaunch of Hobby Machinist Mentoring Program!
You are using an out of date browser. It may not display this or other websites correctly.
You should upgrade or use an alternative browser.
You should upgrade or use an alternative browser.
My Misc Quickie Projects
- Thread starter darkzero
- Start date
- Joined
- May 3, 2017
- Messages
- 2,046
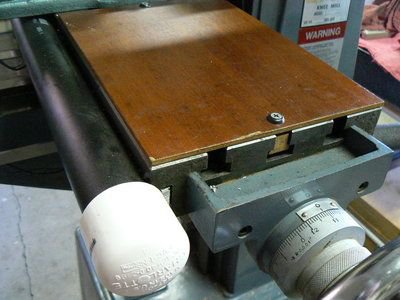
That's a great idea! I can actually think of an enhancement that's slightly more practical. A minor downside to the plywood is that it 'moves' pretty easily if you bump it. Not a big deal, but I had thought about putting a wooden or metal lathing strip on the underside that would ride in the T-slot. It would be a relatively simple matter to drill two or three through-holes and connect the lathing strip on the underside to a metal strip or tab on the top. Accomplishes two objectives: stability and anchor for a mag base.Or just epoxy a 2" square of 1/8" Steel Sheet metal to the plywood as a spot to stick the mag base.
Thanks for the idea.
Regards,
Terry
- Joined
- Nov 27, 2012
- Messages
- 7,970
That's a great idea! I can actually think of an enhancement that's slightly more practical. A minor downside to the plywood is that it 'moves' pretty easily if you bump it. Not a big deal, but I had thought about putting a wooden or metal lathing strip on the underside that would ride in the T-slot. It would be a relatively simple matter to drill two or three through-holes and connect the lathing strip on the underside to a metal strip or tab on the top. Accomplishes two objectives: stability and anchor for a mag base.
Thanks for the idea.
Regards,
Terry
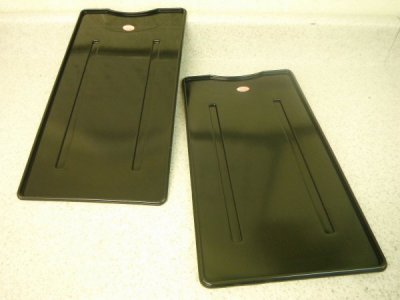
Those commercially made ones are like that and are molded into the cover/tray. But all you really need is only 2 dowels for each cover & is what most people do.
Attachments
- Joined
- Nov 27, 2012
- Messages
- 7,970
Had an extra cold air gun sitting around for years. Figure I'd try it out on the mill. Hopefully it works better on the mill (have one for the lathe too) for blowing chips out the way in addition to coolant that I manually spray on. They sure are air hungry so I may not use it much but hey it's there now. Maybe some day I will suck it up & hook up the flood coolant. Well probably not, I'll probably get a Fogbuster to try first.
Just had to buy some fittings to run an extra air line to the mill, a couple of hoses, & make a distribution block to replace the one that was for the stock coolant. Mounted a regulator & filter on the back of the column.


Just had to buy some fittings to run an extra air line to the mill, a couple of hoses, & make a distribution block to replace the one that was for the stock coolant. Mounted a regulator & filter on the back of the column.


- Joined
- Nov 27, 2012
- Messages
- 7,970
Thanks Mike. Yeah, I have 77 gallons of air, I don't run the guns at recommended psi, & they still use a lot of air. The one I have on the lathe I only use when drilling titanium or for knurling. It works ok in addition to spraying on coolant manually. Firgured for the mill it will work better milling slots etc where I need to blow chips out the way. I originally was just going to run straight air for that but firgured I'd give this a go. Nothing is permanent so I can easily uninstall the setup. I definitely wouldn't buy one of these at full price, I scored 2 of them for cheap on ebay years ago.


- Joined
- Jan 31, 2016
- Messages
- 13,397
We use the cold air guns at work for cooling our shot rollers . We blow poly thru extruders onto the rollers which would get quite hot without them . Never considered using one on a mill , although now you have me thinking . 
- Joined
- Apr 30, 2015
- Messages
- 12,629
Now I feel like an absolute heathen, using cardboard and masking tape LOL
- Joined
- Nov 27, 2012
- Messages
- 7,970
Now I feel like an absolute heathen, using cardboard and masking tape LOL
Oh, I've used cardboard many times & still do sometimes. I'm too lazy to use tape though, I'll just hold the cardboard.

- Joined
- Nov 27, 2012
- Messages
- 7,970
I'm a believer in KISS (keep it stupid simple) but sometimes I don't listen to myself.....
I wanted to make a new torque arm for my tapping head. This is what I've been using that I quickly threw together to get a big project done. I never liked this one cause the stop arm on the Tapmatic rubs up & down the bar as the quill is moved & it's limited in height to whatever the length of the bar is. If the workpiece is higher up from the vise I'd have to make it taller.

I wanted something mounted to the quill but not clamped onto the quill like the other style Tapmatic sells. So I came up with this great idea (so I thought) to make a mount that bolted onto the clamping screw for my quill bracket.
Ordered a hard to find extended length fully threaded SHCS, made a mount to attach to that extended cap screw, & used a thumbscrew to attach a 5/16" piece of grade 5 titanium (I have a number rods on hand so why not).


Well the idea seemed good in my head & I sort of liked how it came out but it was a fail. The whole thing flexed too much at the extended cap screw & the 5/16" bar. It might have worked but on to plan B....
Here's where KISS was the better way. I simply drilled & reamed a hole in my depth stop arm & tapped a hole for the same thumbscrew. This time I used a 3/8" piece of titanium (again had it laying around, I have a big bundle of 3/8" rods). I really wanted the stop arm for the Tapmatic to be off to the side or towards the back so it's out the way but I can live with this. I don't use it that often anyway so no big deal. The torque arm is quickly removed using the thumbscrew, so much more convenient than the table mounted torque arm, & now I can use the tapping head at any height off the table. I'm happy now.


I wanted to make a new torque arm for my tapping head. This is what I've been using that I quickly threw together to get a big project done. I never liked this one cause the stop arm on the Tapmatic rubs up & down the bar as the quill is moved & it's limited in height to whatever the length of the bar is. If the workpiece is higher up from the vise I'd have to make it taller.

I wanted something mounted to the quill but not clamped onto the quill like the other style Tapmatic sells. So I came up with this great idea (so I thought) to make a mount that bolted onto the clamping screw for my quill bracket.
Ordered a hard to find extended length fully threaded SHCS, made a mount to attach to that extended cap screw, & used a thumbscrew to attach a 5/16" piece of grade 5 titanium (I have a number rods on hand so why not).


Well the idea seemed good in my head & I sort of liked how it came out but it was a fail. The whole thing flexed too much at the extended cap screw & the 5/16" bar. It might have worked but on to plan B....
Here's where KISS was the better way. I simply drilled & reamed a hole in my depth stop arm & tapped a hole for the same thumbscrew. This time I used a 3/8" piece of titanium (again had it laying around, I have a big bundle of 3/8" rods). I really wanted the stop arm for the Tapmatic to be off to the side or towards the back so it's out the way but I can live with this. I don't use it that often anyway so no big deal. The torque arm is quickly removed using the thumbscrew, so much more convenient than the table mounted torque arm, & now I can use the tapping head at any height off the table. I'm happy now.


