-
Welcome back Guest! Did you know you can mentor other members here at H-M? If not, please check out our Relaunch of Hobby Machinist Mentoring Program!
You are using an out of date browser. It may not display this or other websites correctly.
You should upgrade or use an alternative browser.
You should upgrade or use an alternative browser.
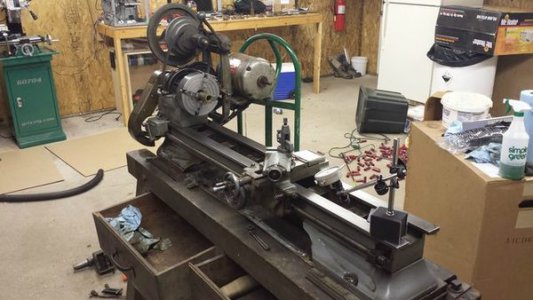
My first lathe! What model is it? Pics!
- Thread starter stevos758
- Start date
- Joined
- Dec 25, 2011
- Messages
- 10,552
Definitely do not use grease on babbit bearings. Pull one bearing cap at a time and remove all grease (don't lose the shim packs). Use SAE 20 ND or equivalent daily. Get a couple of the felt plugs that the later lathes have in each spindle bearing oil cup. With them, if you forget to put oil in the cups for a day or two you won't hurt anything.
I also forgot to mention my babbit bearings are packed with grease..... I assume this is bad and I should remove and clean?
- Joined
- Dec 25, 2011
- Messages
- 10,552
1.) Look at the cutter grinding section in the MOLO. With the original lantern tool post, the cutters were sitting at a pretty steep angle and the cutter was ground accordingly.
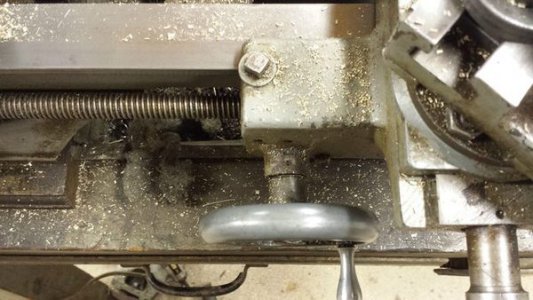
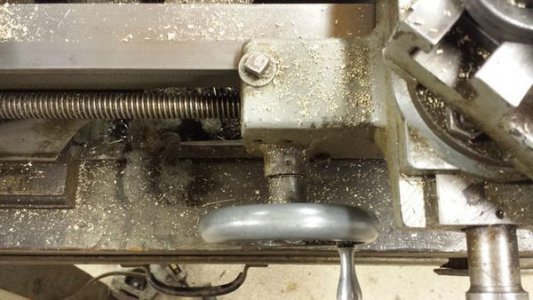
2.) Post a top view photo of the area around the compound and crossfeed hand wheels. According to the mid 30's catalogs, all of the 10" models came with a 1" dia. micrometer dial on both the compound and cross feed, graduated 0-0.100 in .001 increments. Maybe the engraving is just coated over with accumulated crud and grime.
2.) Post a top view photo of the area around the compound and crossfeed hand wheels. According to the mid 30's catalogs, all of the 10" models came with a 1" dia. micrometer dial on both the compound and cross feed, graduated 0-0.100 in .001 increments. Maybe the engraving is just coated over with accumulated crud and grime.
Ok, Question..... How do I get my tool to the right height? It seems really low and I dont think it should be tilted so far.
#2 How do I measure the X axis cuts? I have no dial?
1.) Look at the cutter grinding section in the MOLO. With the original lantern tool post, the cutters were sitting at a pretty steep angle and the cutter was ground accordingly.
2.) Post a top view photo of the area around the compound and crossfeed hand wheels. According to the mid 30's catalogs, all of the 10" models came with a 1" dia. micrometer dial on both the compound and cross feed, graduated 0-0.100 in .001 increments. Maybe the engraving is just coated over with accumulated crud and grime.
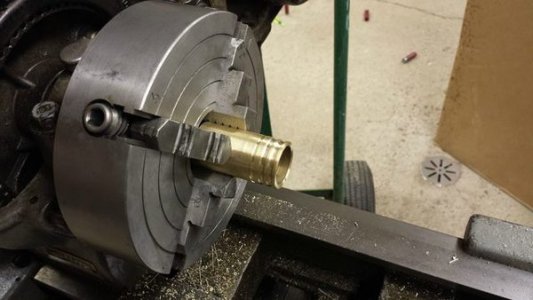
I might be calling it the wrong thing. The cross feed and compound have dials. The other one pictured in my 2nd pic. That is the one I am referring too.
Ill check out the tool grinding section. That makes sense I guess. I just wasn't sure if something was wrong with it.
Ok my tail stock.... What taper fits in there? I want to find a drill chuck and live center for it. Right now its just the shaft with measurements. Its open on the inside and I'm not sure how it would hold anything? I'll try and get some pics tonight to explain.
I'll get to those greasy bearings asap.
One more thing... My ways. The carriage gets really tough to move on the far half of travel. I assume it was used mostly near the chuck and broke in well. Would my best bet be to lap the other half?
So I can use one of these in there then?
https://littlemachineshop.com/products/product_view.php?ProductID=2870&category=7
https://littlemachineshop.com/products/product_view.php?ProductID=2870&category=7
- Joined
- Nov 21, 2010
- Messages
- 1,602
So I can use one of these in there then?
Yes MT2 on the tailstock and the usual MT 3 on the headstock. I think your reference to the missing dial, thats the carriage, which there are none ( not to say they don't exist) .
what we usually do is stick a magnetic dial indicator on a convenient location, thats not on the important list right now. I think first off what Bob said carefully remove bearing caps
with shims keep in order, (don't take more apart than you can handle right now). Clean the grease best you can. while rotating a little diesel/paper towels will help break the grease then start
squirting oil while rotating, clean the caps good, more oil and assemble. The lantern tool post at times does have an alarming angle, plus on some holders, have around a 16 degree pitch
which adds more of a alarming angle. So as already said, you will have to fiddle grinding the top of the tool bit (more flat, level) then try and tweek. You will get it. I already see a
quick change tool post in your future. Don't be afraid of a piston China special with all the holders under $100. Against my negative feelings for over the pond stuff, I bought two
quick change china set ups for my two S Bends, and surprisingly, it works 100 times better than the lantern. Don't throw the lantern away- there will be a time, however the lantern in
my books is a good teacher, quick change? unheard of when I started. You have a fine lathe, use lots of oil forget paint right now, and the learning curve will come trust me.
Now I think about it, i think it was around 80 bucks for a quick change, boring bar, parting, tool, knurler and a tool bit holder, so thats a good jump start for cheap, but works fine....
sam
Oh I forgot, I would say don't lap anything yet, lets try to exercise it first with oil; they do get a little stiff in unused places thats normal. Once a week our lathes, we oil and full travel the
carraige and tail stock whether we need the travel or not.
Last edited:
- Joined
- Dec 25, 2011
- Messages
- 10,552
OK. That is the carriage drive or carriage traverse handwheel. I don't know of any at least older engine lathes that have that function instrumented, at least as originally built. What one usually does is to use a carriage stop attached to the front way to the left of the carriage. Or to mount a dial indicator usually on the back way to the right of the carriage. The other option is to mount a long DRO on the rear of the bed with its buggy attached to the back of the carriage. However, about the only time that you need to know where the carriage is is when turning to a shoulder. And usually you don't really care where it is, you just need to stop at the right point.
You don't normally use the carriage drive for cutting relatively narrow grooves. For that you would position and then lock down the carriage and use a grooving tool (which is essentially the same as a cutoff tool) set square to the work.
On the carriage getting tight toward the right end of the bed, that could indicate preferential wear on the back of the rear way, but before you go and start removing metal, clean the back of the rear way and the front of the front way down to bare metal. And as previously suggested run the machine for a while. Over the years, oil drying on the metal can leave a varnish buildup layer.
I might be calling it the wrong thing. The cross feed and compound have dials. The other one pictured in my 2nd pic. That is the one I am referring too.
One more thing... My ways. The carriage gets really tough to move on the far half of travel. I assume it was used mostly near the chuck and broke in well. Would my best bet be to lap the other half?

