- Joined
- Oct 13, 2014
- Messages
- 9,501
Hi All,
A few years back I completed the DRO installation on my mill by adding the Z Axis to the head, that is my mill is a bed style where the head raises and lowers not the knee or table. However, I found it not be as useful or at least user friendly as I thought, mainly due to the fine adjustment hand wheel being mounted high on the column, towards the back of the machine. And while the head height is also motorized, it moves too fast for precision adjustment. The solution was to mount a scale on the quill and use that for the Z Axis read instead of the head height. Ultimately, a 4 axis DRO that would combine the two Z axises together would be the way to go but for now, I'll just swap out whichever one I need for the height range required. Though the quill Z will probably suffice for at least 95% of my work.
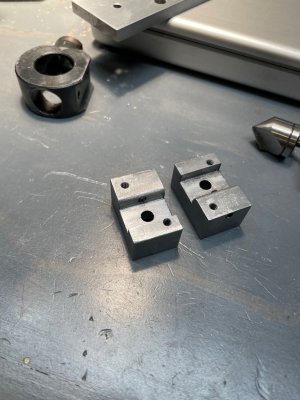
So I ordered a 150mm scale off AliExpress and got to work. Making a bracket mounted to the bottom of the quill and having the scale off to the side was my first thought, as I wanted to leave easy access to the depth-stop. However, that approach was fought with too many issues, mainly where and how to attach the scale to the head. So I decided to mount the scale using the mounting bosses already on the head, presumably for that purpose. The read head would be mounted to the depth-stop itself. I started by making two blocks to attach to the mounting bosses out of some mystery-alloy steel I had on hand. I mounted them to the bosses by drilling and tapping one #10-32 hole in each boss, then screwing them in place, I also drilled and tapped the blocks for #6-32 set screws that would impinge on the side of the bosses, to ensure tight alignment. I then made a plate out of Aluminum that screwed to the blocks. I now had a solid platform for mounting the scale. Also, the blocks held the scale far enough away from the mill head to allow, albeit somewhat impeded, use of the depth stop.
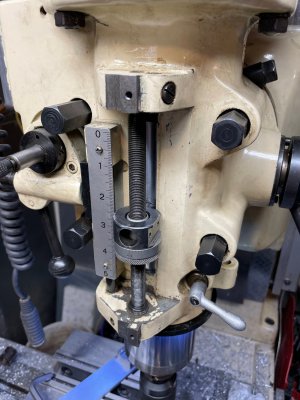
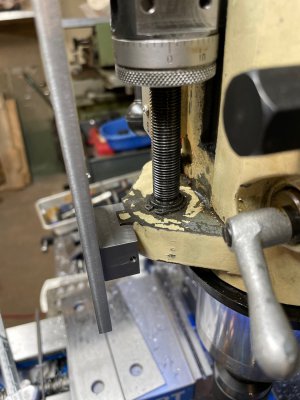
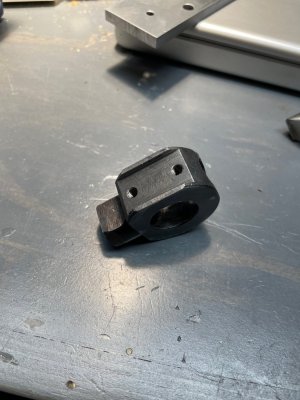
Next was mounting the read-head to the ring shaped, depth stop boss that is mounted to the quill. I first figured on making a bracket with a radius matching the stop and fastening it with screws. but that seemed like too much of a headache and it wouldn't give me any meaningful opportunities for adjustment. I decided to mill a slot on the side of the stop, that would also allow for the bracket to be adjusted forward-backward and thus eliminate the need for any intermediate brackets, etc. Milling the flat went easily, I was able to register it position in the vice by sliding a .625" bar through the hole and setting the ends on two V blocks bottom of the neck of the stop that attaches to the quill was registered against the fixed jaw. This gave fairly accurate alignment square to the quill and the bosses.
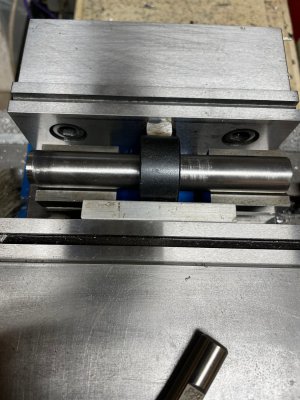
I made the bracket that attaches the read head mounting base to the stop from a piece of ¼ thick, structural steel, angle iron. I milled slots for the screws and shoulders to fit into the slot on the stop that would allow for adjustment without it rocking up or down (it is a very tight fit). I also milled slots to allow adjustment of the read head mounting base right or left. Even though this setup didn't allow for every possible adjustment, I figured having referenced off the known, true surfaces of the machine, when making/altering the parts, would get me close enough in those dimensions. Indeed that was the case.
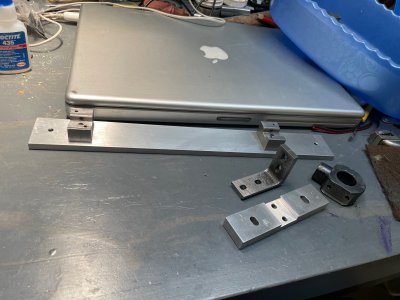
The read head mounting base was also made from Aluminum, I milled a slot on the back to receive the angle bracket, again so not to allowing for any twisting, only side to side movement. All looked good and I attached the scale and head to the mounts, the DRO was now reading the Quill movement. However I discovered a problem. The quill was free to rotate slightly causing the read head to pull away from the scale body by an unacceptable amount.
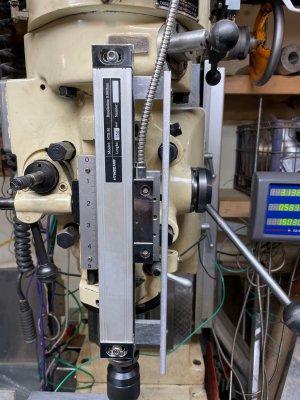
My first thought was to make a piece attached to the stop/read-head that would hook around to the opposite side of the scale mount and ride along its left edge. But that was kind of wonky and would have further impeded access to the depth stop. I also thought I could use the neck of the depth stop by making a new one altogether that would better fit the slot in the mills head it rides in. But that would have meant eventually wear and tear on this parts and there isn't much room to add guide strips, etc. So I figured I would make a additional "track" guide just to the right of the read head.
I made the guide and its mounts from Aluminum and made guides for the redhead mount out of Delrin. On the inner face riding on the scale mount, I bored two .200" holes about .300" deep and through drilled and tapped for a 6-32 setscrew in the bottom. I then mede the Delrin guide "plugs" which proved to be a bit of a challenge as I only had .25" sheet material I attempted to cut a .25" square bar a couple of inches long and turn it in the lathe, it sort of worked but even the short length and having it supported by a center in the tailstock there was still too much deflection. I wound up having to only have .5" protruding from the chuck and turning it with a very sharp HSS tool. Thus the Delrin plugs were adjustable.
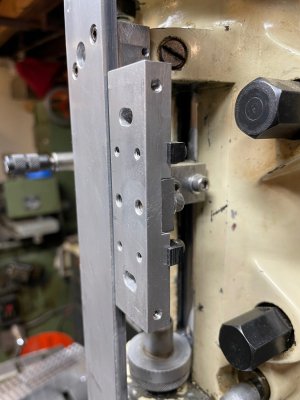
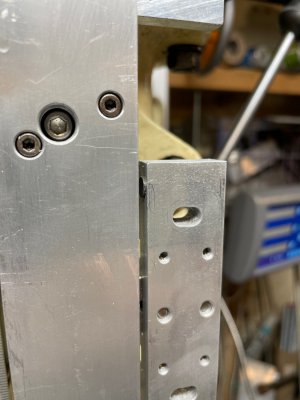
I also made Delrin shoes to ride on the new track, I mounted these in slots cut in the back of the of the read-head mount. They stick out the right side, they have slots in them and are fastened with screws. I couldn't do the hole & plug method on that side as there would be no way to get at the adjustment screws. I assembled the whole thing and it worked perfectly. The quill could no longer rotate and the read head stayed right at its specified distance from the scale body, throughout is entire travel.
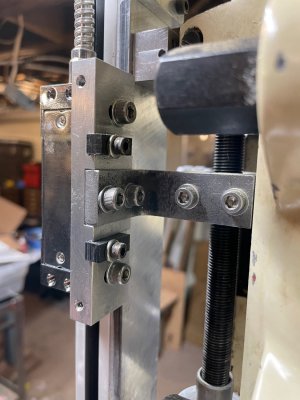
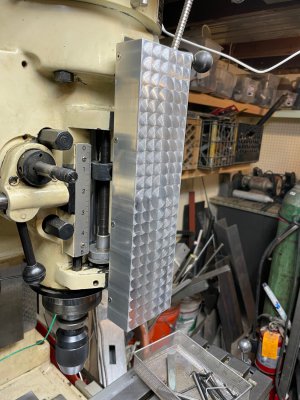
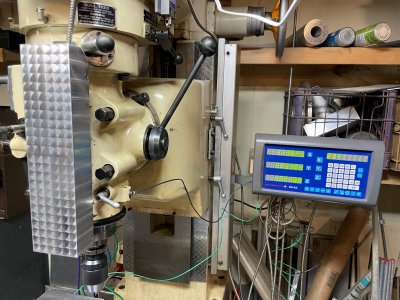
Then my thoughts turned to the cover and I realized Duh, I should have simply made the cover part of the track, I surmised a piece of .25 X 3" wide X1.5" deep aluminum C channel would be perfect, McMaster got it to me the next day. I drilled and tapped the screws for it in the side of the scale mount, though while doing so I accidentally reversed the order, and had to do them, twice.
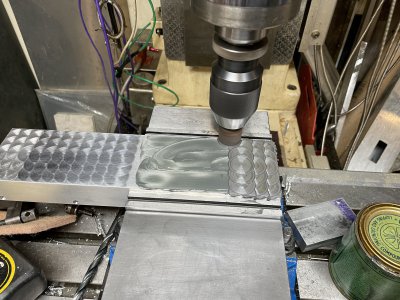
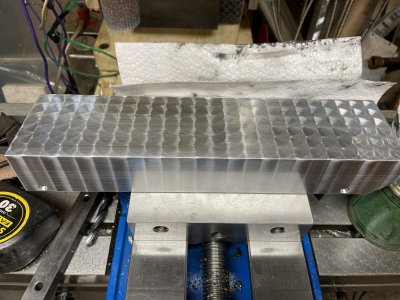
After the cover was on and I was satisfied everything was operating well I decided to dress up the aluminum channel with a "Jeweled" (AKA Engine turning) finish. I had screwed around with this in the past but never when I had a DRO to make it easy. For the "spinner" I use a 1" diameter "Scotchbrite" abrasive drum and some 400# Clover compound. The results weren't perfect but good enough for my needs.
Thanks for looking.
PS In my musing on if I should upgrade my DRO to a 4 channel that could combine the two Z axises, I came across a dongle that does the combination and used the existing DRO, for only $60. I ordered it however its back ordered, Ill update when it arrives.
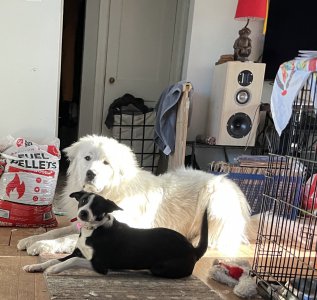
Oh, here's a random picture of the Dogs!
A few years back I completed the DRO installation on my mill by adding the Z Axis to the head, that is my mill is a bed style where the head raises and lowers not the knee or table. However, I found it not be as useful or at least user friendly as I thought, mainly due to the fine adjustment hand wheel being mounted high on the column, towards the back of the machine. And while the head height is also motorized, it moves too fast for precision adjustment. The solution was to mount a scale on the quill and use that for the Z Axis read instead of the head height. Ultimately, a 4 axis DRO that would combine the two Z axises together would be the way to go but for now, I'll just swap out whichever one I need for the height range required. Though the quill Z will probably suffice for at least 95% of my work.
So I ordered a 150mm scale off AliExpress and got to work. Making a bracket mounted to the bottom of the quill and having the scale off to the side was my first thought, as I wanted to leave easy access to the depth-stop. However, that approach was fought with too many issues, mainly where and how to attach the scale to the head. So I decided to mount the scale using the mounting bosses already on the head, presumably for that purpose. The read head would be mounted to the depth-stop itself. I started by making two blocks to attach to the mounting bosses out of some mystery-alloy steel I had on hand. I mounted them to the bosses by drilling and tapping one #10-32 hole in each boss, then screwing them in place, I also drilled and tapped the blocks for #6-32 set screws that would impinge on the side of the bosses, to ensure tight alignment. I then made a plate out of Aluminum that screwed to the blocks. I now had a solid platform for mounting the scale. Also, the blocks held the scale far enough away from the mill head to allow, albeit somewhat impeded, use of the depth stop.


Next was mounting the read-head to the ring shaped, depth stop boss that is mounted to the quill. I first figured on making a bracket with a radius matching the stop and fastening it with screws. but that seemed like too much of a headache and it wouldn't give me any meaningful opportunities for adjustment. I decided to mill a slot on the side of the stop, that would also allow for the bracket to be adjusted forward-backward and thus eliminate the need for any intermediate brackets, etc. Milling the flat went easily, I was able to register it position in the vice by sliding a .625" bar through the hole and setting the ends on two V blocks bottom of the neck of the stop that attaches to the quill was registered against the fixed jaw. This gave fairly accurate alignment square to the quill and the bosses.


I made the bracket that attaches the read head mounting base to the stop from a piece of ¼ thick, structural steel, angle iron. I milled slots for the screws and shoulders to fit into the slot on the stop that would allow for adjustment without it rocking up or down (it is a very tight fit). I also milled slots to allow adjustment of the read head mounting base right or left. Even though this setup didn't allow for every possible adjustment, I figured having referenced off the known, true surfaces of the machine, when making/altering the parts, would get me close enough in those dimensions. Indeed that was the case.

The read head mounting base was also made from Aluminum, I milled a slot on the back to receive the angle bracket, again so not to allowing for any twisting, only side to side movement. All looked good and I attached the scale and head to the mounts, the DRO was now reading the Quill movement. However I discovered a problem. The quill was free to rotate slightly causing the read head to pull away from the scale body by an unacceptable amount.

My first thought was to make a piece attached to the stop/read-head that would hook around to the opposite side of the scale mount and ride along its left edge. But that was kind of wonky and would have further impeded access to the depth stop. I also thought I could use the neck of the depth stop by making a new one altogether that would better fit the slot in the mills head it rides in. But that would have meant eventually wear and tear on this parts and there isn't much room to add guide strips, etc. So I figured I would make a additional "track" guide just to the right of the read head.
I made the guide and its mounts from Aluminum and made guides for the redhead mount out of Delrin. On the inner face riding on the scale mount, I bored two .200" holes about .300" deep and through drilled and tapped for a 6-32 setscrew in the bottom. I then mede the Delrin guide "plugs" which proved to be a bit of a challenge as I only had .25" sheet material I attempted to cut a .25" square bar a couple of inches long and turn it in the lathe, it sort of worked but even the short length and having it supported by a center in the tailstock there was still too much deflection. I wound up having to only have .5" protruding from the chuck and turning it with a very sharp HSS tool. Thus the Delrin plugs were adjustable.


I also made Delrin shoes to ride on the new track, I mounted these in slots cut in the back of the of the read-head mount. They stick out the right side, they have slots in them and are fastened with screws. I couldn't do the hole & plug method on that side as there would be no way to get at the adjustment screws. I assembled the whole thing and it worked perfectly. The quill could no longer rotate and the read head stayed right at its specified distance from the scale body, throughout is entire travel.

Then my thoughts turned to the cover and I realized Duh, I should have simply made the cover part of the track, I surmised a piece of .25 X 3" wide X1.5" deep aluminum C channel would be perfect, McMaster got it to me the next day. I drilled and tapped the screws for it in the side of the scale mount, though while doing so I accidentally reversed the order, and had to do them, twice.
After the cover was on and I was satisfied everything was operating well I decided to dress up the aluminum channel with a "Jeweled" (AKA Engine turning) finish. I had screwed around with this in the past but never when I had a DRO to make it easy. For the "spinner" I use a 1" diameter "Scotchbrite" abrasive drum and some 400# Clover compound. The results weren't perfect but good enough for my needs.


Thanks for looking.
PS In my musing on if I should upgrade my DRO to a 4 channel that could combine the two Z axises, I came across a dongle that does the combination and used the existing DRO, for only $60. I ordered it however its back ordered, Ill update when it arrives.
Oh, here's a random picture of the Dogs!

Last edited:

