
- Joined
- Jul 15, 2020
- Messages
- 422
How can you match the hole spacing of blind holes when you can't use a transfer punch? You could use dial calipers and do a bunch of math to determine the spacing or you could do this:
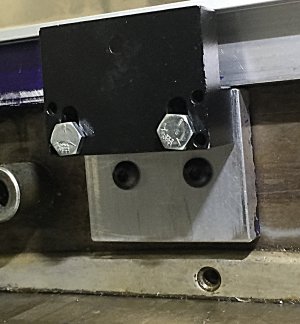
In this case, I needed to fabricate a bracket to mount a magnetic scale reader head for a DRO to the back of the saddle on my mill. The saddle had existing 1/4" x 20 threaded holes, and I wanted to use those rather than drill and tap new holes.
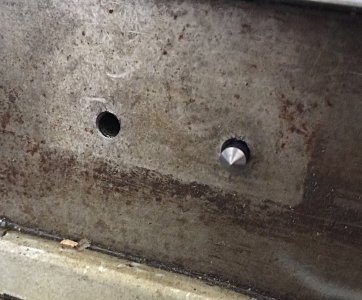
In the first photo, I knew that the holes were aligned vertically, but didn't know the distance between them. I needed to space the holes in the bracket to bolt up to the mill.
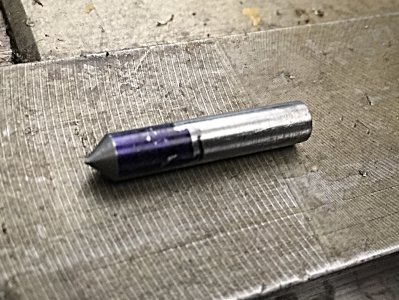
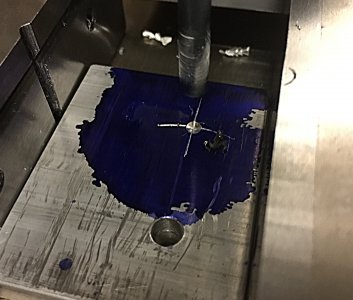
I first determined the location of the first hole and drilled it. I then machined a short stub of drill rod that would slide snugly into one of the existing threaded holes, but not so tightly that it couldn't be easily pulled out. I turned a point onto the stub that sticks out of the hole 3/16" or so.
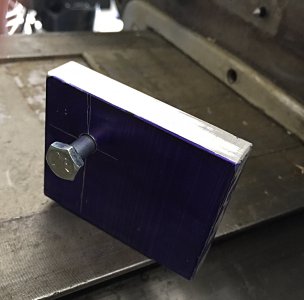
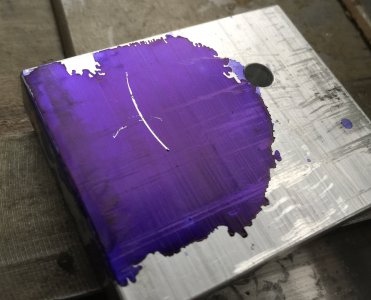
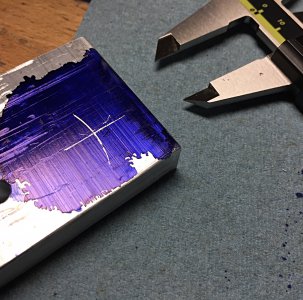
I applied Dykem Blue to one side of the bracket being fabricated, and then bolted it loosely to the mill using the hole already drilled. I then scribed an arc onto the back of the bracket using the pointed stub. I scribed a line across the arc the same distance from the top as the first hole. That gave me the exact location of the second hole, which I center drilled and then drilled.
In this case, I needed to fabricate a bracket to mount a magnetic scale reader head for a DRO to the back of the saddle on my mill. The saddle had existing 1/4" x 20 threaded holes, and I wanted to use those rather than drill and tap new holes.
In the first photo, I knew that the holes were aligned vertically, but didn't know the distance between them. I needed to space the holes in the bracket to bolt up to the mill.
I first determined the location of the first hole and drilled it. I then machined a short stub of drill rod that would slide snugly into one of the existing threaded holes, but not so tightly that it couldn't be easily pulled out. I turned a point onto the stub that sticks out of the hole 3/16" or so.
I applied Dykem Blue to one side of the bracket being fabricated, and then bolted it loosely to the mill using the hole already drilled. I then scribed an arc onto the back of the bracket using the pointed stub. I scribed a line across the arc the same distance from the top as the first hole. That gave me the exact location of the second hole, which I center drilled and then drilled.
Attachments
-
 holes in mill.jpg598.9 KB · Views: 27
 -
 pointed stub.jpg707.4 KB · Views: 27
 -
 stub in hole.jpg966.1 KB · Views: 27
 -
 drill first hole.jpg720.2 KB · Views: 27
 -
 pivot bracket against stub.jpg1.2 MB · Views: 26
 -
 scribed arc.jpg676 KB · Views: 26
 -
 scribe 2nd line.jpg1.2 MB · Views: 26
 -
 center drilled.jpg909.7 KB · Views: 24
 -
 finished.jpg605.6 KB · Views: 26


