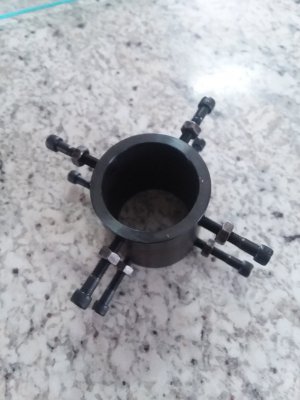
Making a Spider for the lathe

I have been reading everything that I can find on chambering between centers. I came across a post where the poster had made a dead center to precisely fit in the spindle bore and held by the spider. I don't know how long it was. He used it when the barrel was too short to extend out of the spindle and into the spider. What was even more interesting was that with the muzzle in the dead center he then dialed in the chamber end of the barrel. That is a variation of chambering through the headstock that I had never read about before. Gets you to wondering about just how necessary it is to dial in both ends of the barrel.
 
I have been reading everything that I can find on chambering between centers. I came across a post where the poster had made a dead center to precisely fit in the spindle bore and held by the spider. I don't know how long it was. He used it when the barrel was too short to extend out of the spindle and into the spider. What was even more interesting was that with the muzzle in the dead center he then dialed in the chamber end of the barrel. That is a variation of chambering through the headstock that I had never read about before. Gets you to wondering about just how necessary it is to dial in both ends of the barrel.
I think it’s individual preference. There’s a series of videos by a guy who chucks the muzzle end in a 3 jaw and then uses a steady rest a couple of inches from other end, then threads, counterbores and chambers it using a floating reamer attachment with a piloted reamer. Easy peezy. Then he also shows that rifle put 5 through one ragged hole. That same guy has several other videos of him threading and chambering doing all the tweaking in a 4 jaw to dial it in to less than a ten thousandth. He’s a hell of a gunsmith and he said he did the 3 jaw and steady rest video just to show there’s different ways that produce great results. He sold me on that method over the 4 jaw method and the between centers method. I really liked the simplicity of it so I ordered a floating reamer holder from ptg and I’m waiting on it now. I can’t wait to give it a try. My lathe isn’t running right at present but the new motor and control board will be here in a week or two. I just got a SS Schneider barrel blank for my m40 and it’s gonna be the first one I try it on.
 
I believe that I watched that video also. Gunsmith Rod Henrickson puts the muzzle in an ER40 collet after turning it down to fit in the collet. Lots of ways to do this. All I am hoping for from the barrels that I do is 1 MOA at 100 yards and 1 MOD (minute of deer) at around 250 yards. I have no interest in punching holes in paper at any range. I did enough of that in high school when I was into small bore prone competitive shooting. I doubt that I will put even 100 rounds down the barrels of the rifles I build.
 
I believe that I watched that video also. Gunsmith Rod Henrickson puts the muzzle in an ER40 collet after turning it down to fit in the collet. Lots of ways to do this. All I am hoping for from the barrels that I do is 1 MOA at 100 yards and 1 MOD (minute of deer) at around 250 yards. I have no interest in punching holes in paper at any range. I did enough of that in high school when I was into small bore prone competitive shooting. I doubt that I will put even 100 rounds down the barrels of the rifles I build.
I don’t punch paper unless I’m sighting in an eye piece or developing a load. However it has its purposes and is the best way to evaluate accuracy is why he included that in his video. It’s a different video than the one you mentioned but probably very similar. The one I’m referring to is a 3 part series titled “Chambering in a steady rest” By suar 08161991 and here’s a link
It’s definitely worth a look. If you have the time check it out. It sounds like we think a like on this stuff. One moa is more than enough accuracy on my hunting rigs. I’ve got a few that I’ve had for nearly 40 years and they’re closer to that minute of deer you mentioned. They're light weight, reliable, and get the job done. However I need better accuracy out my varmint rifles so being able to obtain that without all the tweaking was nice to see. I might be wrong but I think the guys that are making money from rebarreling and blueprinting actions are bs’ing people about the difficulty involved. At $3-$400 per barrel they probably feel the need to justify the cost. If not the average country boy, like myself, might just buy the tooling and have a hundred bucks leftover instead of bending over for the gunsmith. My next 308 win barrel won’t cost me a cent to rebarrel.
The pm-25mv mill I ordered in November finally arrived last evening so I’m busy with it now. I wanted one so I can make small parts and stuff like that. I’m limited on space or I’d have gotten bigger machines. Hopefully these will be good enough for my needs.
Let me know what you think of that series of videos.
 
I watched those videos within the last week and have them bookmarked for future reference. Among other things I am currently making a micrometer reamer stop. Should have it done in a couple of days. Cutting 40 TPI threads was a trip. I had to look at them with a magnifying glass. I will do a thread on making the stop after I get it done.

From my competitive shooting days many moons ago I felt that the mental aspect was the most import thing to consistently getting good scores. If you didn't have faith in your rifle that it was up to the task your scores suffered. If it takes paying to have your barrels dialed in through the headstock for you to have confidence in your rifle then you best do it if you want to be competitive.

I'd say that we do seem to think alike.
 
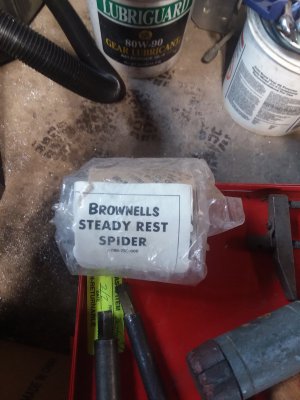
Got this the other day, never used, still sealed.
 

Attachments

  • 20210112_115143.jpg
    20210112_115143.jpg
    931.3 KB · Views: 46
I watched those videos within the last week and have them bookmarked for future reference. Among other things I am currently making a micrometer reamer stop. Should have it done in a couple of days. Cutting 40 TPI threads was a trip. I had to look at them with a magnifying glass. I will do a thread on making the stop after I get it done.

From my competitive shooting days many moons ago I felt that the mental aspect was the most import thing to consistently getting good scores. If you didn't have faith in your rifle that it was up to the task your scores suffered. If it takes paying to have your barrels dialed in through the headstock for you to have confidence in your rifle then you best do it if you want to be competitive.

I'd say that we do seem to think alike.
I’m glad that he put those videos out there and I added them to my library for future reference too. I agree with you about competitive shooting. Every little thing matters. Trying to eliminate any variable and doing everything exactly the same each time so the bullet hits the same spot every shot. It’s enough to drive you nuts. It’ll also take the fun out of it if you aren’t careful.
Are you making a graduated dial for your reamer micrometer? That’s a hard project and the 40 tpi sounds like the tip of the iceberg. I seen video with a older fella using a 100 tooth circular saw blade attached to his lathes spindle. He had a piece of metal clamped in place on one end the other between the teeth on the saw blade. The piece of metal clicked between the saw teeth as the chuck rotated. As he rotated the chuck each click was 1/100 and he scribed the graduations in the metal. A small line every click for 4 and the 5th click got a larger line scribed in the metal and every 10th click got a larger line still. He went back afterward and stamped 0-9 on the largest markings. The simplicity of his contraption was ingenious, it was impressive to see. I don’t think I have the patience to do anything like that. However I have a cheap eBay rotary table with 4 jaw chuck and tail stock on the way from India. I didn’t get a indexing kit but I don’t think I’ll need it. My son finished getting the cnc stuff for my mill wired, programmed, linked up or whatever it’s called, earlier this evening. All the cnc stuff is working and he’s gonna come over this weekend and put it on the machine. He’s been wanting me to buy this stuff for nearly 20 years but I didn’t have the time or money. With the children all grown and gone I now have both LoL.
Sorry about that, I’m rambling on a bit. I’m excited about my mill and I’m looking forward to seeing what it’ll do.
 
The video you referenced is by Mr. Pete aka Tubalcain. I have watched it several times because I have thought about making new dials for my mill/drill. Home Depot sells a saw blade with 100 teeth. I made a crude rotary table out of the swivel base that came with my 4" vice. I might be able to use that to mark dial on the stop. Each line would be 14.4 degrees apart. The 100 tooth saw blade would be easier. No math and no fine adjustment between the degree marks on rotary table. With sketchup I can easily draw a circle with 25 equally spaced lines around the circle. I might do that because it will be several days before I can get to a Home Depot.

25 circle.jpg

Making the micrometer stop was not hard. Time consuming but not hard. All it involves is turning to OD's and ID's and threading. Parting off too. Except for marking the dial the stop will be done this morning. All that is left is drilling and taping the holes for the set screws.

Since joining the ranks of the independently poor (retired) I have lots of time while money is in short supply.
 
Back
Top