Make a few quick change knife holders, I think I found a better way!

My point is: don't be afraid to have some difficult production, you need to have a start, even an imperfect work, even failure should not be a reason to stop the production!
What I haven't had a chance to say is: After heat treatment and grinding machine processing, the final result of these two tool holders is ------ miserably broken and then given up, because of my ignorance of heat treatment and material science, they reached about 58HRC, but the toughness is very poor, so it is easy to break during use, because I chose DC53 material.
I will explain my current production method and process later, I hope you can have patience and wait!
In addition, I would like to know the model and size of your tool holder, as well as the detailed data of the tool holder. If it happens to be the same size data as the tool I made, I am willing to give away an imperfect production work, because the negligence in the production process has led to some minor defects, but the accuracy and effect of the use are not affected at all. You just have to pay the cost of shipping yourself (estimated to be around $40.00)! The V slot spacing of this defective item is 100.00mm, and I used a tool holder with 99.70mm spacing. I will draw detailed size data for your reference! If you are interested in making your own, I will provide you with some drawings and production process.
View attachment 489044View attachment 489045View attachment 489046
It is not finished yet, I have to wait for the rest of the tool holder to finish drilling and threading together
My point is: don't be afraid to have some difficult production, you need to have a start, even an imperfect work, even failure should not be a reason to stop the production!
I agree 100%. A good craftsman will figure a way around the issue if possible. Perfection is the goal, reality is we need to get the job done. When it's for a customer, it needs to be perfect, when it's for one's self, it needs to get the job done.
 
awesome. I like the clamp design, and of course the workmanship and project.
 
My point is: don't be afraid to have some difficult production, you need to have a start, even an imperfect work, even failure should not be a reason to stop the production!
What I haven't had a chance to say is: After heat treatment and grinding machine processing, the final result of these two tool holders is ------ miserably broken and then given up, because of my ignorance of heat treatment and material science, they reached about 58HRC, but the toughness is very poor, so it is easy to break during use, because I chose DC53 material.
I will explain my current production method and process later, I hope you can have patience and wait!
In addition, I would like to know the model and size of your tool holder, as well as the detailed data of the tool holder. If it happens to be the same size data as the tool I made, I am willing to give away an imperfect production work, because the negligence in the production process has led to some minor defects, but the accuracy and effect of the use are not affected at all. You just have to pay the cost of shipping yourself (estimated to be around $40.00)! The V slot spacing of this defective item is 100.00mm, and I used a tool holder with 99.70mm spacing. I will draw detailed size data for your reference! If you are interested in making your own, I will provide you with some drawings and production process.

It is not finished yet, I have to wait for the rest of the tool holder to finish drilling and threading together
Well, unfortunately, the 100mm dimension on your tool holder is only 82mm on mine. So, I'm guessing that your tool post is the next size larger than mine. Anyway, I appreciate your offer. Maybe someone else here could use those tool holders.

Your last tool holder done with the EDM looks great. Nice work !

Ted
 
This was one of the first two I made, and it was so badly damaged that it was completely unusable. This is the result of excessive quenching, resulting in no toughness.
2021_06_12_16_00_IMG_8683_看图王.jpg
 
Considering that the position required for accuracy is mainly in the V-shaped positioning slot, the tool bar fixing slot is processed first.
2024_05_01_08_47_IMG_8492.JPG2024_05_01_08_52_IMG_8493.JPG


In order to make the most of the raw materials, I designed a slightly more complicated cutting route.
2024_04_30_14_23_IMG_8483.JPG

After cleaning up the oil
2024_05_01_09_33_IMG_8499.JPG

Mount M12 boring bar. The size is just right, can be smoothly in and out, can also be easily locked,
2024_05_01_09_35_IMG_8503.JPG

2024_05_01_09_36_IMG_8507.JPG

2024_05_02_13_20_IMG_8537.JPG

2024_05_02_14_43_IMG_8550.JPG


2024_05_02_14_41_IMG_8545.JPG
 
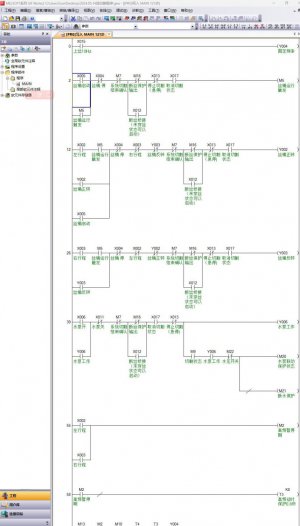
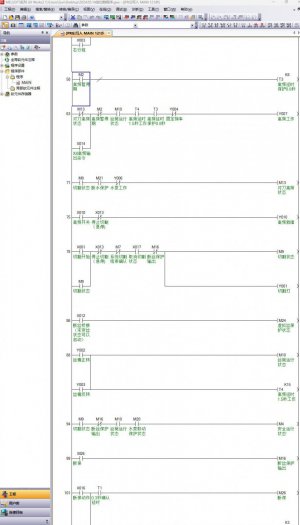
Unfortunately, my EDM is very old, although I have been transformed into PLC control, but I am very unfamiliar with PLC programming, so the logic is a little unreasonable, so the wire is often broken, which makes it difficult for my EDM to work smoothly, and will greatly increase the cost, so I have to suspend the production of tool holder.
Re-rewrite the PLC control logic, as well as the learning of some high-frequency discharge working parameters, can make the EDM can work smoothly. I'll put off the knife restQQ截图20240508204519.jpg
The result of the actual test in the afternoon is still a little confused logic, I will try to correct it. I know this is a very simple control logic, but it is still difficult for me, and this is the drawback of amateur players.
 
Last edited:
Very nice work. That EDM process is still almost "black magic" to me.
Look forward to your further progress.
Ted
 
Very nice work. That EDM process is still almost "black magic" to me.
Look forward to your further progress.
Ted
Sorry for not updating the progress these days!
This is because I got a very old EDM, although I have repaired many parts, but it still always provides me with some faults, so that I can learn to repair and improve the repair ability. I don't know whether this is a surprise or should I be surprised that it can always find faults for me to see?
After the imperfect end of the cutting a few days ago, it began to strike, I tried to debug the machining parameters at all levels, even replaced the molybdenum wire and cutting fluid, and adjusted all the conductive blocks that could affect its work. The final result is still can not work normally, advance and retreat and often report wrong stop, or even cut not into.
I reprogrammed the plc, corrected some errors and improved the control logic, and now the electrical part of the control circuit can work perfectly.
 

Attachments

  • 01.jpg
    01.jpg
    137.5 KB · Views: 5
  • 02.jpg
    02.jpg
    128.2 KB · Views: 5
Back
Top