Logan bed wear?

Pete301

Registered
Registered
Joined
Jun 7, 2013
Messages
49
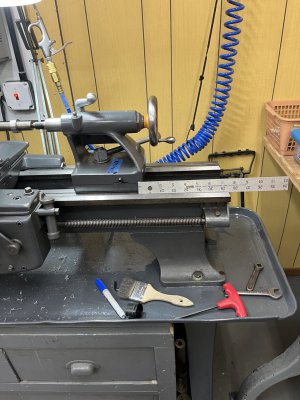
Help me understand what going on here with my lathe. I’ve had a problem with the lathe cutting a taper (by mistake) when work is held in a 3 jaw chuck with a dead center.

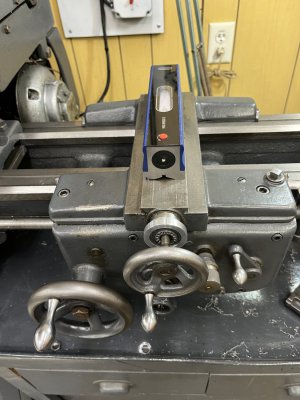
A little background. It’s a Logan 10” model 815 lathe that is fairly new to me. Headstock is non adjustable for alignment, except by scraping. I have the lathe bolted to a concrete floor with leveling pads under it. I’ve leveled the lathe with a .0005 over 10” level. It’s dead center across the vee ways when measured at both the chuck end and the tailstock end. Also measured at midpoint- dead level.

I can eventually get it to cut without a taper ,with work in chuck and dead center, by adjusting the tailstock screws. But, if the next workpiece is a different length then it cuts a taper until I readjusted the tailstock again for that spot on the lathe bed. So, I have to adjust the tailstock to a different alignment at different spots along the bed in order to cut straight.

Is this a sign of bed wear and if so, is there much I can do about it?

Could it just be a worn tailstock that perhaps I could scrape back into alignment. I could do the physical scraping. (you guys helped me in the past to do two shapers). But I have little idea where to start on a tailstock and it might be the wrong sequence of operation.
I’m at the “fix it or junk it”stage so all help welcome.
 
Have you checked the live center for runout and repeatability? I had a similar issue and had a new live center that had .002 runout. I compounded the problem by using a center drill with a 45 degree angle ( wrong box ). Wear in the bed is usually worse in certain areas so that can also contribute . I'd also measure by mounting the dial on the cross slide and reading the bar on the top and on the side. Measuring and leveling the Vees doesn't really tell how the wear in the underside of the carriage affects the cut, nor how the wear on the sides of the vee impacts it.

Dave
 
Last edited:
If you want to check the head stock alignment put a piece of stock or pipe in just the chuck. If you want to check the tail stock turn a piece between centers. Then you can have an idea where the problem is. Could just be a bad chuck.If there is excess bed wear it will be obvious by just looking at the bed. Logan is a nice small lathe. Hope you can figure it out.
 
I'm thinking that the tailstock may have worn from below and is now running low. The work piece is bending down towards the tail stock, and you are adjusting a taper to compensate unknowingly.

Easy to check, make or buy a test bar. And run an indicator over the top in the tool post when it is between centers.
I agree test bars are your friend. Put one in the tailstock to check if the tailstock is at the right height but also parallel to the bed in both horizontal and vertical planes. On one of my lathes it is off and the taper of the part changes depending on how far the quill is extended. Fixing likely requires a combination of shims and scraping. The book "Machine Tool Reconditioning by Connelly is a an excellent investment, kind of the bible on the subject.
The quill can be checked by turning a piece of scrap to the same diameter as the quill then moving the quill up to it. Sweep an indicator between the 2 parts on both the front and top. See how much locking the quill, locking the tail stock and extending the quill changes things.

I think it is a little less likely the headstock is the problem. Put a small chunk of metal in the chuck it and turn it into a center than turn your part between centers without removing the chuck center. The headstock can also be checked with a test bar that fits the spindle bore and scraped into alignment.

Look for an unworn original surface on the bed that can be used to check for V way wear. The top of the V or area between the Vs were likely all machined at the same time when the lathe was made.
 
I think it's pretty obvious that if you have to readjust for different areas of the the bed then the bedwear is the issue most likely.
Probably also there will be corresponding wear on the carriage as well.
Some folks like their Logans enough to get the bed and carriage reground but it's hard to justify the cost these days
Worn lathes can still turn out good parts- most machinists can compensate for wear in the machine (I do often) when using.
But you can't expect perfection on something with this many miles
 
I agree test bars are your friend. Put one in the tailstock to check if the tailstock is at the right height but also parallel to the bed in both horizontal and vertical planes. On one of my lathes it is off and the taper of the part changes depending on how far the quill is extended. Fixing likely requires a combination of shims and scraping. The book "Machine Tool Reconditioning by Connelly is a an excellent investment, kind of the bible on the subject.
The quill can be checked by turning a piece of scrap to the same diameter as the quill then moving the quill up to it. Sweep an indicator between the 2 parts on both the front and top. See how much locking the quill, locking the tail stock and extending the quill changes things.

I think it is a little less likely the headstock is the problem. Put a small chunk of metal in the chuck it and turn it into a center than turn your part between centers without removing the chuck center. The headstock can also be checked with a test bar that fits the spindle bore and scraped into alignment.

Look for an unworn original surface on the bed that can be used to check for V way wear. The top of the V or area between the Vs were likely all machined at the same time when the lathe was made.
I’m going to try with pics to show what going on.
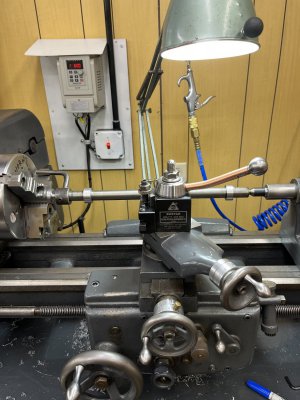
First pic. I can turn between centers and get straight cut by adjusting the tailstock- no problem.
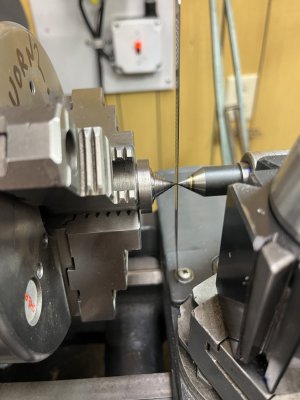
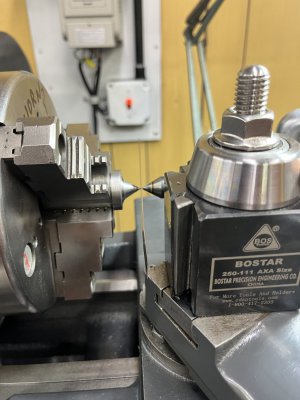
Second and third pic just shows visually the center alignment using a ruler.
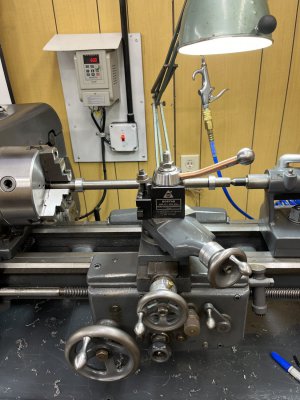
Fourth pic. Shows the same test bar now held directly in the chuck. Same dead center in tailstock. Quill is in the same extended position as before. But the tailstock has been move towards the chuck about 7”, fifth pic. . Now it cut a taper of .0025 big at chuck end.
It’s a trusted chuck from a previous lathe. I’ve tried different dead centers-same results. The center hole in the test bar has been drilled as carefully as I can with a 60 degree center drill ( yeah, I once also found a non 60 degree center drill mixed in with my drills and that was a nightmare).
So I’m puzzled and not sure what to do next.
 

Attachments

  • IMG_6005.jpeg
    IMG_6005.jpeg
    277.8 KB · Views: 17
  • IMG_6008.jpeg
    IMG_6008.jpeg
    196.2 KB · Views: 16
  • IMG_6007.jpeg
    IMG_6007.jpeg
    218.6 KB · Views: 15
  • IMG_6009.jpeg
    IMG_6009.jpeg
    280.8 KB · Views: 14
  • IMG_6010.jpeg
    IMG_6010.jpeg
    318.7 KB · Views: 18
When checking tailstock position, make sure you check it not only for horizontal alignment, but for vertical alignment as well. I had to shim mine to get it to proper height.
 
I had exactly the same problem on my Logan 9", except that with no leveling screws you are left with bolting it down, checking it, unbolting it and adding shims, and repeat until you go nuts. I could never seem to get the taper out that way. And there is no visible wear in my ways either.

Here's what worked for me. I put the level back in its box. I put a test bar in the headstock with no tailstock support, and twisted the bed until an indicator attached to the carriage with a wide flat face ran within .001" over the length of the the test bar.
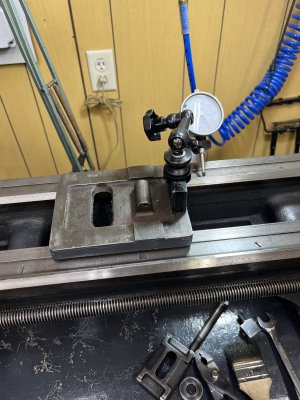
So I just checked for bed wear and found next to none. 7 tenths at most, right were you’d expect it. I also put the level on the saddle and moved it along the bed. Bubble hardly moved. I will note that the bubble was in a different location than when it was sitting on the v tops. So the plane of the bed and the saddle aren’t the same. Not sure if this matters?
In any advent little bed wear is good, but what then is making such a big .0025 error when the tailstock moves in such a short distance. Am I right in thinking that such little bed wear could cause such a big error?
I’m considering your solution but wanted to ask a question first. Have you noticed any difference in your accuracy with different lengths of work? I’m wondering if I get it set to cut straight at that one point that is the length of the unsupported test piece if it will cut straight with a longer piece?
In the meantime I’m still wanting to find the cause of this issue.
 

Attachments

  • IMG_6011.jpeg
    IMG_6011.jpeg
    316 KB · Views: 8
  • IMG_6012.jpeg
    IMG_6012.jpeg
    267.8 KB · Views: 7
Back
Top