Hi gubni,
Welcome to the group!
First some terms:
By "tram the head" we mean get the spindle set accurately to 90 degrees to the table both left-right(x-axis), and front-back (the y-axis).
Some mills allow adjustment in various directions to allow special cutting set-ups. "tilt" and "nod" are commonly used terms.
On yours it doesn't look like you have these advanced adjustments. Don't worry, you can still do many of the same advanced operations, you just need to be more creative in your work holding, maybe using sine-plates, etc. But that advanced stuff can wait.
However, you still need to "tram the head".
By "sweep" we mean to place a sensitive measuring device in the spindle (and with the mill turned off!), place the indicator against the table and move the table to look at how the indicator reading changes. You want to place the indicator against a smooth flat surface, so you are not just measuring the table dings and holes (yikes!) left by the previous users.
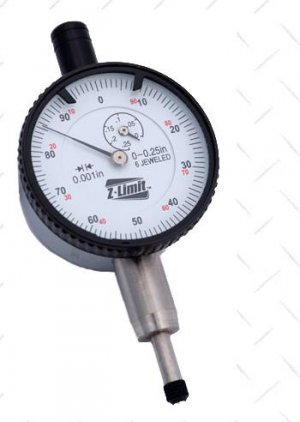
The measuring device can be a "dial indicator" like this:

from here:
http://littlemachineshop.com/products/product_view.php?ProductID=4285&category=
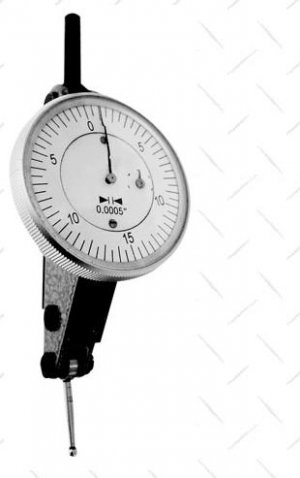
or a "dial test indicator" like this:

from here:
http://littlemachineshop.com/products/product_view.php?ProductID=3709&category=
Note the difference between those two.
On the dial indicator the bottom plunger moves up/down to take a reading.
With the dial test indicator the lever-arm on the bottom moves back and forth, but you can change the angle that it covers.
Ideally, you want zero difference while moving the table, realistically, you need to determine what's required by the job and what's possible with the equipment.
-for x-axis you can put the indicator on the top of the table between the t-slots if the table is not too banged up
-for the y-axis you can still run the indicator on top the table, you just need to lift it over the t-slot gaps.
First get the table trammed in, and then introduce the vise.
For your machine I believe tramming requires you to install/adjust shims under where the vertical column bolts to the base.
I know it may sound daunting, but with some thought and effort I am sure you can get it.
I know there is a thread here about tramming a machine like yours.....though it may take me a while to find it.
When(if?) I do , I will post a link here.
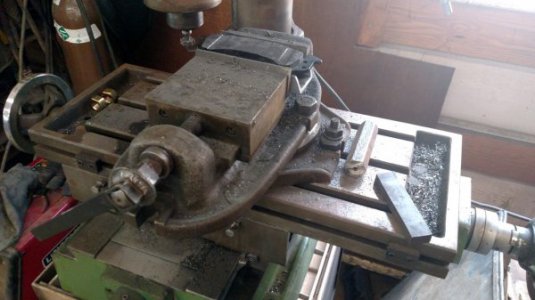
Once the head is trammed to the table, then get the vise trammed in too. Bolt the vise down loosely to the table, run the indicators along the fixed jaw of the vise, and adjust it with little taps from your hand or a mallet. When it's right, tighten it down.
50 thou is significant....it should not be this far out. There is a problem that needs to be corrected.
However, I would not shoot for +/-0.0005 either; (that's 5 tenths of a thou.!) that would just drive you crazy.
For many automotive applications I have found 5 thou (0.005 ") to be plenty accurate.
Other thoughts:
Could there be some chips under one end of your work?
Could there be some chips under one end of your vise?
Good luck!
Please post back with any questions or progress.
-brino

![IMG_20160716_145518341[1].jpg IMG_20160716_145518341[1].jpg](https://www.hobby-machinist.com/data/attachments/89/89816-7fd3d9eef931e71e9f4b7e8961541b95.jpg)
