LED spindle light

WobblyHand

H-M Supporter - Diamond Member
H-M Lifetime Diamond Member
Joined
Dec 18, 2019
Messages
7,321
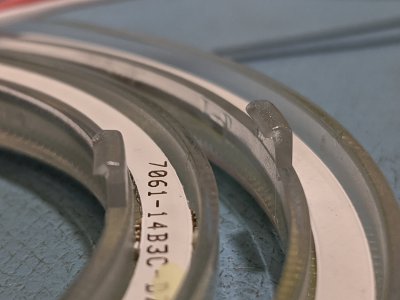
On the HSS tool grinding thread, I posted about making a tool that could cut a small retaining groove to hold down some LED rings I picked up on AliExpress. I am in need of better lighting for my drill press. I ground two tools to make this, a parting like tool and a grooving tool.
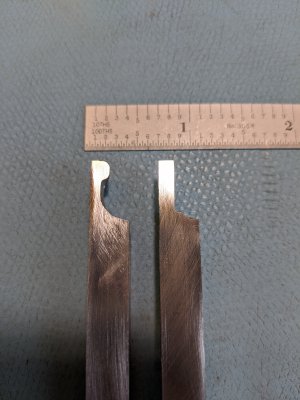
IMG_20200413_132211_topview.jpgIMG_20200412_180341.jpgIMG_20200412_180420.jpg
As I'm about to cut metal, I thought I'd better make a better drawing of what I was going to do. Looking at it, some of the dimensions make me uncomfortable. To cut to the quick, I've got 0.050" from the groove to the bore. (Assuming I can hold dimensions to the drawing.) Is this a reasonable amount of material? Material is 3.75" diameter 6061, 1/2" thick. I'll reduce the thickness to reduce the weight. I was hoping to epoxy magnets to the back after counterboring.

I just have the top view of the drawing. (Haven't sat down to draw the side view.) The dotted lines represent the groove that is subsurface. I haven't put in the locations for the magnets. Is 50 thousandths enough? It's not holding anything but the weight of the plastic LED rings. Thought I'd ask. I don't have any other stock in that large a diameter to try, so it would be nice to get it right the first time.
 

Attachments

  • ledspindlering.pdf
    178 KB · Views: 34
  • ledspindlering.dxf
    30.5 KB · Views: 14
.05" wall thickness will be plenty for your application.
 
On the HSS tool grinding thread, I posted about making a tool that could cut a small retaining groove to hold down some LED rings I picked up on AliExpress. I am in need of better lighting for my drill press. I ground two tools to make this, a parting like tool and a grooving tool.
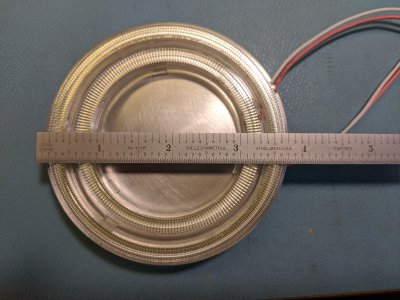
View attachment 321407View attachment 321410View attachment 321411
As I'm about to cut metal, I thought I'd better make a better drawing of what I was going to do. Looking at it, some of the dimensions make me uncomfortable. To cut to the quick, I've got 0.050" from the groove to the bore. (Assuming I can hold dimensions to the drawing.) Is this a reasonable amount of material? Material is 3.75" diameter 6061, 1/2" thick. I'll reduce the thickness to reduce the weight. I was hoping to epoxy magnets to the back after counterboring.

I just have the top view of the drawing. (Haven't sat down to draw the side view.) The dotted lines represent the groove that is subsurface. I haven't put in the locations for the magnets. Is 50 thousandths enough? It's not holding anything but the weight of the plastic LED rings. Thought I'd ask. I don't have any other stock in that large a diameter to try, so it would be nice to get it right the first time.
Would you mind posting the ring light description for us. I am considering doing the same on my knee mill.
 
The AliExpress link is: LED Ring Lights
Specifications:
- Item Type: Angel eyes-style headlight rings
- Light Source: LED- Voltage: 9V~12V
Features:- 100% Waterproof
- Ultra-bright COB ring light
- Made from durable materials
Available in 60, 70, 80, 90, 100, 110, 120 mm OD

I power them with a 12V 3A LED power supply. I'm planning to use 2 rings, one nested inside the other. If I remember, together the current consumption was a little less than 700mA. When looking at them, they are quite bright. Kind of hurt your eyes bright. I'm sure when mounted on a spindle I'll want even more light. However, I also have a magnetic LED task light as well. The rings will fill in shadows, it's a dark corner of the shop.
 
Thank you very much. Going to check my setup when I get to my shop and see how instalation could be done.
 
Uggh. Carefully set things up and proceeded to put slot in the wrong place.:frown 2: Oops. I've got the other side, maybe I can flip around the piece.
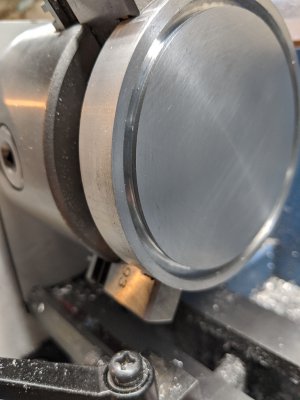
The parting tool stalled the lathe once, I guess I was excited it was cutting well and pushed it. Fortunately, no fuses blown. Might as well practice with the slotting tool, while I'm here. This is what I have so far. I'm amazed there is an undercut.
IMG_20200418_203121.jpg
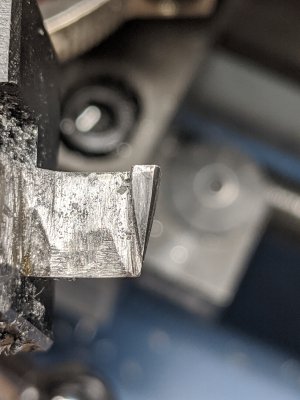
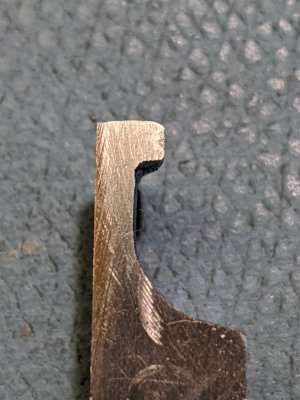
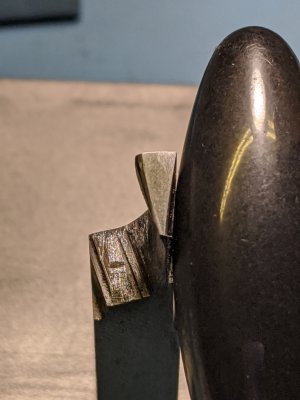
The slotting tool had a lot of trouble, it didn't cut that well. The tool was more rubbing than cutting. Unlike the parting tool which was making decent chips, the slotting tool was making anemic little dust like cuts. It did cut better when I added oil, but only for a short while. So I removed the tool holder and took a picture of the cutting edge. That's not good.
IMG_20200418_203435.jpgIMG_20200418_210229.jpgIMG_20200418_211058.jpg
That bright flat at the top of the triangle shouldn't be there (left photo). Guess I was rushing the honing. Time to stop and grind that out. Looks like that is where the rubbing is. The last time I put oil on the workpiece, there was like a puff of smoke. When I stopped the lathe, I made the mistake of touching the workpiece. It was really hot! So much so that the chuck was hot too. Yeah, need to sharpen the bit. Be back for round two... (The egg shaped object on the right photo is a magnet. I put it there to fool the phones autofocus.)
 
New tool works! Machined the undercut slots, bored out the hole, and chamfered the back of the bore hole. Fits the spindle, and more importantly, the LED rings! Pics to follow. Just not sure when the website is going down.
 
Back
Top