I've used HSS thousands of times on my lathes through the years and I've achieved "good enough" finishes and acceptable accuracy. I've never been wowed by the finishes but good enough is good enough.
Today I spent quality time with the Mulliner Enlund lathe. It's also a good time to practice with the Armstrong type tool holders in a lantern tool post. I've never ground tools for use in one of these tool.posts and holders and it is readily apparent I've got plenty to learn.
This was the tool that did the best today.

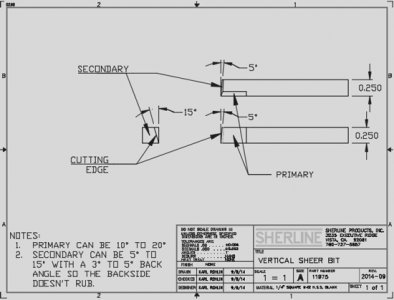
The lead edge took advantage of the tool holder angle, with back rake toward the tailstock. I ground enough clearance to work with the holder and not rub. I ground enough clearance that the tool can be used to turn and face. That turned out to be important later.
This is the beautiful old girl making chips.
Most of my test cuts showed some tearing in the cuts. I pretty much ran 340 rpm (top speed until tomorrow), at 0.003" to 0.005" feed with the point leading just a bit. My brain is thinking like a CCMT insert. 0.005" ipr was a bit nicer than 0.003" every time. Depths of cut ranged from 0.005" per side up to 0.020" per side.
This is an example of the slightly torn finish.

I tried a bunch of stuff including honing my cutting edges to a really high polish.
It wasn't until I set the leading edge more perpendicular to the direction of travel did I finally see a change.
This is my last pass tonight after changing the angle of the cutter. 0.005" and 0.005" per side.

It still isn't as smooth as I'd like so I'll increase the radius a bit more tomorrow and try again. I might grind another tool with a lead edge angle to give some more surface area and back pressure.
This piece is within 0.0001" at both ends but within 0.0003" over all. For a beautiful old machine of 106 years old I'm ecstatic.
Today I spent quality time with the Mulliner Enlund lathe. It's also a good time to practice with the Armstrong type tool holders in a lantern tool post. I've never ground tools for use in one of these tool.posts and holders and it is readily apparent I've got plenty to learn.
This was the tool that did the best today.

The lead edge took advantage of the tool holder angle, with back rake toward the tailstock. I ground enough clearance to work with the holder and not rub. I ground enough clearance that the tool can be used to turn and face. That turned out to be important later.
This is the beautiful old girl making chips.
Most of my test cuts showed some tearing in the cuts. I pretty much ran 340 rpm (top speed until tomorrow), at 0.003" to 0.005" feed with the point leading just a bit. My brain is thinking like a CCMT insert. 0.005" ipr was a bit nicer than 0.003" every time. Depths of cut ranged from 0.005" per side up to 0.020" per side.
This is an example of the slightly torn finish.

I tried a bunch of stuff including honing my cutting edges to a really high polish.
It wasn't until I set the leading edge more perpendicular to the direction of travel did I finally see a change.
This is my last pass tonight after changing the angle of the cutter. 0.005" and 0.005" per side.

It still isn't as smooth as I'd like so I'll increase the radius a bit more tomorrow and try again. I might grind another tool with a lead edge angle to give some more surface area and back pressure.
This piece is within 0.0001" at both ends but within 0.0003" over all. For a beautiful old machine of 106 years old I'm ecstatic.

