Just some minor surface rust...

francist

Active User
H-M Supporter Gold Member
Joined
Sep 5, 2013
Messages
3,793
Well, perhaps more than just a little!

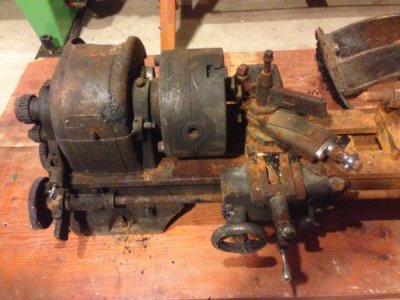
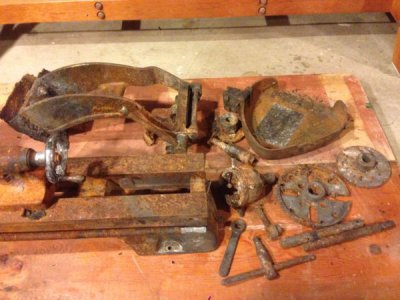
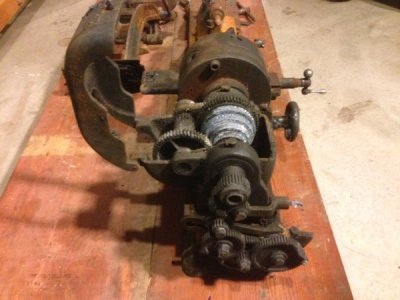
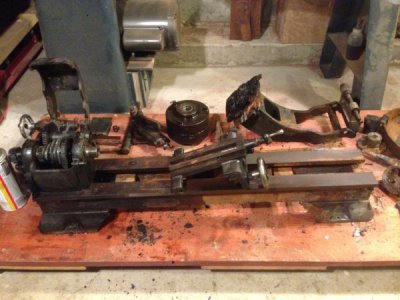
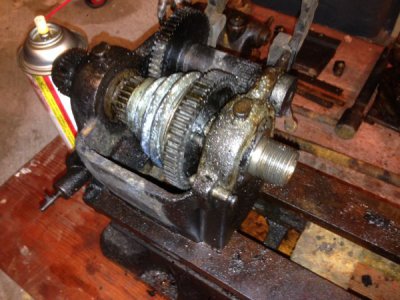
Buddy delivered this to me this morning. It's what remains of (or is the remains of, depending on how you see it) a little 6" Craftsman lathe. It saw the inside of a house fire, then sat for a year in the burned-out shell while insurance was being sorted out. It's pretty rough.

My first thought was to maybe get it going again, but that was before I'd seen it up close. Supposedly it wasn't in the area of the house that got completely burned, but there's still pretty convincing evidence that it saw some heat. Some of the Zamak parts have started to melt a bit, and there's a fair bit of scorching. But amazingly, the back gears still turn freely! I guess they were under the hood and remained somewhat protected.

Anyhow, even though it feels a bit creepy to have the thing in the shop, I'm going to tear it down for salvageable parts if any exist. I've got a running Atlas 618 as well as an new-old Atlas mill, both of which have parts crossover. I already see a countershaft assembly that isn't too far gone and there might be others. So while I don't really need another project just now, it looks like I've got one. Time to start a fresh tank of molasses....

Thanks for looking, and if anything really nifty shows up along the way I'll post the findings here.

-frank
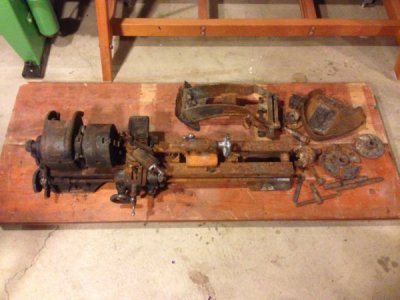
image.jpeg image.jpeg image.jpeg image.jpeg
 
That thing looks just about small enough to fit in a plastic tub of some kind. Think it'd be fun to drown it one of those rust removing formulas for a while just as it is and see what u get. Not much to lo$e there, and u never know!?
 
Yeah, that's what the molasses will do. I've had good success with it in the past, although it is somewhat slow. Works best when it's warm, and it is summer here so I can soak outside. I do want to disassemble things first though as far as I can.

And on that note, here it is after about two hours of monkeying. Much to my surprise, a lot of things are freeing up pretty quick. Dead centre just popped right out of the tailstock quill, cross slide threaded off, but the most impressive was the chuck. Fortunately the lathe had already been in gear when the fire happened, so I just engaged the back gears and put both hands around the chuck body while uttering a "yeah right frank, like this will work" and it did! Stupid thing came right off as easy as anything. Note near perfect condition of spindle threads in the second photo. Crazy. Some days you just get lucky, I guess.

-frank

image.jpeg image.jpeg
 
Get some Evapo-Rust. Not cheap but it works very well and will remove rust without eating into the metal. Try and use with a container/bag and a lid to prevent the water evaporating. A few hours or overnight and the rust should be removed. Any dirt or grime needs to be cleaned off so the product can get to the rust.

The parts need to be completely submerged or you will get a "tide" mark which is very difficult to remove.
 
Hope you can save her, Frank. If the bed is not warped from the heat you just might bring her back to life. Some new guy somewhere could use a start, I'm sure.
 
Here's my take on that lathe.
It's good for parts. Based on the fact that the gears started to melt, indicates to me that it is not worth restoring. I think you will get too far down and find it just won't track right. it's warped, it's got other issues.
I would part it out and at least someone can make a lathe that might need the good remaining parts .
But that's just my opinion.
 
  • Like
Reactions: bfd
If all of the parts can be removed then tank it.

Get a plastic trash can and a can of drain cleaner (lye) along with a battery charger and some rebar.

Locate a roof rafter or other hard point above and place the lathe bed on a rope and suspend it lengthwise in the trash can.

Place the rebar along the sides inside and hold in place with spring clamps or whatever is handy.

Battery charger positive goes on the rebar and negative on the rusty part and wire wheel a spot to make good connection.

Connect rebar parts all together.

Fill with water about 1/2 way then pour in about 1/3 can of lye then fill to where rusty part covered with a couple inches.water.

Turn charger on and note the current meter.

Should see bubbles from rusty part.

The rebar will collect nasty crud which we call "corn dogs" and amp meter will drop.

Carefully without bumping pull them out and smack them inside your trash can to clean them off.

The above will get the rust and anything organic from the bed.

Do not place anything not iron or steel in it.

With all the rust go now evaluate condition..

If the ways look good and not trashed it could be fixed.

Assemble before much work and try it out.

<REDACTED> but they are still handy for lots of tasks due to small size more than enough lathe for certain things so it can be fixed up and used as a "do-fer" do for now...You can learn things while hunting for next one as we all do...we started with one of those and always made money on them.


Sent from my SAMSUNG-SGH-I337Z using Tapatalk
 
Last edited by a moderator:
Well I've been playing around with this little Craftsman lathe again. I managed to get all the pieces off and broken down months ago already, but then I set it aside for the proverbial rainy day. Enter one rainy day, or several rainy days actually, and I figured I'd break it out again and see if I could make some progress. And while it's not my intention to provide a testimonial for Evapo-Rust (I have no affiliation whatsoever) I have to say I'm pretty impressed.

The rust on this little guy was not years and years worth, but it was enough be significant. The lathe survived the house fire, then sat in the burned out building for more than a year while the insurance claim was being processed. It's really too bad, because I think it was a virtually unused machine prior to that. However, I digress.

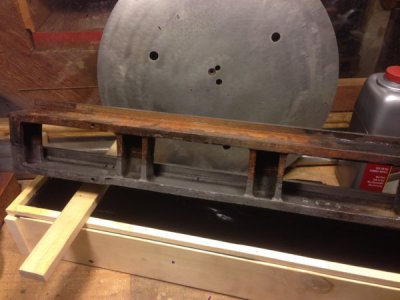
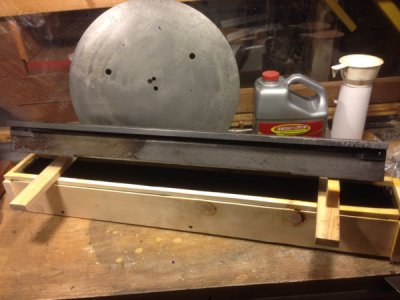
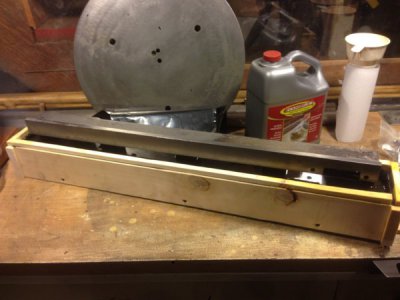
It's too cold for molasses treatment right now and I didn't want to fiddle with electrolysis, so I decided to give the Evapo-Rust a try. I knocked together a quick tray out of some pine and lined it with 6-mil poly. I opted to do the bed in two stages so as to not have to have to buy so much product -- one 4 litre jug was enough to fill the tray to just shy of half the bed width. I'm not worried about a tide mark at the centre, it's a rough casting and will also be painted afterwards so who cares.

Here's the bed after one 24-hour soak. I didn't make any attempts to clean the piece first nor did I degrease it. Just put it in there, walked away, and took it out a day later. I did scrub it though with a small wire scratch brush as well as an old paintbrush, but not super-aggressively. I was pleasantly surprised at how easily all the rust just rinsed right off.

image.jpeg

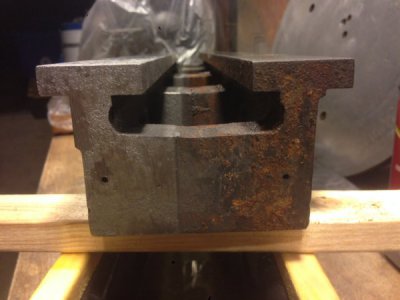
I had earlier determined that the fire advanced from the tailstock end and didn't completely overtake the machine. In this photo the headstock end is to the left, tailstock end to the right. The paint survived at the one end but not the other, and the Evapo-Rust did no damage at all to it. I was fortunate as well in that I was able to remove the rack from the bed casting -- makes cleaning a lot easier.

image.jpeg

View of the tailstock end looking towards the headstock end. There's some pitting of the ways at this end, but again it's fortunate to be the tailstock end where the carriage would not travel. The two small holes are all that's left of the badge (actually I lie, I think I may have retrieved one of the drive screws) that succumbed to the heat.

image.jpeg

And back into the bath again for the second side. As I mentioned earlier, if you're reasonably conservative with your tray building you can get away with one 4-litre jug of solution. I already did the lead screw the slow way (by hand with wire brush!) but I still have the rack as well as most of the other parts to do once I no longer need the long skinny tray. I'm in no rush though.

image.jpeg

Thanks for looking.

-frank
 
Back
Top