- Joined
- Feb 17, 2013
- Messages
- 4,417
A couple weeks ago I was at a meeting of Valley Metal, the Phoenix area machinists' club. I'd mentioned that I was on the way to buy a Pexto stomp shear from a Craigslist seller, but I was concerned about all the floor space it would take up. The president of the club, Marty Escarcega, suggested that I buy a plate shear instead. The seller turned out to be busy on a job, so we didn't get together that day. This gave me time to look at plate shears. I decided to buy one of them instead of the stomp shear, and phoned the seller to cancel. Bought a Shop Fox 12" unit (model M1041, $165) from Amazon.
I got the shear in a couple days (Prime!) and used it to complete my current project. After using it, I decided it needed a couple of improvements. First off, there's a kinda funky "foot" about 2 1/2" diameter, that's supposedly meant to secure the metal stock and prevent it from shifting during a cut.
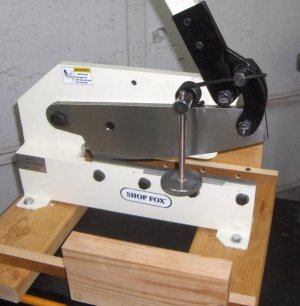
The bottom of the foot was slick chrome plating - very little friction or holding power! In an attempt to increase holding power I chucked it up in the lathe and cut some grooves, then lightly sand blasted the bottom.
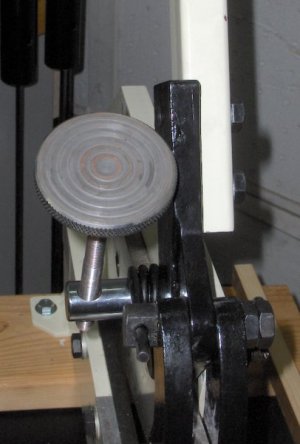
No joy. The bottom wasn't very square with the stem, it was hard to adjust, and there was no real back-stop on the shear.
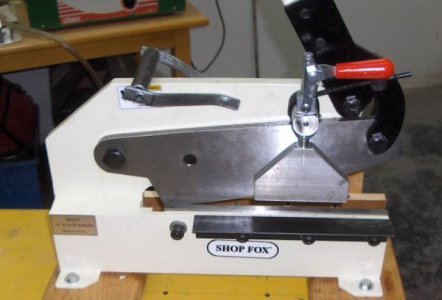
Plan B was to make a new hold-down, based on a De-Sta-Co #604 clamp (Amazon, $18.60). This clamp mounts into a thru hole with 3/4-12 threads. The original mounting post for the foot was a tad less than 1" diameter, so not suitable for 3/4" thread. Turned a new mounting post from some 1 1/4" diameter stock. Milled a flat on the large end, then drilled and tapped to suit. The new foot is a 3/4" wide by 4 1/2" long chunk aluminum. It's drilled 1/2" most of the way through for a 1/2" rod, which is held in place and with a countersunk screw at the bottom. The rod, topped with a 5/16-18 stud and wing nut, can rotate inside the foot. The stud threads into the end of the DeStaCo. Rotating the wing nut provides height adjustment.
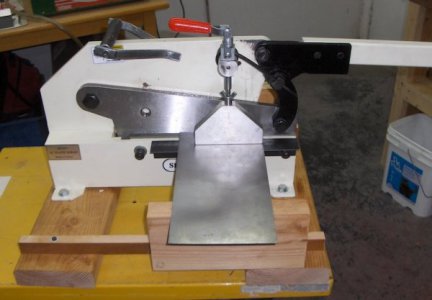
I then mounted a length of angle iron to the lower shear bolts, to give the foot something to press against. I also bolted the shear to a pair of 2x6s and added material supports on both sides. Finally, I added a simple handle at the top of the shear to make it easier to lift from the floor (under a table, where it's stored) to the work bench.
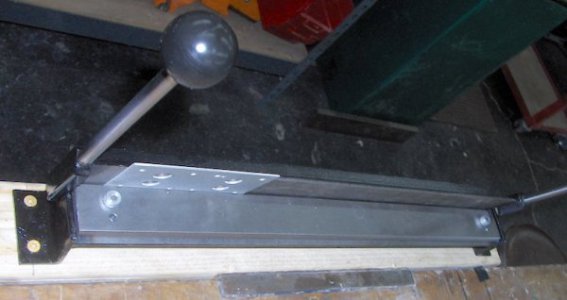
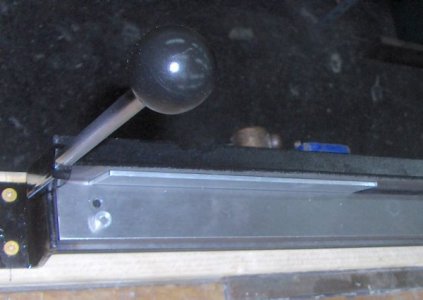
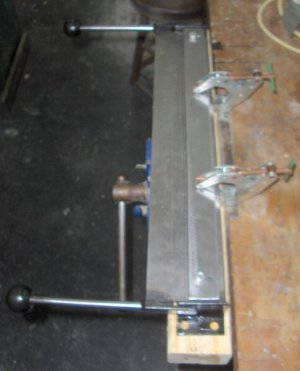
PS - After shearing sheet metal to size, the next step is naturally to fold it. Again, trying to save floor space, I opted for a cheap 18" Harbor Freight bending brake (SKU 39103, $45 before discount). It worked adequately. My main issue was that, even with good clamps securing the hold-down bar, the bar would shift during a bend. I took care of that problem as follows - Raised the folding bar all the way, placed a chunk of 1/16" aluminum between folding bar and hold-down bar, secured the hold-down bar, and match drilled through the hold-down and base at both ends for a couple of pins. I repeated the process with a piece of 1/8" aluminum and a new set of holes. Now I can positively position the hold-down bar. Note in the last photo that the brake is screwed down to a couple of 2x4s, which I can clamp in my woodworking vise. I store the brake on the shelf below when not in use.
I got the shear in a couple days (Prime!) and used it to complete my current project. After using it, I decided it needed a couple of improvements. First off, there's a kinda funky "foot" about 2 1/2" diameter, that's supposedly meant to secure the metal stock and prevent it from shifting during a cut.

The bottom of the foot was slick chrome plating - very little friction or holding power! In an attempt to increase holding power I chucked it up in the lathe and cut some grooves, then lightly sand blasted the bottom.

No joy. The bottom wasn't very square with the stem, it was hard to adjust, and there was no real back-stop on the shear.
Plan B was to make a new hold-down, based on a De-Sta-Co #604 clamp (Amazon, $18.60). This clamp mounts into a thru hole with 3/4-12 threads. The original mounting post for the foot was a tad less than 1" diameter, so not suitable for 3/4" thread. Turned a new mounting post from some 1 1/4" diameter stock. Milled a flat on the large end, then drilled and tapped to suit. The new foot is a 3/4" wide by 4 1/2" long chunk aluminum. It's drilled 1/2" most of the way through for a 1/2" rod, which is held in place and with a countersunk screw at the bottom. The rod, topped with a 5/16-18 stud and wing nut, can rotate inside the foot. The stud threads into the end of the DeStaCo. Rotating the wing nut provides height adjustment.
I then mounted a length of angle iron to the lower shear bolts, to give the foot something to press against. I also bolted the shear to a pair of 2x6s and added material supports on both sides. Finally, I added a simple handle at the top of the shear to make it easier to lift from the floor (under a table, where it's stored) to the work bench.


PS - After shearing sheet metal to size, the next step is naturally to fold it. Again, trying to save floor space, I opted for a cheap 18" Harbor Freight bending brake (SKU 39103, $45 before discount). It worked adequately. My main issue was that, even with good clamps securing the hold-down bar, the bar would shift during a bend. I took care of that problem as follows - Raised the folding bar all the way, placed a chunk of 1/16" aluminum between folding bar and hold-down bar, secured the hold-down bar, and match drilled through the hold-down and base at both ends for a couple of pins. I repeated the process with a piece of 1/8" aluminum and a new set of holes. Now I can positively position the hold-down bar. Note in the last photo that the brake is screwed down to a couple of 2x4s, which I can clamp in my woodworking vise. I store the brake on the shelf below when not in use.


