HSS Lathe Tools chipping, what might cause this?

It looks like the platen location in relation to the belt is adjustable. I would just glue the glass to the steel and move the platen back a little to compensate for the thickness. I used JB Weld to glue mine on, and it isn't going anywhere.
How do you deduce that? Where's the adjustment? The motor location and the drive pulley are fixed relative to the platen.

Ah, yes, the top pulley can be adjusted a little away from the platen and also go up and down.

When I have it all apart, I'll check to see if I can get away with a simple JB Weld job. And a stop for the glass. Otherwise I have to mill it. Might mill it flat anyways, that is, if I can figure out where there is a true reference surface. (Flat or perpendicular to what?)
 
Does anybody have a good source for pyroceram?
 
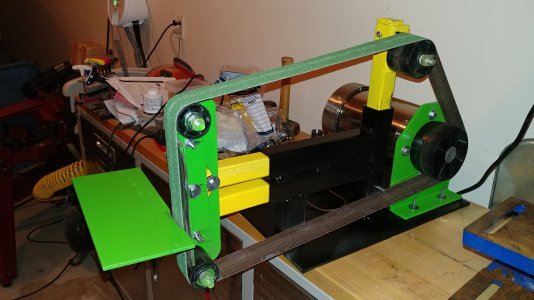
It looked like it might be adjusted by loosening some screws like #59 in the image. Hard to be sure from the photo though. My homemade one has slots you can use to slide the platen. That part on mine is a steel angle, commercial setups may be different.

20180114_190414.jpg
 
@ttabbal Nice grinder. I need to make one. Maybe this winter... First, will try to patch what I have.

#59 is the screw to hold the table to the platen. The drive wheel #53 is fixed relative to the bottom of the platen. Tomorrow will look at all the pieces and figure out some sort of idea. No clue right now.
 
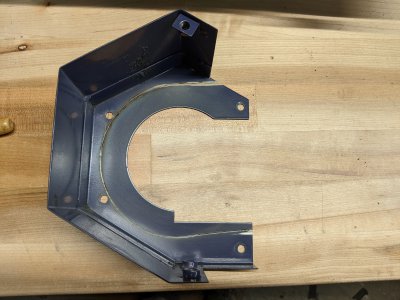
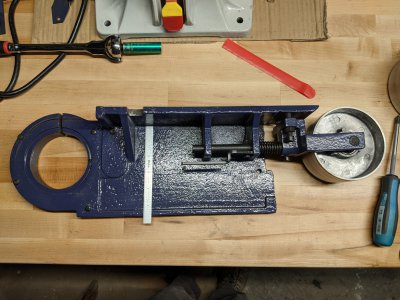
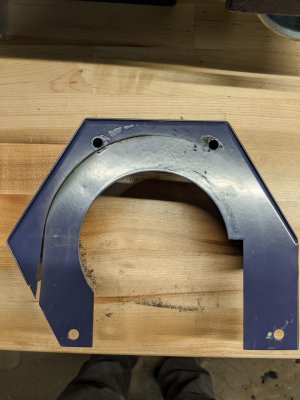
Well, uncovered a couple of things. There's not much of a curve to these rollers. Both are not flat, but the curve is very minimal, say 0.5mm. And apparently this set up wasn't adjusted to track well, as the belt sort of sat against the "L" and slowly ground it away. The belt ground through some sheet metal, and a some of the "L" behind it.
PXL_20201002_184801772.jpgPXL_20201002_184732854.jpg
PXL_20201002_183634013.jpgPXL_20201002_183657906.jpg
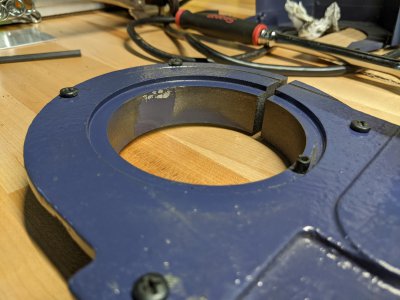
You can see the cut in the casting. It actually cut two screw heads as well as making a semi circle cut.

Here's the platen wear. It's uneven and varies between 5-20 thousandths.
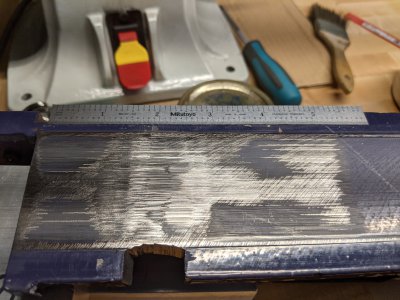
PXL_20201002_184328053.jpg
Unfortunately, I think I have to mill this flat(ter). With the 7/32" platen, the belt won't be in a good place. When I put everything in place, along with the belt guard and the drive wheel, the geometry didn't look good. I am going to try to take off about 0.100" off the surface. That way the platen will only stick up 0.118" rather than 0.218. Probably make a pocket for the glass, with little cutouts for the corners. The pocket will act as a stop for the glass, should it come loose.

Since nothing on this piece is really flat, or for that matter smooth, I'm not going to bother getting 246 blocks. Have two 2x3x6 blocks of 6061 that can be used as spacers instead. The blocks were fly cut together to 'match' them and make them smooth and flat. I'll use the blocks to hold up the "L". Somehow I'll clamp the whole mess down and reference it to the table.

Here are the roller wheels.
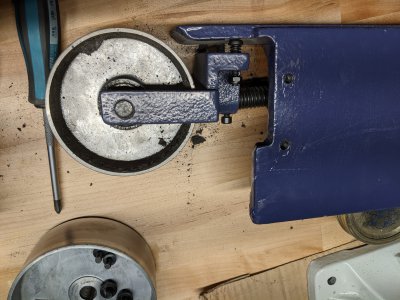
PXL_20201002_183918982.jpg
The top wheel has a rocking adjustment, to sort of track the belt. It also has a spring to maintain tension on the belt. The bottom drive wheel is 5" OD with a 16 mm keyed shaft. The top wheel has a bearing, but I haven't looked at it yet. Have to say, grinding dust is terribly messy, and just gets everywhere.
 
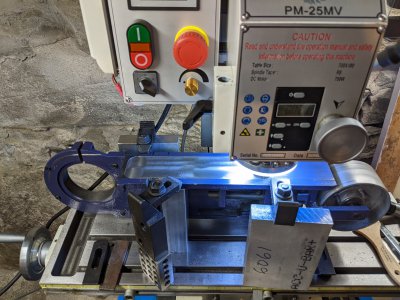
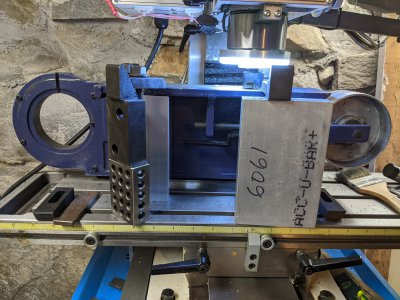
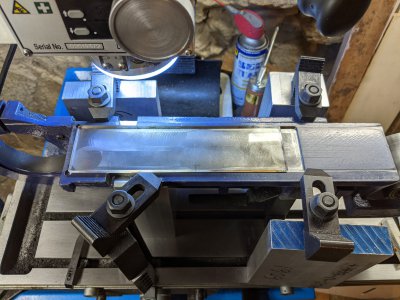
Had to make a Frankenstein set up but it's almost done. Used a combination of aluminum blocks, 123 blocks and normal tie downs. Used my longest studs for this. Lining it all up was pretty hard. At one time, nearly everything fell over. Was not happy about retrieving a 123 block up off the dusty concrete floor. Eventually stuff was nearly level and in sort of tram. Here is the set up.
PXL_20201003_170113836.jpg PXL_20201003_170133123.jpg
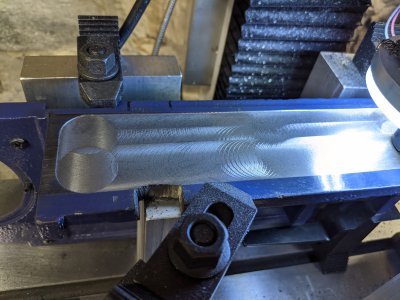
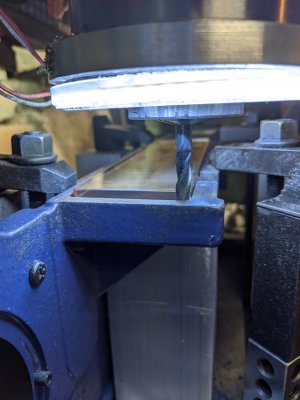
Used a little Sherline fly cutter to hog out most of the pocket. It took a while, mostly since I was afraid to load the machine and hold downs by taking too deep of a cut. After a few passes I had:
PXL_20201003_170216077.jpg
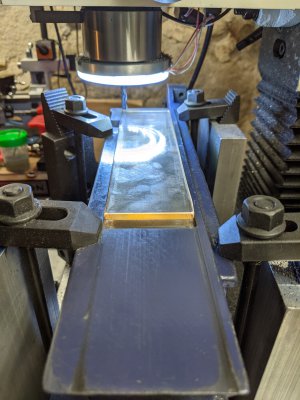
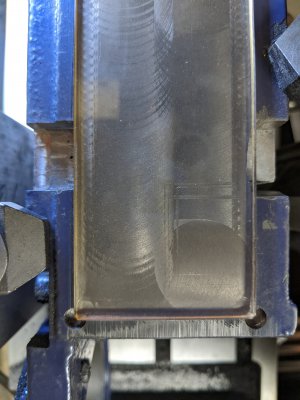
Then I took a 1/4" Niagara carbide tool to chase out the corners and slightly increase the size. It turns out the pyroceram was a little oversize at 2.05", not 2.00. That's why we test fit. Here is the pyroceram, now fitting in the slot. The slot is 0.100 deep, or about 1/2 the total thickness of the glass. I made the slot a little oversize in case the thermal expansion of the table or glass is a problem.
PXL_20201003_213214959.jpg PXL_20201003_213242808.jpg
Last photo is the lower part of the pocket. I stopped for a little bit to post, and to figure out how I was to machine out the corners. Had to clean up, just so I could draw a couple of sketches to convince myself where to make the clearance pockets. I figured the work has turned out pretty nice so far, so I'd stop and check what my next step would be - before I ruin the whole piece. It was slightly different than what I thought, so it was good to stop for that sanity check.

While it's still up on the table, will cut a relief on the other (left) side, so it's possible to grind left hand tools. At the moment, it's not possible to grind left hand HSS tools on this grinder, especially the top relief. This belt grinder most definitely was not designed to grind lathe tooling. Hopefully these modifications will make lathe tool grinding a little better.
 
Nice job! I think that will work nicely for you. I think it will help if you can get clearance for the top rake in there. That can be tricky if you don't have good clearance.
 
@ttabbal Thanks!

Put in the mouse ears to better register the glass in the bottom. (Round holes at the corners.) Then milled a notch for left hand tool grinding. Whether all this work will result in better lathe tool grinding, that we will find out after it's all together. I'm really pleased with having a mill. It made this kind of repair/modification possible. And it was an interesting puzzle to solve.
PXL_20201004_193230131.jpg
The right side notch was ground out using caveman methods, before I had a mill, you can see it is slightly undercut under the glass. (Using a 7 inch hand grinder in situ. That grinder was really heavy and gyroscopic. Amazed that it came out as well as it did as both the grinder and I really were out of control. :chemist:)

The left hand side was done with a mill. In this picture it looks kind of crude, but it's reasonably machined. (The phone has problems focusing at much less than 6 inches.) I can get nearly a 45 degree grind angle if needed from the face. That's more than enough.
PXL_20201004_193513395.jpg
The extended pocket really was a blunder, but hey, that happens. One can think of it as a feature, so the angle to apply leverage on the glass is a little less, should it have to be removed. Going to JB Weld it. Plan to clean everything up with acetone and maybe scuff the machined surface for a little better adhesion. (Kind of seems heretical to scuff it up after machining it flat!) Then a thin layer of epoxy in the cavity and place the glass. I've heard people use duct tape to hold the glass in place rather than clamping. Guess it reduces pressure points on the glass which reduces the stress on it. Will try the duct tape although I'd like something better.

Unless I can think of something in the next few minutes, I'm going to break down the set up. It was a first for me, never milled anything that didn't fit in a vise before. Learned a lot and will be able to do similar set ups better and faster the next time.
 
Back
Top