How Would You Center This Under The Spindle?

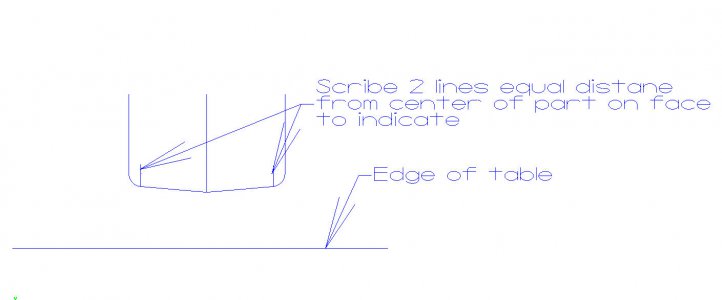
ok.....push the 2 pins down and hold those against the edge of the table. This allows you to slide the base along the table while pins stay against the side. This will allow you to indicate the side of the part parallel to the edge of the table. So pick the flattest or longest side to indicate. You should then be able to mill the top because know center and now have a side that is straight along the axis.
 
Dear All,

Success! And Failure!

Using the approach I wrote about above:

1) make a tight fitting plug with a concentric flange that just fits inside the recessed area. The flange will be about 1/8" thick. This is like the plug pictured above, but with a much shorter flange and without the long pin.
2) center drill a clearance a 10/32 SHCS hole in the plug ...

I was able to get everything square and centered relative to the upper bore. Yea!!!

Unfortunately, it became evident upon milling the journals that my bore was not centered along the crankshaft axis. Boo!

The casting that I received was not perfect, the two halves of the castings were shifted relative to each other. Somehow, in trying to correct for this, I ended up about .070 off center.

So, I ordered a new casting and will try again. Total cost of the mistake is a weeks worth of evenings and $22.

I also ordered some extended drill bits to make it easer to drill the crankshaft journal caps and base mounting holes.

If folks are interested, I may do a build log. Let me know.

Cheers,

Tom
 
It is always best to blue up the casting and lay out things before any machining. Also best to take your time and make sure you start off right. It is too easy to end up off somewhere without lay out everything first.
 
If folks are interested, I may do a build log. Let me know.

Always good to see a project coming together :)

Any chance of braze filling the casting to have a second shoot at it ?

Stuart
 
ok.....push the 2 pins down and hold those against the edge of the table. This allows you to slide the base along the table while pins stay against the side. This will allow you to indicate the side of the part parallel to the edge of the table. So pick the flattest or longest side to indicate. You should then be able to mill the top because know center and now have a side that is straight along the axis.
Thank you Sir !
 
Always try to help......I have used this method several times for 1 off parts.
 
For 1 off parts with draft angles I use this method and line up the indicator to scribe lines as best I can by eye.

indicate.jpg
 
It is nice to see you doing this one I'm still working on my #7. I wound up getting a new base cast for my #7. The fun part is now ensuring the wholes in the cylinders line up with the new cast when I drill it. Will have to work at it. I agree with the blue up and marking things up to start with. In fact I have been putting the blue down, then mark it real light, Then If I want to change I just put a little more blue then redo it. and measure and see if things line up until I get it right. Again nice to see you working on this one. How is it to do on the Sherline.
 
Back
Top