How To Measure The Diameter Of A Spindle Taper?

Beware on using that tapered plug method. You will without doubt have some sort of edge break on the ends you measure. The theory is sound, but what you would actually be needed to measure would be a projected dimension. If you have access to an optical comparator, you can get your tapered plug qualified and an actual measurement to target.

The ideal way to measure inside precision tapers for face dimensions is to verify the angle, then use 2 precision gage balls to arrive at a linear dimension to calculate from.

Or if your pockets are deep........get a nice CMM.
 
Yes Tony, I was hoping to hear from you. I think you are correct. So when I turn just a section of round stock in my chuck, very light cuts, .002" and then measure the diameter near the chuck and out at the end, about 7" away from the chuck. I am getting .004 taper, thinner at the opposite end from the chuck.

What should I be looking for?

Thanks

Joe
 
CMM, I would love to have a CMM, but unless I make one myself there is little chance I could afford one.

Joe
 
Well, 7" is a long way if the diameter is small. So in any case, if you are reading small at the tailstock end, the true spindle axis has some misalignment issue with respect to the ways. This could be many things. I don't remember what lathe you are working on, or how old it is. Way wear can cause it. Twist of the bed can cause it. More unlikely, but cutting edge can be a root cause.

What diameter is your test bar? How much is gripped in the chuck jaws?

On some lathes, the headstock swivels on a largish dowel pin, but I believe you said according to the manual, it is non-adjustable. I would guess then that the bottom of the headstock casting has mating vee and flat surfaces and sits directly on the ways of the bed. If this has been disassembled, and not reassembled properly, like clean, then it will throw alignment out.
 
Thanks Bob for the diagram, I went back and looked at the Victor chart (included above) Their 2.750 measurement is way back on the end of the spindle. The 2" measurement is further down the taper. So it may be near impossible to get a measurement and as you indicate it may be really hard to mic such a measurement.

Joe
 
Tony,

Lathe is 1954 Clausing 6316. I tried a .750 round stock of aluminum, 2" in the jaws. I know, how stupid of me :), I have a piece of 1.750 out in the car. I will cut a piece of that and try again. I sometimes get so anxious, to try things. I am going to have to stop that. I will re-test with the larger stock.

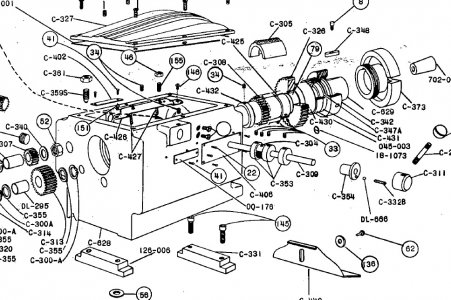
Clausing recommends in their manual not to remove the headstock. Yes it mounts directly to the bed with clamps. Image enclosed.

Thanks

Joe

Headstock.jpg
 
I'd prefer that you turn the length of the bar, then undercut the center section before turning a couple of "rings", without changing the cutting position. Use a sharp tool, and a light cut. Use power feed, and patiently wait while it cuts air in the undercut section so as not to disturb anything. If your "rings" are about 6" apart, that will be enough. All of this in a single chucking.
 
Thanks Tony, I will perform the undercut method you recommend.

I will post the results.

Thanks a lot

Joe
 
I like to add to what has already been said.
I have three lathes that have L-00, L-0, and L-1 spindle tapers. The spindle noses on all of them are all in good shape and accurate. Once in a while, when mounting a chuck, I will encounter some problems getting the chuck to mount correctly. Generally my problem is getting both the spindle taper clean and the chuck back plate taper clean. They both have to be absolutely clean! Runout of the chuck body has never been an issue with any of my chucks I use. But, I do have a heavily worn Buck Adjusta Tru chuck that the jaws are sprung from wear and abuse, not from me, but from previous owners of the lathe. That chuck if used will cut tapers on any piece of barstock put in it. I replaced it with a newer set tru chuck that is in much better shape. When making up the nut onto the chuck adapter, it should make up solid, once hand tight is encountered and the proper wrench is used to tighten up the nut. If it is "spongy" while making up with the proper wrench, there is trash caught up in the tapers. Back it off, clean again, and try again. Wipe the spindle taper and chuck taper clean with your fingers. Don't rely on compressed air or solvents to remove fines left behind from cleaning. Only your bare clean fingers will you know if it was good and clean.

I very highly doubt that you are having problems with the taper on the spindle or the nut. Especially if they were fine with any other chucks mounted to the spindle before buying a new chuck. You have to remember the spindle and taper are harden and ground. They were checked to a standard before they left the factory, to guarantee the spindle was correct. The spindle nut went through the same process and it is harden, too! The spindle and nut hardly ever see any wear. What I have seen in my past is signs of not properly cleaning the tapers before installing chucks and allowing shavings, crud, etc. get between the tapers and eventually damaging the tapers. You see this much worse on the taper of the chuck adapters than the spindles. Got to remember, the chuck adapters are "soft" in hardness compared to the spindle tapers. This is done for a reason.

I must ask, can you "eye ball" the chuck body and see any wobble? If so, set up an dial indicator and check how much it is. The chuck body should be running within about .0015" or less. IF more than that, pull the chuck from the chuck adapter. Check the runout of the chuck adapter. You may need to take a facing cut to get it running true. But even with a little runout in the chuck or the adapter, this would not show up in the taper that you are indicating is happening when turning the od on a piece of bar stock.

I think you need to leave the chuck and the spindle alone!

Make the test bar that Tony mentioned.

I believe what you will find is your lathe has lots of bed wear that is causing it to cut a tapered OD work piece.

Report back and let us know what you find out.
 
Thanks Ken, After I perform the turning test that Tony indicated I will run a dial indicator along the ways and check.
I will report back with findings.

Joe
 
Back
Top