How to make a slot inside a cylinder ?

Several approaches to work around this.
Drilling, or plunging with an endmill into full material (not on an edge) balances the sideways load on the endmill so it is purely twisting. Actually any plunge that is symmetric around the center of the endmill will be pure torque. Taking smaller cut steps would reduce the sideways force. Another way to do this is to use a 2 mm endmill and cut the right (clockwise) edge in steps, then shift over counterclockwise by .5 mm and cut again, being careful to cut no deeper than the first pass.
That's what the sacraficial slugs were for.

.
 
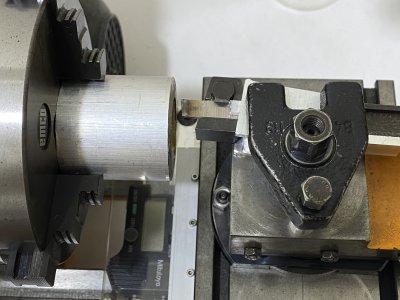
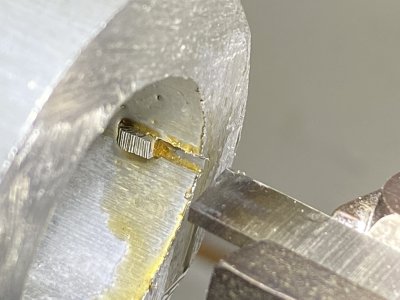
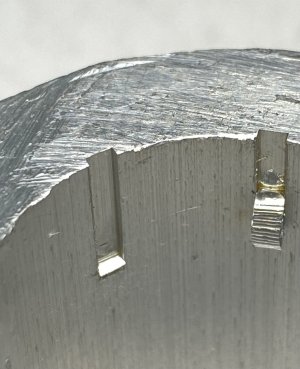
OK. I really like the idea of using the lathe as a shaper which is something I have not heard about before. I just tried using my parting tool on a piece of 6061 aluminium tube. It seems to work quite well ! Now the question is : how do I fix the angular position of the chuck to the desired values ? I need 0, 90, 180 and 270 degrees for this parts.

IMG_6041.jpgIMG_6039.jpgIMG_6042.jpg
 
Last edited:
Some lathes have means of indexing the spindle- the Compact 8 does not. You would need some means of locking the spindle and indexing it.
A 4-jaw chuck would help tremendously since it would provide a means to do both
-Mark
 
My opinion is similar to others who said drill it with the end mill. there appears to be enough material to have the end mill drill down at the outer area, and be fully supported.

Then come in on top of the web and slowly knock it out drilling down.
Then come in and side mill conventional cut which will want to pull into the material, where as a climb would taper since it would push away.
I would side mill in one step very slow feed rate.

That's me.. if that didn't work, I would make a plug as described to provide support.
 
4 jaw chuck or scribe some lies on the chuck.

Place in lowest speed with back gear then use c clamp or something else to grab the motor pully to keep it from turning.

Sent from my SM-G781V using Tapatalk
 
  • Like
Reactions: rwm
4 jaw chuck or scribe some lies on the chuck.

Place in lowest speed with back gear then use c clamp or something else to grab the motor pully to keep it from turning.

Sent from my SM-G781V using Tapatalk
May I know how a 4 jaw chuck can be used for such purpose ?
 
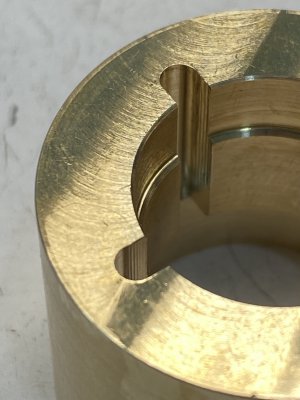
OK, I tried plunging today. Started with a spot drill followed by drilling a full-length 2.3 mm hole at the outer end ( away from the center of the cylinder ) of the slot, then start plunging with a 2.5 mm endmill starting from the other end ( close to the center of the cylinder ) . Advanced by just 0.2 mm each time to minimize tool flexing. The result looks good. I got a slightly wavy surface but it's far less pronounced when compared with those steps obtained in the previous attempt. Will try broaching on the next piece. Just pondering whether it will be better to do it on the milling machine or the lathe.

IMG_6045.jpg
 
Last edited:
Since I have a keyway broach set, I just assumed that was the right tool! Your lathe broaching looks very promising!

You might see if you can pull off a cover and stick something in the bull gear teeth for indexing.

If you have access to a straight section on the back of the spindle you can make a friction lock to fit on it. Or an expanding lock to go in the bore. Have a decent lever length on your lock and go out to something solid, like the chip pan or handy bolt...

Sent from my SM-G892A using Tapatalk
 
Since you are having some success with pre drilling and plunging with an end mill, you might want to start that process with a 2mm end mill. That will give you the 90, 180, 270 you are looking for. Then clean up and square the slot with your broaching technique on the lathe using a 2.5mm broach. This will put far less stress on your broaching work since most of the material will have been removed.
You will still need to figure out a way to hold the spindle still, but you will have the 90 degree indexes referenced from your milling work. Adds a step, but gives you the accuracy you are looking for and what should be a better broaching experience.
 
Back
Top