Home-made CNC lathe using servos

I used SigmaWin+ tool to configure and auto-tune my servodrives. This tool is available for free download on Yaskawa website, as well as all manuals. This tool allows to:
1. check the drive,
2. configure it to one of the standard settings (velocity, torque, position, combined mode, etc.),
3. auto-tune electromechanical control loop,
4. check the Gain, stability and Phase Margin of the loop,
5. automatically search and suppress electromechanical resonances (tool performs FFT analysis and enables notch filters),
6. apply hundreds of settings, limits, adjustment manually.

I use these steps above to setup and configure my Sigma-3 servodrives as a part of the lathe. As I know auto-tuning is not available on older Sigma-1 and Sigma-2 generations. The next Sigma-5 and Sigma-7 gens are much more powerful!
What is really great about SigmaWin+, that it analyzes the performance of the whole machine! (mill, lathe, plasma cut), considering servodrives as parts of the bigger system. The tool tunes-up the servodrives to a machine-specific rigidity, inertia, friction, step-response to provide the best performance in each individual case. Even my Z and X drives have different settings after auto-tuning, because the weights and rigidity of Z and X axis’s are different.
Yaskawa manuals are very technical, detailed and clear. These are one of the best manuals I’ve ever seen. JZSP-CMS02 cable to connect servodrive to PC is available on ebay.
 
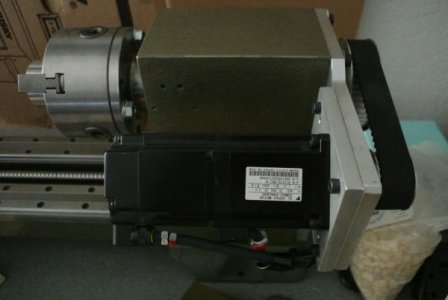
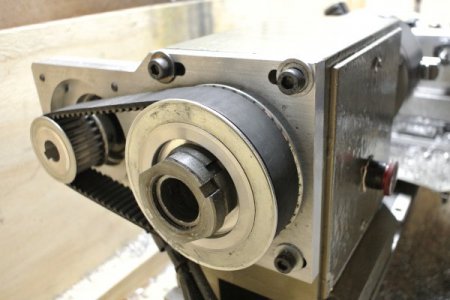
The spindle is driven by 400W SGMAS-04ACA41 servo motor by means of HTD-5M timing belt and 2 x 1 pulley set.

I wanted to have a more powerful motor initially but can’t find anything greater than 400W with 110V AC supply. All servos having more than 400W require 220V AC supply. I didn’t like the idea of having two different supply rails – 110V for axis’s and 220V for spindle.

Then I found Walter Machining Calculator that helps calculating cutting force (and driving power needed) to cut different materials at different speed, feed and depth. Using this calculator, I realized I do not need more than 400W on a small lathe. Since I use servo motor, I’m talking about “true” 400W mechanical power with up to 1kW “overdrive” peak power. I was happy about using Yaskawa servos on coordinates, so I converged to using 400W SGMAS-04ACA41 servo motor for spindle. The servodriver for this motor is SGDS-04F01.

DSC_3110.JPG

This motor has 3000RPM nominal speed and 6000RPM peak speed. The timing pulleys reduce the speed on spindle by 2 with doubled torque. Typically spindle runs at 1000-2000RPM. I can cut 7075 aluminum of 80mm diameter without a problem (not at 2000RPM, of cause :) ). Just haven’t tried anything bigger than that.

CSC_5179.JPG
 
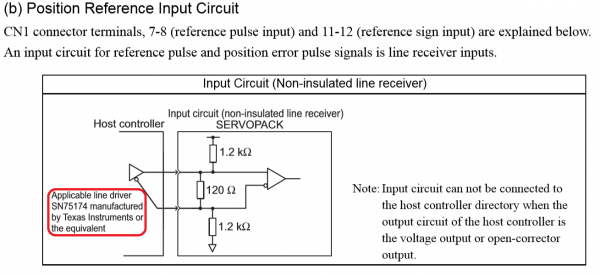
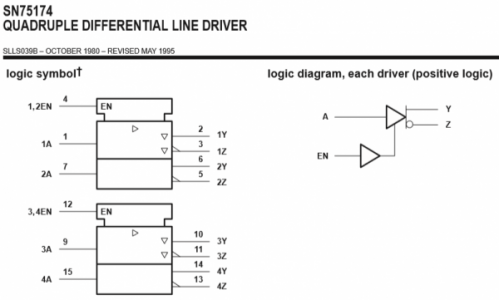
Servodrivers are connected to LPT port of the PC. The only interface used in between of PC and servodrivers is the one recommended by Yaskawa. It’s a simple SN75174N signal converter. It takes digital signal from PC and generates a pair of output signals – the buffered and the inverted one.

75174.png

75174_2.PNG

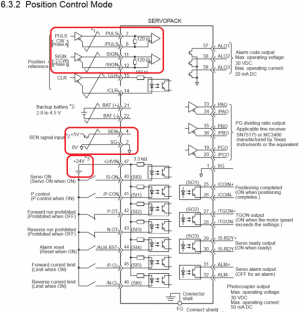
This pair of complementary signals goes to the differential input stage of servodriver. The input signals that need to be buffered are “PULS” (step) and “SIGN” (dir) for each servodriver. Two DC voltage sources +24V and +5V are required to enable the driver. That’s all you need for communication if you use "step-dir" protocol.

servopack.png

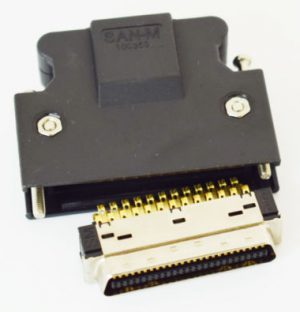
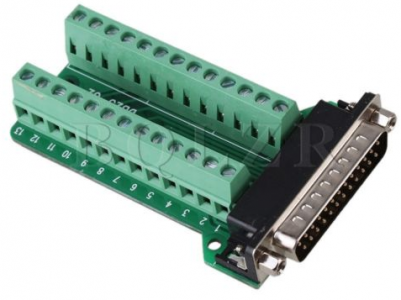
SCSI MDR 50Pin Connectors are used to connect to servodrivers, and DB25 D-SUB Male Plug Adapter to connect to PC.

SCSI_50pin.PNGLPT_connector.PNG

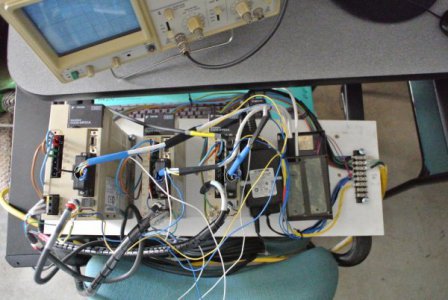
My first hook-up :)

DSC_3118.JPG

I use MACH3 to generate “step-dir” control signals. Standard MACH3 setup, nothing special.
 
Here is something about tooling.
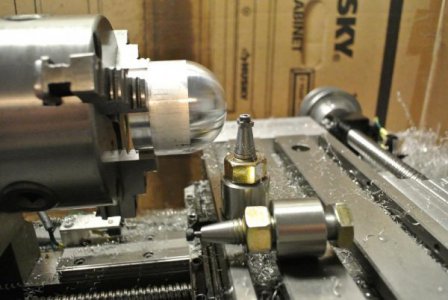
First, I tried to use a simple and quick idea below. The carbide insert is installed on the top of 1/2” bolt. Of course, the height of the bolt is trimmed precisely to have the edge of the insert at the lathe center. This idea works fine, it can be used for external turning. If the thread insert is installed, the external threads can be machined either.
DSC_3137.JPG

However, both X- and Z- coordinates of the insert tip must be re-captured every time the insert is replaced. This is not convenient.

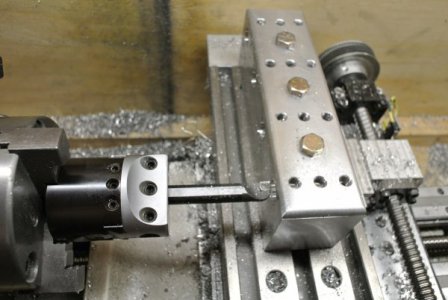
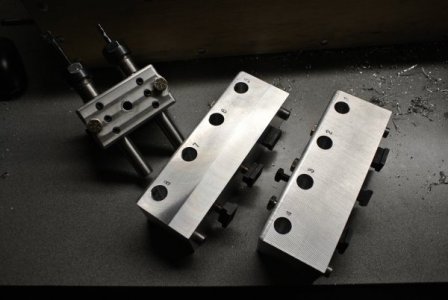
Then I made module holders for 2 and for 4 tools. I used 2” thick 7075 aluminum plate. There are 2 pins on the bottom surface of the module. These pins have a tight fit into the slots of the table. So, the module is aligned by the pins inserted into the slot. There are 16mm holes drilled and bored in the plate. Drilling and boring were performed on the lathe to match the height of the holes.
DSC_4086.JPG

DSC_4090.JPG

Tools with 16mm shank are used. I have LH and RH boring bars with 16mm shank, I use these bars for internal (RH) and external (LH) turning. Other tools can be installed into collet chucks with 16mm straight shank. I use ER-16 chucks having 10mm through hole, so I can install smaller boring bars, drill bits, end mills, HSS round stock (custom tools).

Each tool has it's own unique number. The coordinates of all tools are entered to Tool Table in MACH3. After the module is changed, I need to reference just one instrument. After this setup MACH3 knows coordinates of all instruments.

Number of tool modules can be made to use an individual module for a specific part. The basic idea here is replacing the whole module, not adjusting instruments one-by-one for every new part.

DSC_3167.JPG
 
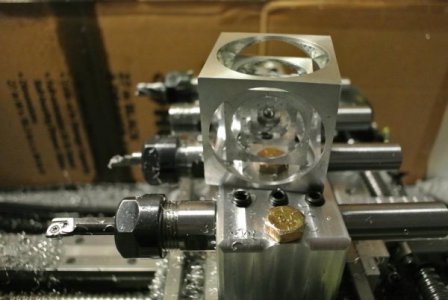
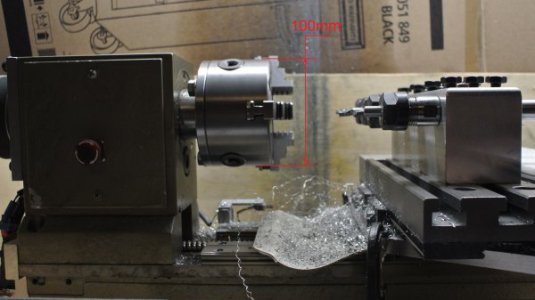
As a conclusion. What do I finally have? I have a small CNC lathe with linear swiss-type tooling. Maximal X-axis travel is 165mm, that allows me to install 4 tools by 50mm distance. More tools (x 5 by 40mm, for instance) can be installed for machining smaller parts. Maximal Z-axis travel is about 350mm, what makes me feel happy. Maximal diameter over carriage is 100mm, over bed – 200mm.

CSC_5178.JPG

I consider this is a low-cost machine, I bought most of the parts on ebay as used. Sure, the costs of these purchases depend on your personal luck. The parts I bought in LMS were quite inexpensive. I didn’t invest any money in buying CNC controllers or processors for this machine.

It took about 11 months to build this machine. This time includes learning things about CNC, buying components, reading manuals, learning MACH3 and basics of G-code programming. I’m using this lathe almost every day for the last 8 months without any major problem. Minor problems can be fixed easily. I think it’s a great machine, and I’m still happy about it after 8 months of usage. Hope, the information I put here will be useful for someone.
 
Thank you for posting! If you make any updates, please post them up.
 
It's been a while since I started this thread. The lathe works great. And here is an update.
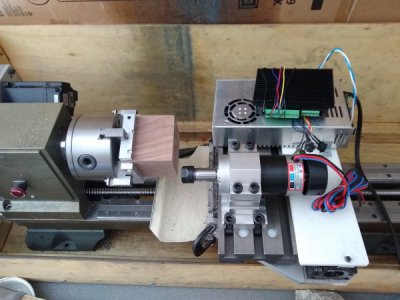
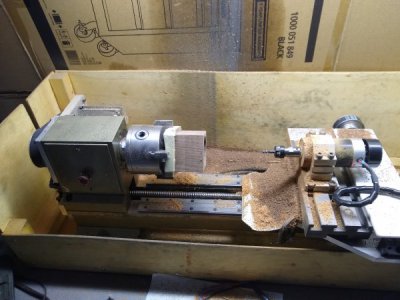
I've added a new tool - the milling spindle.
It's a regular 48V supply air-cooled spindle. It has ER16 collet chuck. Brushless 3-phase motor, 500W, 12500 RPM at 50V supply measured by a laser tachometer.

293336

293337


On this video I'm milling a piece of black walnut wood. 3/16" or 5mm end mill is used.

 
Last edited:
Back
Top