-
Welcome back Guest! Did you know you can mentor other members here at H-M? If not, please check out our Relaunch of Hobby Machinist Mentoring Program!
You are using an out of date browser. It may not display this or other websites correctly.
You should upgrade or use an alternative browser.
You should upgrade or use an alternative browser.
Hendey Refurbish #3
- Thread starter 682bear
- Start date
- Joined
- Apr 10, 2021
- Messages
- 621
You provide a great education on how to make old stuff as good or better than new- and tuition is free. Thanks.
Can't wait for you to find a 9x24 T and G to restore. Dave
Can't wait for you to find a 9x24 T and G to restore. Dave
- Joined
- Nov 28, 2016
- Messages
- 2,793
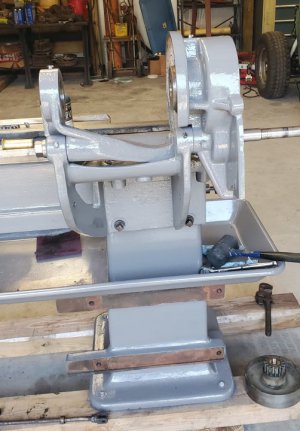
I've been working on the countershaft drive this week... I've been painting the main castings and today I began reassembling it...
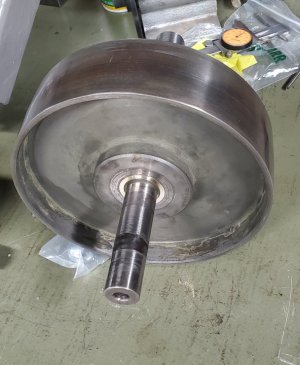
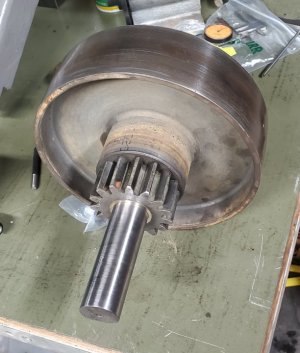
The step pulley is pretty rusty... I've degreased it and have it soaking in evaporust.
The bearings also were rusty...
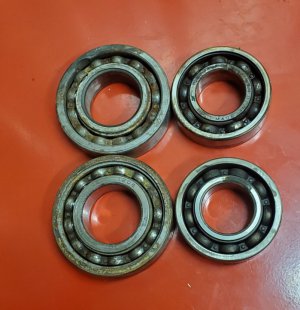
They all spin free, but not smooth, so I have new bearings ordered. I still need to clean and paint the belt cam and handle assembly as well as the outer covers. I still have some work to do on this...
I'll have to fabricate a motor mount platform... it will bolt to the leg under the countershaft assembly and have some means of tensioning the motor belt... I'm still working out the engineering for that...
I'm open to listening to ideas if anyone has any...
-Bear

The step pulley is pretty rusty... I've degreased it and have it soaking in evaporust.
The bearings also were rusty...

They all spin free, but not smooth, so I have new bearings ordered. I still need to clean and paint the belt cam and handle assembly as well as the outer covers. I still have some work to do on this...
I'll have to fabricate a motor mount platform... it will bolt to the leg under the countershaft assembly and have some means of tensioning the motor belt... I'm still working out the engineering for that...
I'm open to listening to ideas if anyone has any...
-Bear
- Joined
- Nov 28, 2016
- Messages
- 2,793
Today the step pulley shaft bearings arrived, so I spent the afternoon installing the step pulley. I had the pulley soaking in evaporust, so I finished cleaning it and chucked it up in the South Bend and used sandpaper and scotchbrite to brighten it up some.
I managed to get the pulley installed by myself... but ended up taking it back out four times before I finally managed to get everything right...
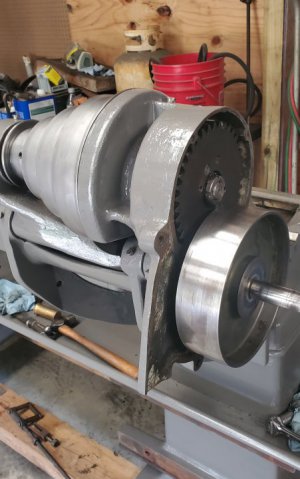
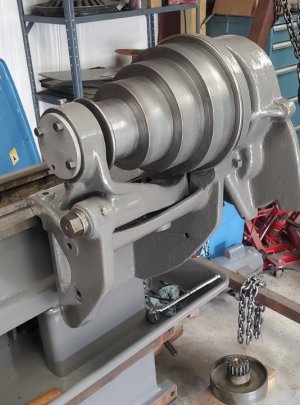
One of the bolts for the end cap was missing, so I'll need to either find or machine a bolt to match.
The bearings for the idler pulley should be here in a couple of days... meanwhile, I'll be finishing up with the outer covers and other parts.
-Bear
I managed to get the pulley installed by myself... but ended up taking it back out four times before I finally managed to get everything right...


One of the bolts for the end cap was missing, so I'll need to either find or machine a bolt to match.
The bearings for the idler pulley should be here in a couple of days... meanwhile, I'll be finishing up with the outer covers and other parts.
-Bear
- Joined
- Nov 28, 2016
- Messages
- 2,793
I took the countershaft apart again...
Somehow, I missed installing a spacer on the step pulley shaft, so had to take the step pulley back out to install the spacer.
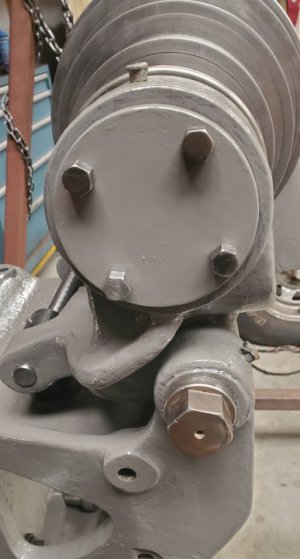
While I had it apart, I realized I had neglected to do another step... originally the outboard bearing cap bolts had a wire ring inserted through the bolt heads... I'm assuming to keep the bolts from backing out. I hadn't replaced the wire... I had to cut the wire to get it out, so I made a new ring out of 1/32" er70s6 welding wire..
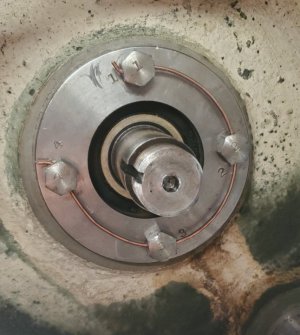
Next, I installed the new bearings in the idler pulley and reassembled the outer covers...
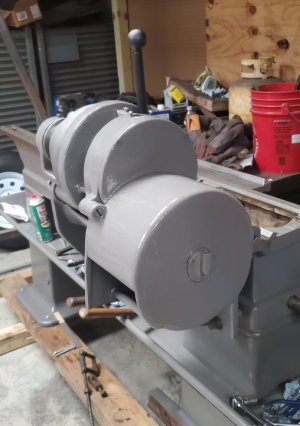
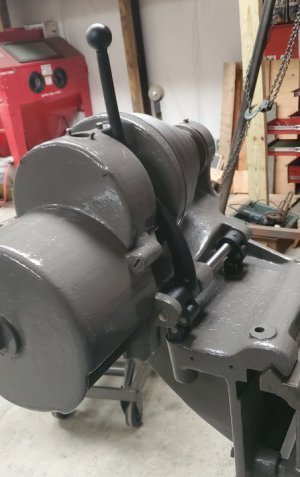
I also reinstalled the belt tension cam and handle...
The bearing cap on the small end was missing one of the bolts. I found a bolt the right size, but the head was thinner than the other three bolts, so I fired up the TIG welder and built the bolt head up...
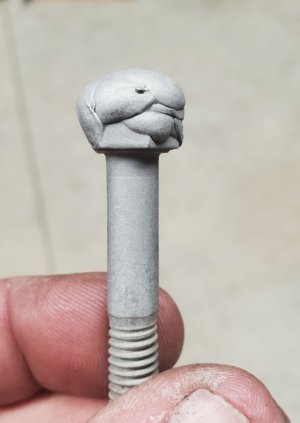
...then set it up in my dividing head on the mill and machined it back to the right size and thickness...
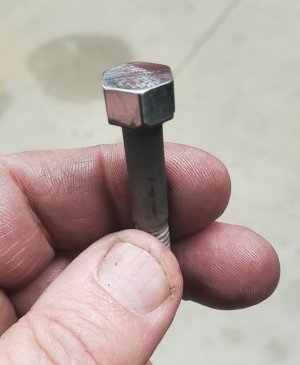
It's not perfect, but better than having a missing bolt...
-Bear
Somehow, I missed installing a spacer on the step pulley shaft, so had to take the step pulley back out to install the spacer.
While I had it apart, I realized I had neglected to do another step... originally the outboard bearing cap bolts had a wire ring inserted through the bolt heads... I'm assuming to keep the bolts from backing out. I hadn't replaced the wire... I had to cut the wire to get it out, so I made a new ring out of 1/32" er70s6 welding wire..

Next, I installed the new bearings in the idler pulley and reassembled the outer covers...

I also reinstalled the belt tension cam and handle...

The bearing cap on the small end was missing one of the bolts. I found a bolt the right size, but the head was thinner than the other three bolts, so I fired up the TIG welder and built the bolt head up...

...then set it up in my dividing head on the mill and machined it back to the right size and thickness...

It's not perfect, but better than having a missing bolt...

-Bear
- Joined
- Nov 28, 2016
- Messages
- 2,793
I've finished up with the countershaft assembly and have started on the carriage and taper attachment. I slopped some paint on the carriage this morning...
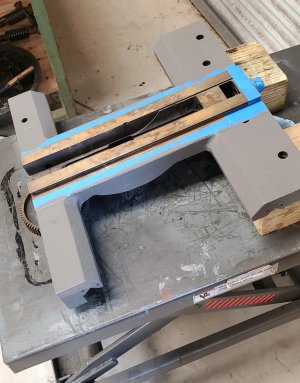
...then began cleaning up the parts of the taper attachment. The lower slide was pretty rusty, so after degreasing it, I started trying to figure out how to soak it in evaporust. I needed something 36 inches long by 6 inches wide and 3 inches deep to put it in to soak. I finally grabbed a few pieces of scrap wood and nailed together a box and lined it with plastic sheet...
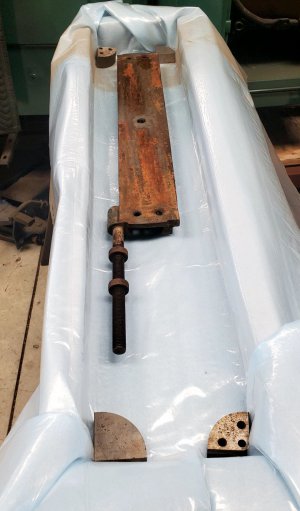
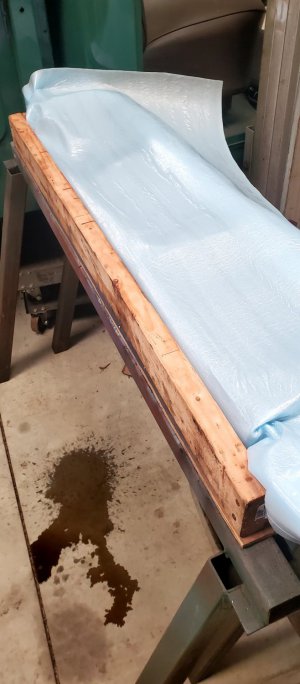
I'm not much of a carpenter, but it seems to be working.
The taper attachment has two gibs in it... there is a 24 inch gib in the lower slide, and a 5 ½ inch gib in the upper swivel. I knew I was missing the shorter one and would have to make one, but I thought I had the longer one... I can't find it, though.
It was disassembled when I bought the lathe, and I don't specifically remember seeing the long gib, so it was probably missing also.
I can make the shorter one easily enough... but I can't fit a 24 inch long part on my surface grinder. I'm considering making two 12 inch gibs instead... I don't know why that wouldn't work...
I guess I'll find out if it will work... if it doesn't, I'll have to come up with plan B...
-Bear

...then began cleaning up the parts of the taper attachment. The lower slide was pretty rusty, so after degreasing it, I started trying to figure out how to soak it in evaporust. I needed something 36 inches long by 6 inches wide and 3 inches deep to put it in to soak. I finally grabbed a few pieces of scrap wood and nailed together a box and lined it with plastic sheet...


I'm not much of a carpenter, but it seems to be working.
The taper attachment has two gibs in it... there is a 24 inch gib in the lower slide, and a 5 ½ inch gib in the upper swivel. I knew I was missing the shorter one and would have to make one, but I thought I had the longer one... I can't find it, though.
It was disassembled when I bought the lathe, and I don't specifically remember seeing the long gib, so it was probably missing also.
I can make the shorter one easily enough... but I can't fit a 24 inch long part on my surface grinder. I'm considering making two 12 inch gibs instead... I don't know why that wouldn't work...
I guess I'll find out if it will work... if it doesn't, I'll have to come up with plan B...
-Bear
- Joined
- Nov 28, 2016
- Messages
- 2,793
After a long pause, I've started tinkering with the old Hendey again.
This morning I started machining a replacement gib for the taper attachment swivel.
I had previously bought a 70 degree cutter from a seller on ebay specifically to machine the gibs for this taper attachment. I set it up on the horizontal mill this morning and began machining the edges of a piece of 7/8" soft steel.
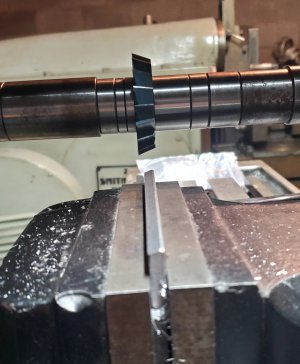
After machining both edges until the width was 'about right', I have this...
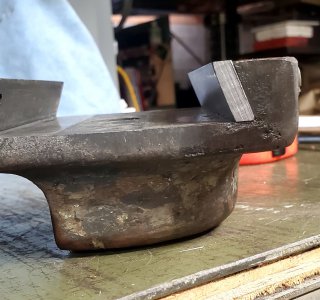
I still need to mill both ends and set it up on the surface grinder and clean both sides up. Then I'll drill the divots in one side where the adjustment screws seat.
-Bear
This morning I started machining a replacement gib for the taper attachment swivel.
I had previously bought a 70 degree cutter from a seller on ebay specifically to machine the gibs for this taper attachment. I set it up on the horizontal mill this morning and began machining the edges of a piece of 7/8" soft steel.

After machining both edges until the width was 'about right', I have this...

I still need to mill both ends and set it up on the surface grinder and clean both sides up. Then I'll drill the divots in one side where the adjustment screws seat.
-Bear
- Joined
- Nov 28, 2016
- Messages
- 2,793
I've finished the gib... the hardest part was setting it up on the mill on a 70 degree angle to drill the divots where the adjusting screws seat. I was planning to just hold it flat to do the divots, but realized that would leave the center of the divot in the wrong position at the depth.
So... I created a sketchy setup... it worked...
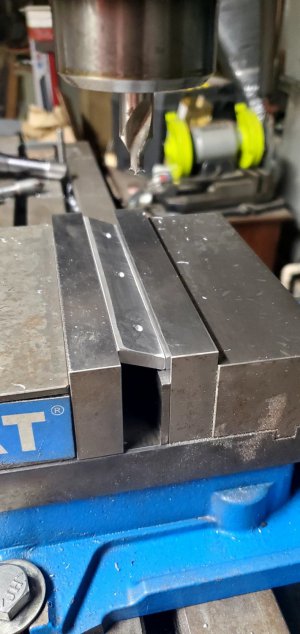
Then I put it on the surface grinder and cleaned both faces up, concentrating on the surface that slides against the dovetail.
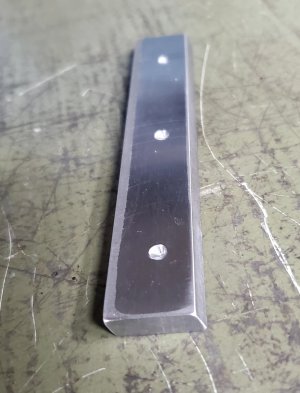
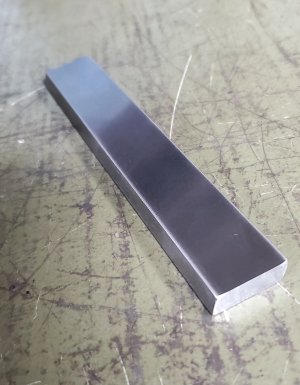
It fits!
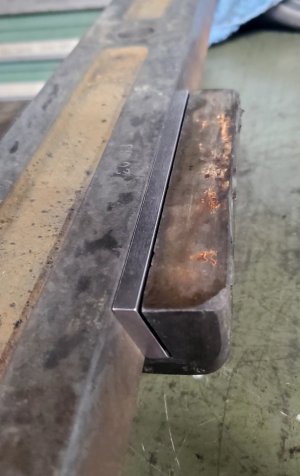
I have to make a longer one for the main slide on the taper attachment. It needs to be 24 inches long... I can only grind an 18 inch piece on my surface grinder, so I'm considering making two 12 inch gibs instead... we'll see how that works.
-Bear
So... I created a sketchy setup... it worked...

Then I put it on the surface grinder and cleaned both faces up, concentrating on the surface that slides against the dovetail.


It fits!

I have to make a longer one for the main slide on the taper attachment. It needs to be 24 inches long... I can only grind an 18 inch piece on my surface grinder, so I'm considering making two 12 inch gibs instead... we'll see how that works.
-Bear

