Heavy 10 project

Wow unbelieveable work and restoration!!! I joined this group to post my progress on a late model Heavy 10 but after seeing this and other projects I am very humbled. I has some left to do and still may post the details, photos, and my findings of the differences in the restoration guide vs. actual disassembly but again truly amazing work on this Heavy 10. I would doubt it looked this good brand new from the South Bend factory.

WELL DONE!!!
Thanks Jerry! Please do post your work! Do not be humbled by anyone elses work, there are guys way more talented than me, and if I did not work on things and try new stuff I wouldn't learn anything. Be proud of what you learn and accomplish. Some guys would never restore a lathe to the level that myself or others do, but that's ok too. Some guys would just change the wicks and put it back together and call it a done, that's ok also. I take pride in my tools weather they are for wood working, machining, or mechanics. This lathe is special to me for many reasons, I never thought I would be able to own a south bend, it is rich in history and a piece of america's industrial revolution, it was made by american craftsman at a time when quality meant something. A friend called my restore a.i.r., that means american iron restoration.
There are some differences in the guide due to the fact that south bend made minor changes to certain parts through the years, it is still a great guide! I found things on my lathe that where not exactly as shown in the book, an example is my reversing gear does not have all the wicks shown in the book, but mine is a 1949 and an early model. The cabinet heavy 10's probably had more upgrades or changes.
As an update, I am painting the brackets for the gears and should be able to get them assembled and installed tomorrow, pics to come!
 
Excellent work I really like how you didnt use any bondo to smooth out the castings.I think machines look better that way.
 
Excellent work I really like how you didnt use any bondo to smooth out the castings.I think machines look better that way.
Yeah I thought I would leave it as south bend made it, I like the way it looks too. This lathe is going to be a user, not a museum piece. The whole point of the restore was to change the wicks and inspect and repair any damaged or missing parts, the wicks where very hard and packed with crud! But I am one of those people that just can't take something apart and not put it back together better than it was, which led to the whole painting and restore thing. It's not perfect, but way better than it was when I got it. It should be easier to keep clean too.
 
What a great job you've done there, I love the look of old style machinery, thanks for sharing yours :thumbzup:
 
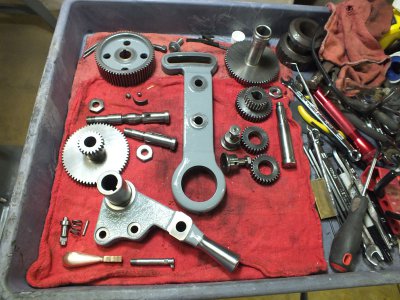
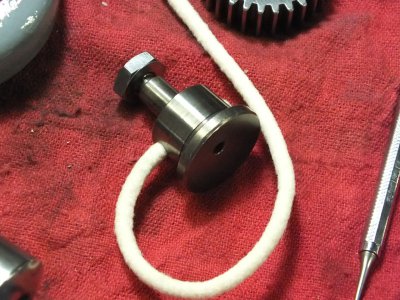
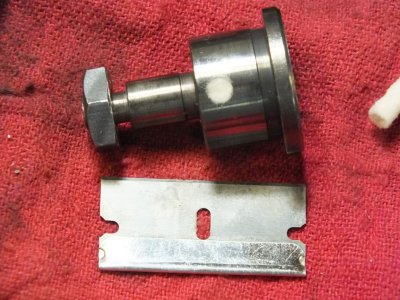
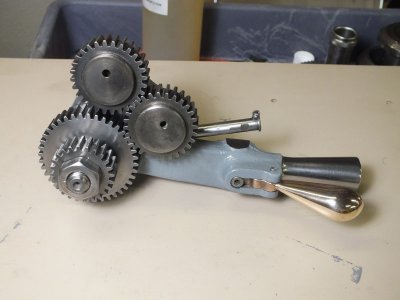
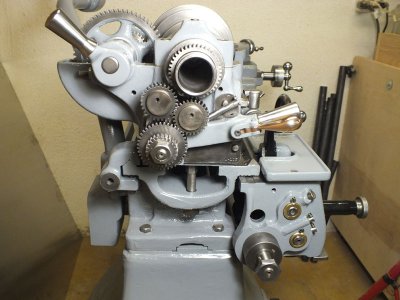
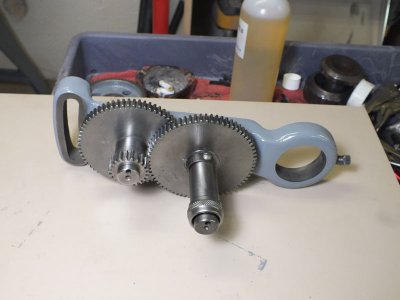
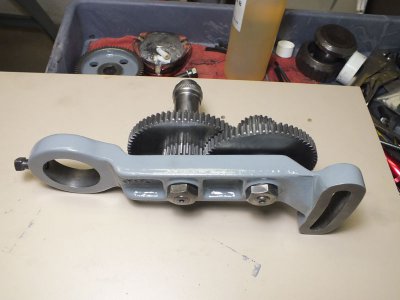
gears-001.jpg gears-002.jpg gears-003.jpg gears-004.jpg gears-005.jpg Here's a few pics of last weeks and today's progress. A shot of the headstock awaiting the gears, painted and cleaned parts to be assembled. My reversing gear assembly was not exactly like the one in the rebuild book. This is one of the many variations that you may run into, South Bend continuosly made changes and improvements to their lathes over the years. mine did not have all the oil passages and wicks that where shown in the book. The 2 small gears at the top of the assembly had round felt wicks in them feed by gravity through holes in the shafts. when reassembling the reverser and pressing the gears in make sure the holes are at the top. A pic of the completed reverser assembly
gears-002.jpggears-001.jpggears-003.jpggears-004.jpggears-005.jpg
 
Last edited:
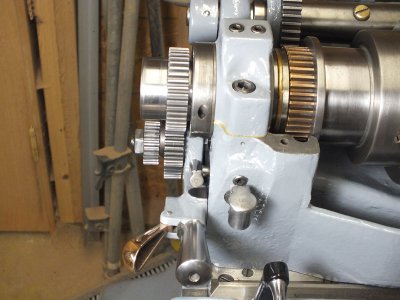
gears-006.jpg gears-007.jpg gears-008.jpg gears-009.jpg Here you can see the reverser installed on the lathe. In the second pic you can see the spindle drive gear has been driven home, I waited to do this until the reverse gears where installed so I could center it up with the gears. There is plenty of room between the spindle take up nut for adjustment if needed. A couple of pics of the Hi-lo range gear assembly. I also made sure the oil holes where at the top of this assembly when pressing the shafts in..

gears-006.jpggears-007.jpggears-008.jpggears-009.jpg
 
Last edited:
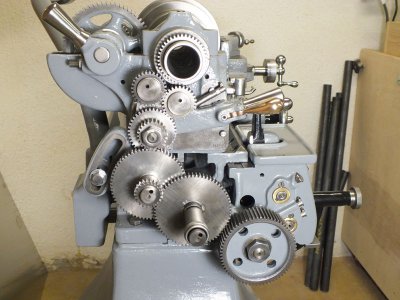
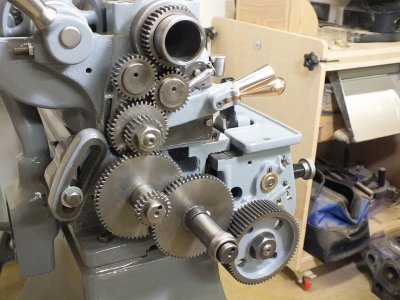
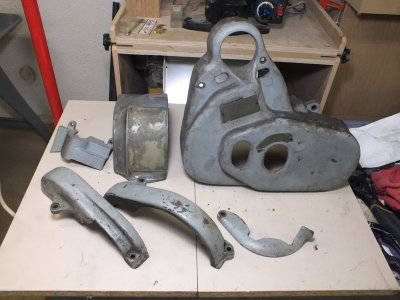
gears-010.jpg gears-011.jpg gears-012.jpg gears-010.jpg gears-011.jpg gears-012.jpg Here's a couple of pics of all the gears installed, everything turns freely by hand. The little bronze reverser lever really polished up well, I hand sanded some nicks and dings out of it and then buffed it. I think it is my favorite piece on the lathe! I took care to make sure all the gears had full engagement and where centered as best as possible. Next I gathered up all the covers as seen in the pic. I was missing the bull gear flip cover and I found a set of bull gear/back gear covers with the flipper on ebay. The new/used covers are cast iron, mine where aluminum. I then washed them in the parts washer to degrease them. I am going to take this to a media stripper by me to have them glass beaded to remove the paint and make ready for repainting. The reason I degreased them is so they didn't get grease in the strippers blast cabinet, little things like this are appreciated by vendors and you usually get better service in the long run.

gears-010.jpggears-011.jpggears-012.jpg
 
Last edited:
Here's a couple of pics of all the gears installed, everything turns freely by hand. The little bronze reverser lever really polished up well, I hand sanded some nicks and dings out of it and then buffed it. I think it is my favorite piece on the lathe! I took care to make sure all the gears had full engagement and where centered as best as possible. Next I gathered up all the covers as seen in the pic. I was missing the bull gear flip cover and I found a set of bull gear/back gear covers with the flipper on ebay. The new/used covers are cast iron, mine where aluminum. I then washed them in the parts washer to degrease them. I am going to take this to a media stripper by me to have them glass beaded to remove the paint and make ready for repainting. The reason I degreased them is so they didn't get grease in the strippers blast cabinet, little things like this are appreciated by vendors and you usually get better service in the long run.

View attachment 42537View attachment 42538View attachment 42539. Woodtickgreg, everyones work I look at, is beyond words that I know of, to tell them how great their work is. One member, who has been helping me is Rick. He ask me to send pictures of my problem, but i can't seem to get a picture from cell phone to I Pad. Then I saw your pictures, what I have now is in pictures number 53 kb and 60 kb. What i don't have and need to know is, as pictures in 100 kb and 101 kb, what is the diameter of the gears located at the end of lead screw, I think it is 56T, and the small one on top, may be a 20T. I have some gears,but may be for a regular 9. If you could help me out, I would so thankful, Chester
 
Last edited:
Here's a couple of pics of all the gears installed, everything turns freely by hand. The little bronze reverser lever really polished up well, I hand sanded some nicks and dings out of it and then buffed it. I think it is my favorite piece on the lathe! I took care to make sure all the gears had full engagement and where centered as best as possible. Next I gathered up all the covers as seen in the pic. I was missing the bull gear flip cover and I found a set of bull gear/back gear covers with the flipper on ebay. The new/used covers are cast iron, mine where aluminum. I then washed them in the parts washer to degrease them. I am going to take this to a media stripper by me to have them glass beaded to remove the paint and make ready for repainting. The reason I degreased them is so they didn't get grease in the strippers blast cabinet, little things like this are appreciated by vendors and you usually get better service in the long run.

View attachment 42537View attachment 42538View attachment 42539. Woodtickgreg, everyones work I look at, is beyond words that I know of, to tell them how great their work is. One member, who has been helping me is Rick. He ask me to send pictures of my problem, but i can't seem to get a picture from cell phone to I Pad. Then I saw your pictures, what I have now is in pictures number 53 kb and 60 kb. What i don't have and need to know is, as pictures in 100 kb and 101 kb, what is the diameter of the gears located at the end of lead screw, I think it is 56T, and the small one on top, may be a 20T. I have some gears,but may be for a regular 9. If you could me out, I would so thankful, Chester
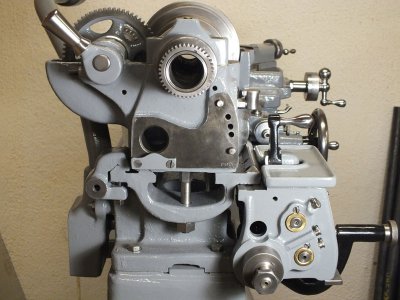
Are you talking about the 2 stacked gears on the reverser or the wide gearbox input shaft gear on the bottom right? let me know which and I will count the teeth and give you a outside diameter measurement.
 
Back
Top