-
Welcome back Guest! Did you know you can mentor other members here at H-M? If not, please check out our Relaunch of Hobby Machinist Mentoring Program!
You are using an out of date browser. It may not display this or other websites correctly.
You should upgrade or use an alternative browser.
You should upgrade or use an alternative browser.
Heavy 10 project
- Thread starter woodtickgreg
- Start date
- Joined
- Jun 22, 2012
- Messages
- 1,552
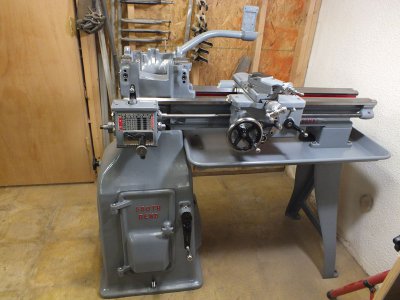
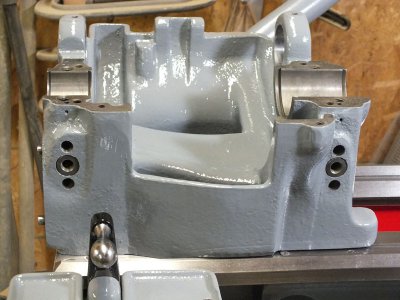
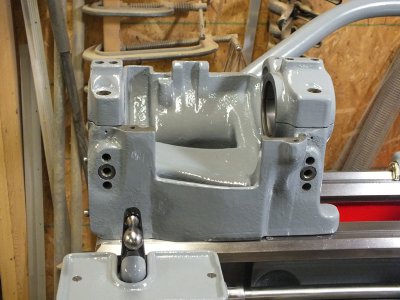
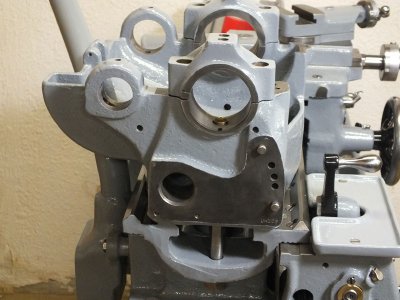
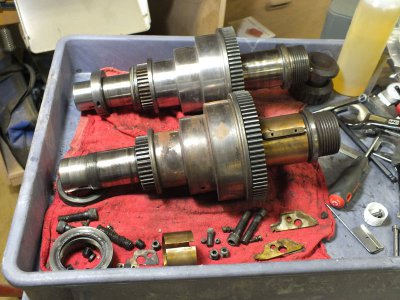 Work has just been insane lately and the days are getting really short, but I have been working on the lathe a couple of hours a day. One day I stripped the head stock, next day into the parts washer for a good cleaning and degreasing, next day wire wheeled all the paint off the casting and sprayed down with brake clean to remove any residual oil. 4 days to paint, 2 coats on the bottom and 2 coats on the top, all brushed and not masked, gettin pretty good at this free hand painting stuff. LOL Here's a few pics, painted head stock mounted to the bed, a pic with the bearing caps just sitting on the head stock. There's also a pic of the spindles and the used bearings with the dovetails, these where missing in the original. Now I have 2 spindles and all the associated parts and I can pick the best parts for my lathe.
Last edited:
- Joined
- Jun 22, 2012
- Messages
- 1,552
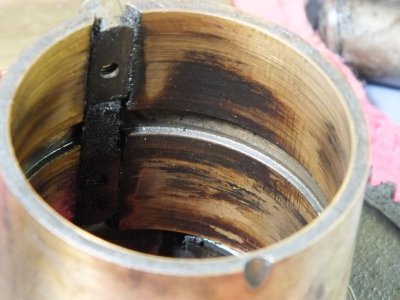
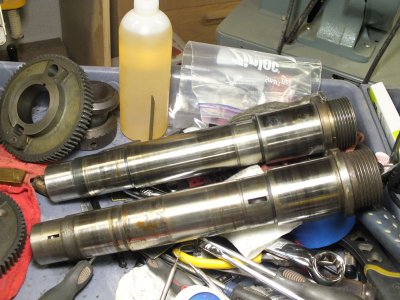
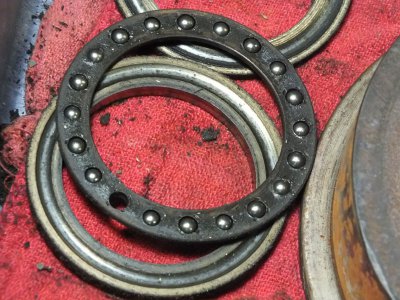
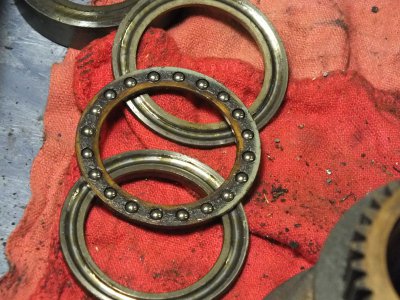
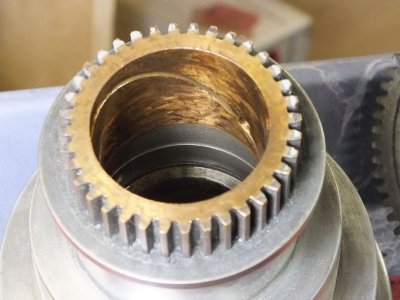 Here's a few pics of some spindle parts before cleaning. The new used spindle bearing shows signs of being run low on oil or without proper bearing clearance, it has some wear but no major galling, I think it will clean up ok. These are the 2 spindles, the top one is the original and the one I will use, it is in a little better shape even though both are good. 2 sets of take up bearings, the original is in great shape, I wonder where the ball went from the other one! LOL The cone pully from the original will also be used, someone did a half a$$ cleanup on the bronze bearing, I'll fix that, It does fit nicely. I did get to wash everything for the spindle in the parts washer since I took the pics, the bearing and all the parts cleaned up well.
Last edited:
You are on the home stretch for sure. Only painting left is what.....Tail Stock and maybe some gears?
I see now how valuable having the Parts Washer -- man it is a time saver. All my cleaning is in separate buckets of Dawn Detergent - Simple Green -and then mineral spirits. Lots of rags too.
You have beat the cold weather -- good for you!
I see now how valuable having the Parts Washer -- man it is a time saver. All my cleaning is in separate buckets of Dawn Detergent - Simple Green -and then mineral spirits. Lots of rags too.
You have beat the cold weather -- good for you!
- Joined
- Jun 22, 2012
- Messages
- 1,552
Yeah I have had the parts washer for years as I am a small engine mechanic also, it's been in the 30's and 40's here and I could feel the cold solvent through my gloves. I got quite a bit of painting to do yet, covers, gears, work light, and ? I do one component at a time as I have been doing all the work on the cart in the pics do to lack of space.You are on the home stretch for sure. Only painting left is what.....Tail Stock and maybe some gears?
I see now how valuable having the Parts Washer -- man it is a time saver. All my cleaning is in separate buckets of Dawn Detergent - Simple Green -and then mineral spirits. Lots of rags too.
You have beat the cold weather -- good for you!
- Joined
- Jun 22, 2012
- Messages
- 1,552
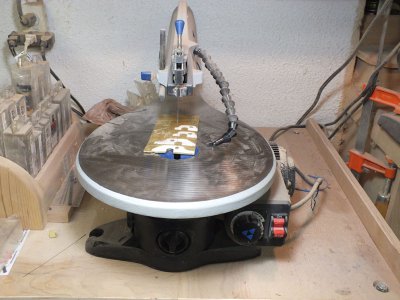
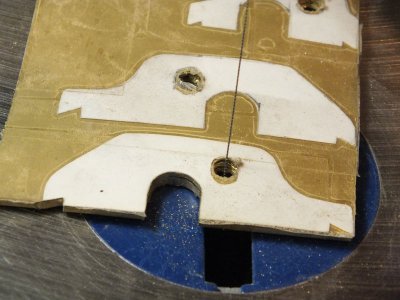
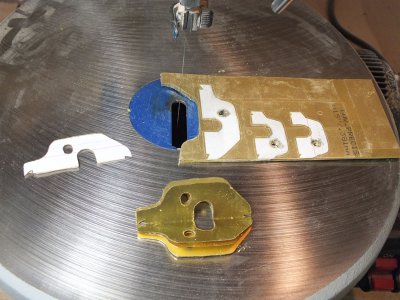
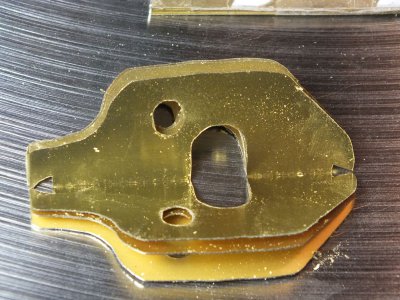 I have made some phone calls to try and find some new shims for the spindle caps as mine where pretty mangled, only to find out that grizzly only sells parts for new lathes and the new south bend lathe company no longer sells them either. they still have some parts but not the shims, I did get a couple of new set screws for the back gear though. So what to do? I had an idea and it worked! Brass is soft so I used my wood working scroll saw and stack cut 12 different size shims from .001" to .015" and a .0015" for a half a thousandth shim. I just made some paper templates and taped them to the stock and cut away! This was a cheap way to do this without having to buy any tools to make them. I will just use a small file to debur them. They may not be as perfect as the originals but they will work just fine! I got the big end ones done and I can cut the small end ones after work during the week. I'm so relieved. I should have enough shims for any possible configuration needed.
Last edited:
That's the way to do it.......nice Greg!
I bet someone at SB back in 1910-15 scrolled out patterns. I'm guessing somewhere along the line they got a die press to stamp out the shims. You bet those will work!
You're doing great buddy -- thanks for the show.....
I bet someone at SB back in 1910-15 scrolled out patterns. I'm guessing somewhere along the line they got a die press to stamp out the shims. You bet those will work!
You're doing great buddy -- thanks for the show.....
- Joined
- Jun 21, 2012
- Messages
- 193
Nice progress! It may not be as quick, but there is something to be said for doing one part at a time. It allows you to really focus on doing a good job. I'm doing a 10" Sheldon right now myself....unfortunately I did NOT beat the cold weather. Looks like I'll be painting in a cold garage and hoping it all cures okay.
- Joined
- Jun 22, 2012
- Messages
- 1,552
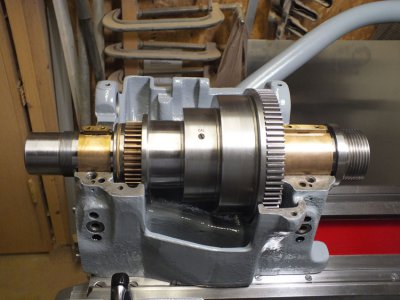
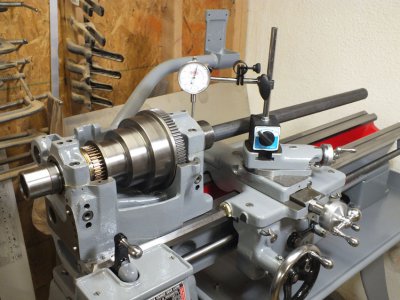
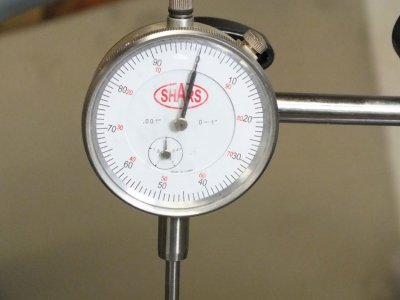
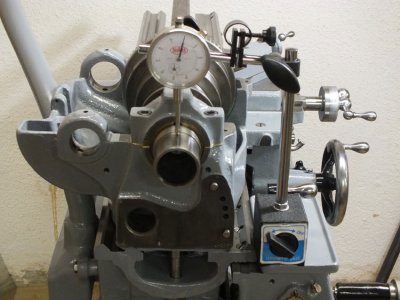
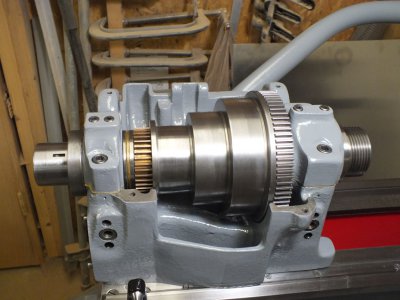 Well after the parts where cleaned I did not feel comfortable with the bearing shells, there was some scoring or ridges in them that I could feel with my finger nail. So I set them in place in the head stock and put the caps on with the bolts finger tight so as not to crush them and to hold them round. I then cleaned them up with a cylinder hone by hand just untill the ridges where gone, Then I polished them up with some 600 grit paper just to remove the scratches, voila! like new. I then buffed the bearing surfaces on the spindle and reassembled the spindle and set it in place with new capillary oil wicks installed. I installed the caps with .0225" of shims for the first test indicator. I took readings on both ends with a .001" dial indicator, I did this three times until I got it right with a perfect setting of .001" of clearance, and end play of take up bearing and nut was also set to .001" I ended up with a .0185" shim stack. In the pics you can see the lift test bar, a solid 1 1/4" bar inserted about a foot into the spindle. Made sure the indicator was set to zero for the testing. Last pic shows everything installed, had to trim a little of the ends of the shims so they did not stick out of the caps and rub on the spindle flange, bull gear, or take up bearings and nut.


Last edited:
