Headstock -leveling- ?

LVLAaron

Registered
Registered
Joined
Oct 4, 2020
Messages
484
PM1440GT pictured.

I've got some down time and decided to take the time and level/align anything I can. My ways are dead nuts level the whole way across.

I carefully turned this barbell. The "ring" closest to the chuck is 3 tenths larger than the one on the right.

From the top: The ring on the right is also 3 tenths HIGHER than the left ring.


I can repeat this is a 1 inch ground bar. The right side of the bar is a couple tenths higher than the chuck side.


My lizard brain tells me that the chuck is pointed up and I need to raise the 2 left-most feet on the lathe (The 1440 has 6 feet, 4 under the headstock and 2 under the tailstock end) to get the spindle parallel with the ways.


I'm not emotionally fully committed to changing anything, so I'm brewing coffee and talking to you guys instead. :)
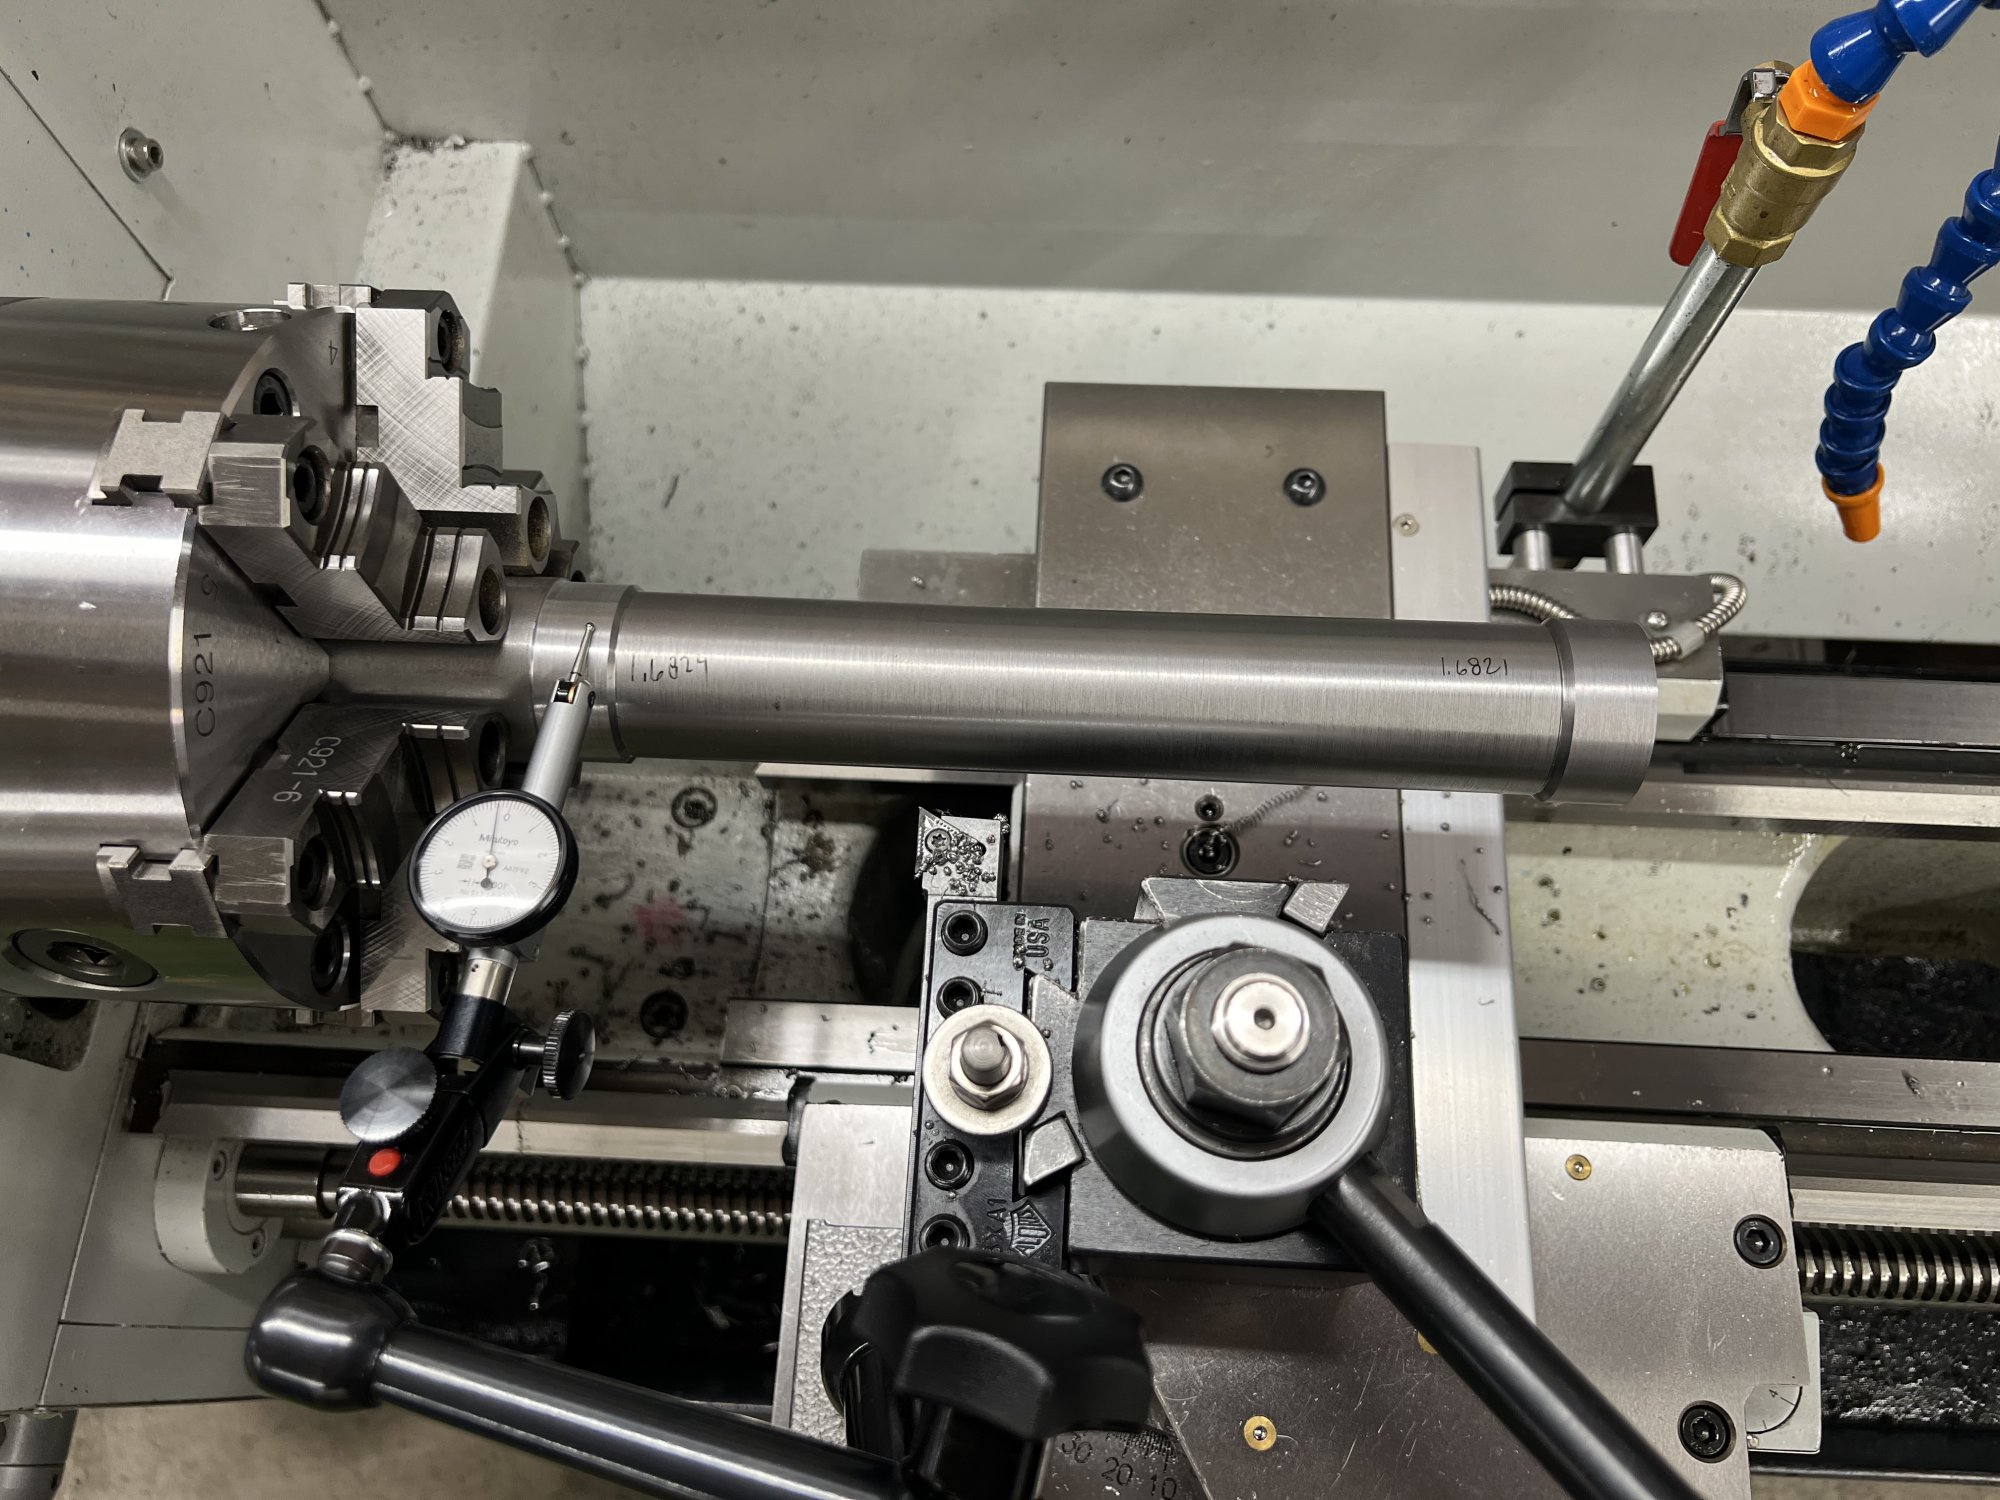


23-12-26 15-09-26 0389.jpg
 
Did you check the test bar for runout? All of my lathes, including the one just reground, cut a few tenths smaller at the chuck. Tool pressure will do that, especially as far out as you are testing. 3-4 x diameter is the max without a center. I'd verify runout, and then test with a collet chuck or a 4 jaw and see if the numbers change . I think you will find that you have won the lottery and anything you do to adjust the headstock is like burning the ticket. Dave
 
The test bar has SOME runout, but it seems straight. it's so little it might just be me influencing the headstock bearings on a cold machine by turning things by hand. But regardless, if I move back and forth on any one chuck position, I get that 3 tenths.

I have a 4 inch round of aluminum I could do the same test with... I should get the bearings warmed up and try with that to verify before I start turning any bolts.
 
You're probably right. I chamber barrels on this machine so it's imperative I get it as good as I can. However, Over the distance a chamber reamer runs, we're talking about a tenth. I should ignore this perceived problem and focus on the tailstock.
 
The "ring" closest to the chuck is 3 tenths larger than the one on the right.

From the top: The ring on the right is also 3 tenths HIGHER than the left ring.
Well, 10 inches to be fair.


I'm pretty sure that this is not where you start truing up a lathe, but rather this is how you know that you are done.
 
I would need to know more about methodology used. It appears that you have used the two collar test and that the diameter on the right is .0003" larger. In that case the right hand side should be higher by .00015".

I would also mount the dial test indicator on the cross slide to avoid any errors created by removing the indicator from the the ways and relocating it.

.0003" vertical misalignment is less of a concern the lateral misalignment as it basically amounts to changing the tool height relative to the spindle axis and is a cosine error. For that small an angle, the error is zero out to ten decimal places.

If it were my lathe, I wouldn't mess with it. The .0003" lateral error is a different matter for the discerning machinist. It can be tweaked out by shimming the tailstock end. Who knows, that may change your vertical error in your favor.
 
Back
Top