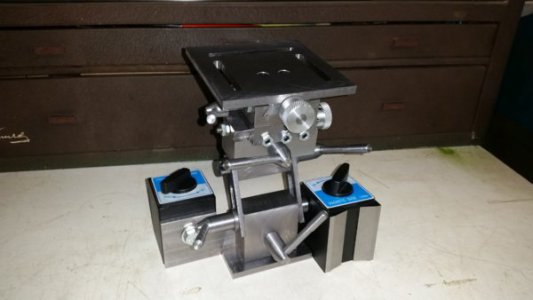
Harold Hall advanced grinding rest

Hahaha... sometimes, reading the directions can take all the fun out of things!

But, I would strongly suggest you do read the directions very carefully. There are a couple of items that I think could really end up biting you if you don't. A couple of things that come to mind are the way he suggests to drill the nuts for the cross feed screws. And, make sure you match mark your parts! Once you get everything aligned and fitted mixing the parts around isn't going to be fun. At least I found that alignments with the dovetail slides were not perfectly centered and then that makes the nut being threaded a touch off center. If you mix slides, the direction that the nut faces, etc. things will not fit properly. I did match mark mine, but tried to change things around and it didn't work for me. YMMV.

Ted
 
Thanks for the heads up. Guess I better do some reading before I make any more parts. Still waiting for the dovetail cutters to come from Asia so I have time. I see you used a homemade one with great success. I made one before but it didn't work. The first few turns the insert chipped. Rotated the insert and tried again with the same results. I think the material I used for the shaft was too soft and was flexing. I might try making one again if I get impatient waiting for mine to arrive.

Keep up the good work.

John
 
This was the first time I used my homemade carbide insert dovetail cutter and here's what I found.

1- Run it fast. I used the highest speed my mill has, a little over 1600 RPM. I probably would have run it 1800-2000 RPM if I could have.
2- Take light cuts I think the heaviest cuts I took were ~ 0.020". Of course, this will be true with about any dovetail cutter that we'd be using in a home shop.
3- I don't know the the exact part number of the insert I used. Just something I had. They are a positive insert with clearance, but the clearance was not a great enough angle. I got a rough finish and I could see that the insert was rubbing on the bottom of its' cutting edge. So, I ground some secondary clearance on my bench grinder and that did the trick. This might be why yours chipped, because mine started chipping on the bottom edge. You don't need a special grinding stone for grinding carbide. A regular stone will work for doing this. It's just clearance and carbide, at least any of the carbide I've done this with, it's so hard that a regular stone won't cut it.

The insert cutter pounds and bangs because of its' single cutting edge and it's not a nice sharp edge like a HSS cutter. Carbide beats the metal off where HSS cuts it and you have several cutting edges on a typical HSS cutter. If I was doing something where I thought it was more critical, I think roughing with the carbide insert cutter and finishing with HSS would be a good way to go. This would minimize the amount of sharpening for the HSS cutter while being able to simply change inserts for roughing (if necessary). For this grinder rest, I really don't think the dovetail is all that critical. And, the only way to get a really good fit would be to hand scrape it in anyways.

Ted
 
Another update: Got most of the parts and pieces made now. Dials made and graduations added, locking bolts and nuts made, all but locating and drilling holes for the handles for the locking nuts. Stopping now to draw up the angle base to accommodate the two mag indicator bases. I'll be buying two more so I can have the simple rest on one side of the grinder and the advanced rest on the other.

After making the base angle, I'll assemble and locate the positions for the locking handles on the locking nuts and finish them off. That will just leave some putter work and the rest will be finished. Next, I'll draw up and make the fences.

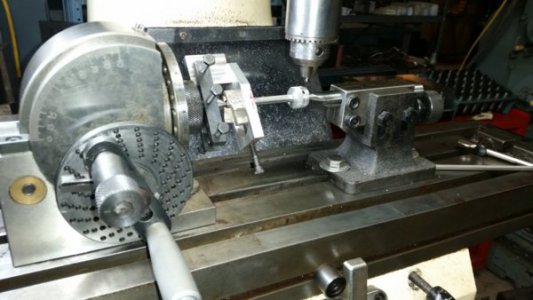
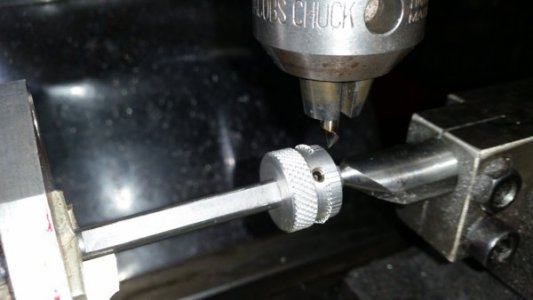
I put the dials in the 3 jaw chuck I use with my dividing head and I didn't like the run out I was seeing and the collet quick indexers I have didn't have the divisions I needed so I made up a dog and mandrel and used the indexing head with centers. I put the dial on the dead center end so I knew that no matter what it would run dead concentrically. Sharpened a round tool bit with a nice sharp edge and dragged away. They turned out well.

Ted

20180204_145123.jpg
20180204_145133.jpg
20180204_145147.jpg
20180204_113753.jpg
20180204_113816.jpg
 
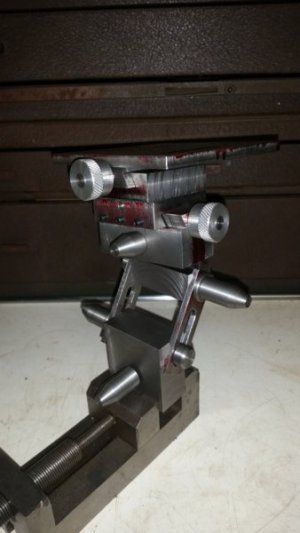
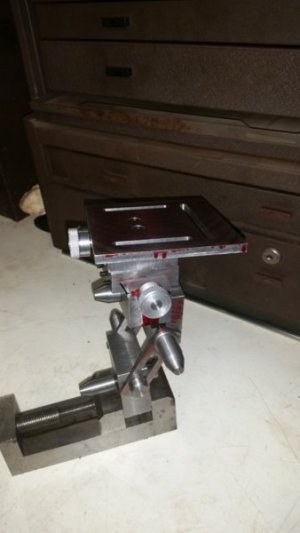
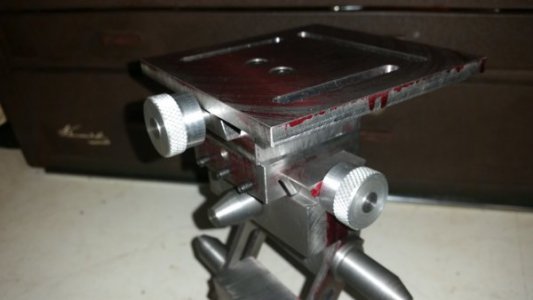
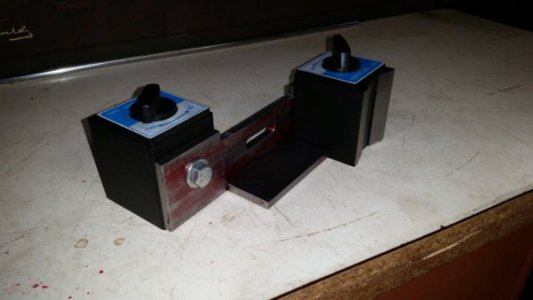
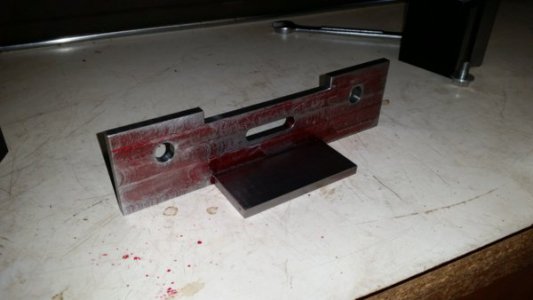
Got the base angle mounting plate done today. Had a few ideas I wanted to try out. For my setup, when using two mag bases, the angle plate on the simple rest is too long and big. Using mag bases, which are so easily moved and positioned, eliminates the need for such a long base. So, I shortened it up and made it compact. I put a very short slot in it, because, again, it's very easy to just unlock the mag bases and move the whole assembly. I thought that staggering the bases, one on the inside and one on the outside would increases rigidity, but this is likely a little over kill. But, if things are in the way, I can have both mag bases either on the same side or staggered so I thought this would increases flexibility in my setups.

Now, to position, drill and assemble the handles for the locking nuts.

Ted

20180206_161721.jpg
20180206_162122.jpg
20180206_162228.jpg
 
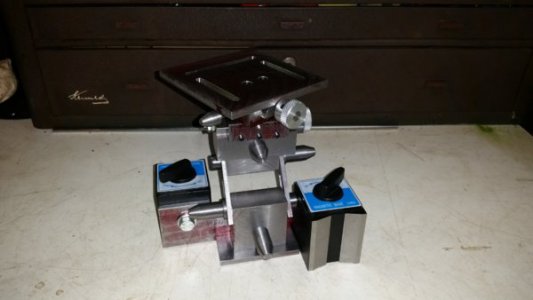
The rest is finished. I decided to use some Loctite maximum strength retaining compound I had rather than epoxy for the handles, just because it was easier. I don't think it will take much to hold them in there. I can always use something else if I have trouble down the line. I'm happy with the way it turned out. I think it will be a joy to use and much easier/quicker to setup than the simple rest.

Now, I have to draw up the fences & stops and make them, but that will have to wait a bit while I tackle a couple other small projects. For one, the hardened blade guides on my Boice Crane vertical bandsaw have run out of travel from wear and the blade isn't tracking correctly. I'll either grind these up out of some 1/2" HSS tool blanks or make some out of some tool steel and harden them. We'll see what I can find laying around.

Ted

20180208_113420.jpg
 
Nice work Ted! I'm anxious to hear your experiences with using this one vs. the simple rest. I've got the Tool & Cutter Sharpening book and I'm contemplating getting the Milling book just for the plans to this rest.
 
Excellent work and thanks for posting the final product.

I haven't been able to do any work on mine for the last 5 days. Been busy plowing, pushing and moving snow. Only went into the shop to get chains for the skidsteer. It's cold in there without the wood stove going.
 
I'm anxious to hear your experiences with using this one vs. the simple rest. I've got the Tool & Cutter Sharpening book and I'm contemplating getting the Milling book just for the plans to this rest.

Haven't even used it yet, but I can tell just by moving things around that it is going to be easier and quicker to setup. It also has more weight because it's made with more steel than the simple rest and I'm sure this will help keep things solid (not that the simple rest is shaky, but this one is just more robust). It's more work than the simple rest, but I'm always looking for projects for my shop so that wasn't an issue for me. One reason I made the simple one first is because I had just made a radius/ball turner and was looking for something to make a ball for! :)

I guess if I was going to make a blanket recommendation I would say this: If you're only going to use it for occasional work then I would go with the simple rest. But, if you're going to push it to the limit, sharpen milling cutters, end mills, lathe tools, basically only being limited by your imagination, and plan on doing a lot of it, I would go with the advanced rest.

And, both books are very inexpensive!

YMMV,
Ted
 
Rest is finished! Made up the fence and clamp and also made some rectangular aluminum washers to go between the mag bases and the angle base. Being directly fastened to the angle base, the mag bases were losing some of their holding power. With the aluminum spacers, they are much stronger.

Next, to try it out. I also picked up a couple of new cup grinding wheels that I might make arbors for and try out as well. So much fun to have, such little time! :)

Ted
 
Back
Top