Hardinge Hlv (early Model - Ca 1950 - S/n 102) Restoration

mmcgirr

Registered
Registered
Joined
Oct 11, 2015
Messages
28
Howdy,

In an effort to provide photographic (and possibly video - still learning to do that) record of the teardown and rebuild of an early HLV lathe, I'm going to devote a thread to my particular model. Note that my particular machine is so early, that it does not have an oiling system for the carriage, etc. Only oiling bungs (for point of reference).

The plan is roughly as follows:
1) teardown and decrustify the machine, and
2) rework, repaint and rebuild the machine to as close to factory spec as possible.

Unfortunately, I'm not really sure what the "factory spec" was for this machine, as real documentation is very scarce - whereas the HLV-H has pretty solid docs. So, I'm mostly going to shoot from the hip, and if you all have info please do share so I can build a library as comprehensive as possible.

I am going to take as many photos as possible during the course of this endeavor, which will probably last at least a couple months, if not more (depending on funds and what needs to be done).

Hopefully, by the end of it all, I'll be able to provide information on a machine which I've been unable to find a lot of documentation on - especially since it's one of the first (by my current knowledge, actually the third ever made) HLV lathes.

If you have any specific requests for things to see to help out in your HLV travels, please do let me know, and I'll do my best to accommodate via pictures. As a rule, I'm using the HLV-H maintenance manual, but I've already found some significant deviations from said manual, and I'll do my best to make note of them where applicable.

I'll start off with initial condition photos in the following posts, but for now, an overview (which I've posted elsewhere). I started with an initial thread in the bridgeport forum (as I also acquired one of those when I got this machine), but a couple of things lead me to separate them:
1) There really is a lack of information on this particular type (HLV) and vintage (very early) online
1a) All the manuals I've found are for newer HLVs (mid 1950's and up) or for the HLV-H (1960 and up). Mine is a strange beast
1b) She's extremely crusty and varnished, which leads to interesting exercises in disassembly
1c) I don't always have the proper tools, which leads to further interesting exercises in disassembly, we'll either fab up or hack our way around that
2) There is no support from Hardinge for this lathe, unlike the HLV-H.
3) I'm trying to restore the old girl to glory as cheaply as possible
4) My memory is terrible, so pictures help enormously - both now and in the future.

Pardon the kind of scattershot way I'm going about this, as this is my first real "major" project of this type, so I'm still wrapping my noodle around it and trying to figure out the best way to organize it all. If any of you have recommendations for better ways to approach it, let me know!

Regards,
Mike

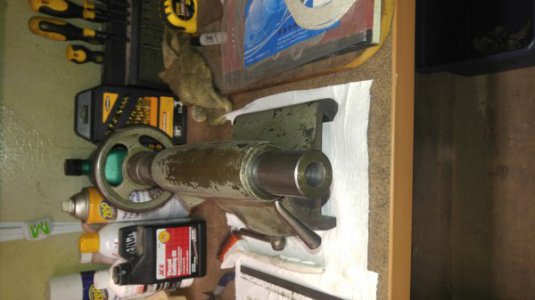
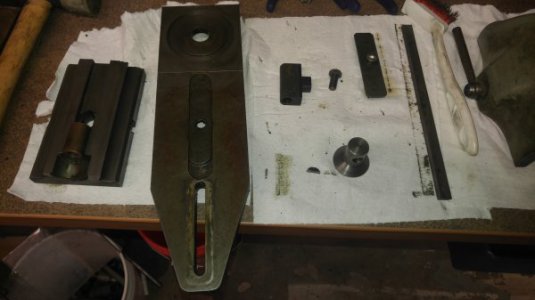
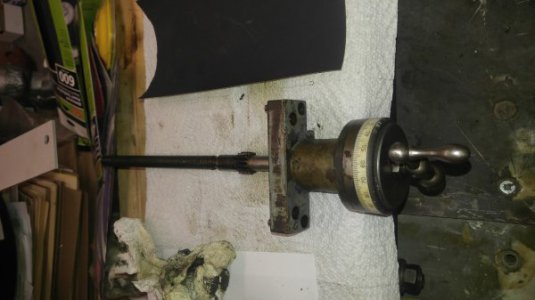
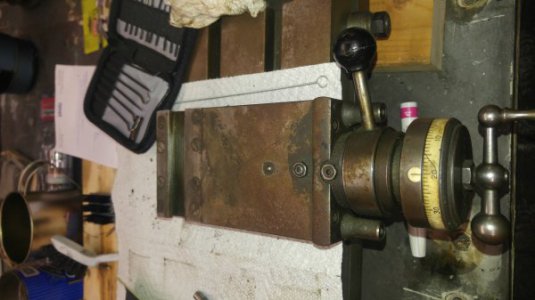
An overview set:
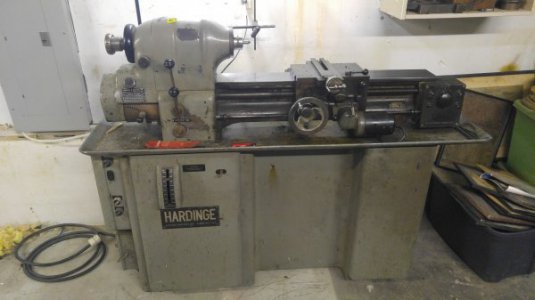
overview 1.jpg

Tailstock Assembly (2).jpg

Cross and Compound Components (3).jpg

Cross and Compound Components (9).jpg

Cross and Compound Components (10).jpg
 
First things first - teardown and cleaning.

For background, I'm the second owner of this machine. It was bought, as far as I know, brand new by the previous owner in 1950. It was used as a secondary machine in a manufacturing facility shop - along with my bridgeport, and regretfully next to a grinding / wire wheel assembly.

Further, lubrication was not appropriate, and maintenance was less than stellar - so the cleanup and restoration is going to be exciting.

The first thing I did was evaluate the overall condition, as follows:

The machine was under power (240VAC, 3phase 20A supply) at the time of removal. At that time, it was reasonably smooth from a spindle perspective (thankfully). However, age and lack of maintenance have taken their toll on the machine.

The belts will certainly need to be replaced (the spindle belt is still a bit of a mystery to me, as I'm not sure if mine is one of the ones that needs to have the spindle popped to remove the belt, or if it's one of the ones that require the factory to do it - they don't support it due to age, and I can't afford it anyway, so we'll make it work no matter what).

The bedway has some dings near the headstock due to carelessness with the chucks and so forth, so at least some very light stoning will be required to rectify some humps, with a full bed grind at some point in the future being performed.

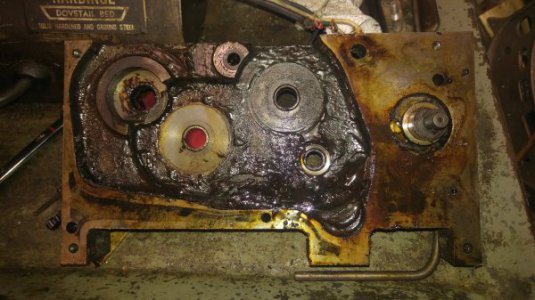
There is a "wonderful" coat of protective solidified varnished lubricant / unknown contaminants and detritus all over the thing, which will require creative use of solvents and degreasers to clean off. Funnily, the coolant sump had 8.5 13oz coffee cans worth of old chips (probably much older than me) still in it, as well as very dark, black-coffee looking fluid in it. I assume that a coolant pump teardown and rebuild will certainly be in order.

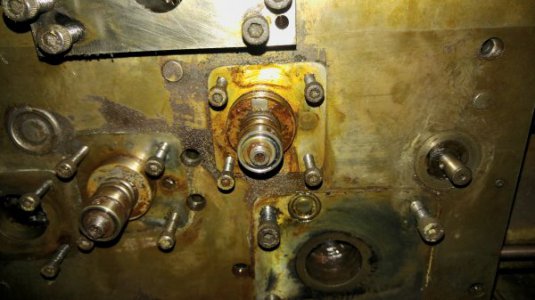
The gearbox probably hasn't seen lubrication since the Nixon administration, so that will require removal, evaluation and rectification. The gears themselves (in the apron and the gearbox) seem to be in good shape, but again the varnish strikes, causing things (like the 1,2,3 selector) to not turn so nice.

The carriage doesn't seem to get tight on the bedway anywhere, which is nice.

The power feed does still work, which is nice.

The brake shoe isn't even connected, and the cork is shot, which is not so nice.

The vari-speed assembly and motor mounting plate and assembly is different than any variety of HLV or HLV-H I've seen docs on, which is not so nice.

There is no pump oiling system for the carriage - which is terribly not nice, and perhaps some homebrew will happen to implement one. Further, the apron did not have enclosed lubrication like the HLV-H, which is also not so fun. Homebrew may be involved there as well.

The machine had provision and was originally supplied with: the collet closer, taper assembly, change gears, steady and follow rests and other attachments, but through the passage of time from the original owner to me, has regretfully seen the items likely go to scrap.

We will try to make them. I'd like to make her whole again.

If anyone has (or is willing to provide) dimensioned drawings for the accessories, I would be most appreciative. Otherwise, we'll figure out how to lash 'em up.

At some point I will probably DRO it out to make life easier and more fun. However for now it's dials all the way which are thankfully whole and in reasonably good shape.

New pictures:

Apron varnish (yay!), handles removed.

Apron - No Handles (1).jpg

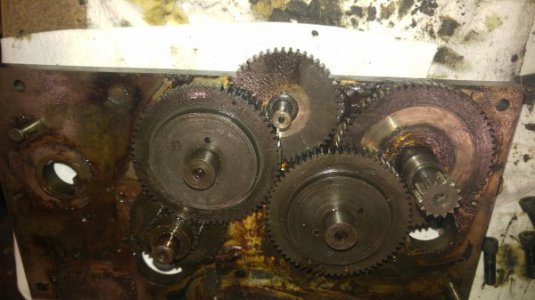
Apron geartrain (gears in good shape):

Apron Internals (7).jpg

Please note that if you're trying to disassemble the apron face from the carriage on an older model HLV, that you have to separate the entire apron from the carriage prior to apron face removal (there is a gear in the way). If you're trying to utilize the HLV-H maintenance manual, it will not work the way they indicate as the construction is substantially different. Forewarned is forearmed!

To remove the apron from the carriage, you remove the 4 SHCS screws on the top of the carriage at the front, as well as the 2 SHCS set screws in the same row. Holes I'm talking about are here:

Carriage - No Apron - Apron Hole Locations.jpg

Apron backside - more varnish (yay!):

Apron Internals (9).jpg

Long and Cross Clutch cruft:

Longitudinal-Crossfeed Clutches (3).jpg

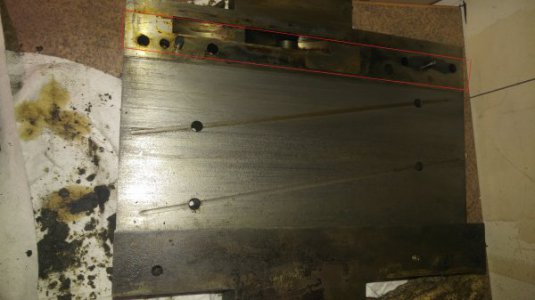
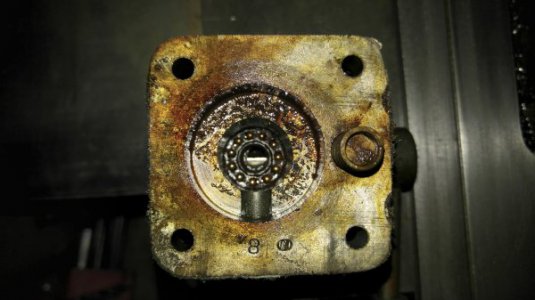
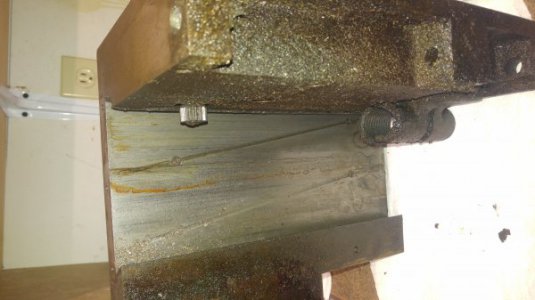
Carriage condition, varnish and way wear:

Carriage Crust and Way Condition (2).jpg

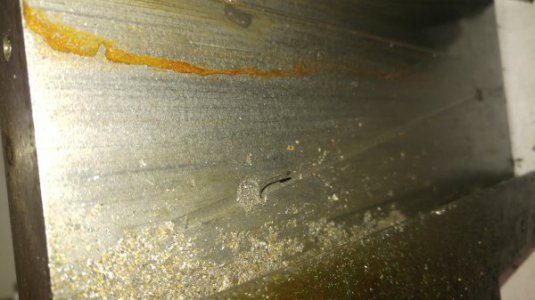
Here's why way wiper maintenance is important!

Carriage Crust and Way Condition (1).jpg

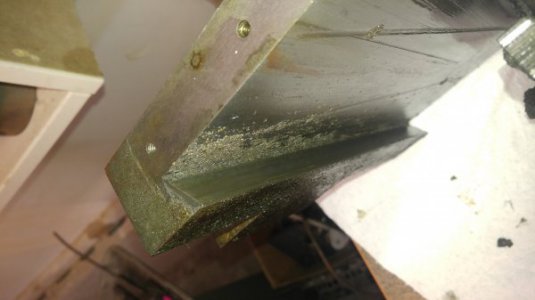
Part 2 of above:

Carriage Crust and Way Condition (6).jpg


As you can see, she's been rode semi-hard and put away very wet. We'll fix that up nice-like.

Regards,
Mike
 
Last edited:
Carriage power feed removal, pictures and wiring lash-up.

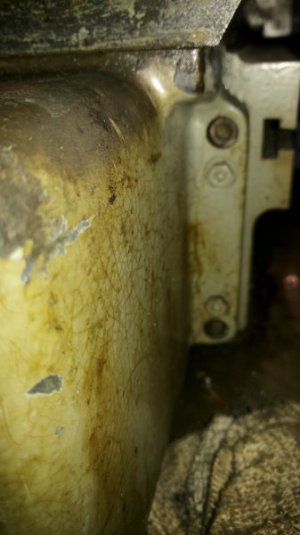
Bolts and dowels far side (dowel pins held in by nuts below and above SHCSs:

CarriageFeed Unit and Mounting (4).jpg

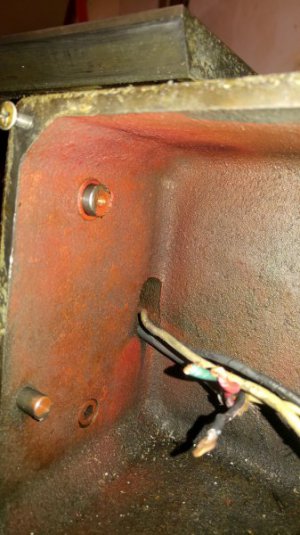
Bolt near side (and interior of power feed unit, showing lead screw and carriage stop rod mounts):

CarriageFeed Unit and Mounting (3).jpg

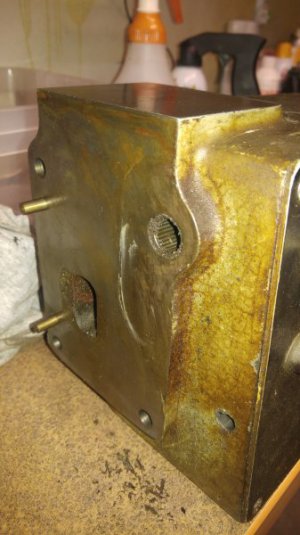
Machined surfaces of carriage power feed unit and lead-screw needle bearing/mount:

CarriageFeed Unit and Mounting (8).jpg

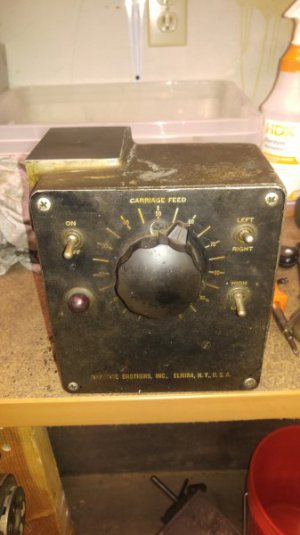
Carriage power feed overview:

CarriageFeed Unit and Mounting (9).jpg

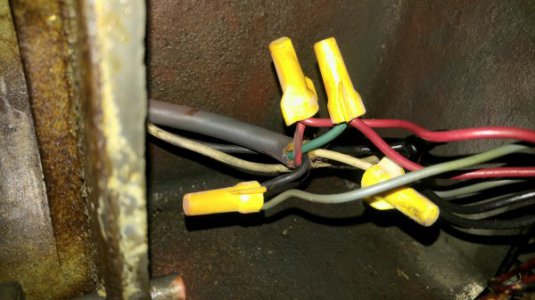
Wiring (please note that I will trace these out and indicate their proper function to the panel or carriage feed motor at a later date):

Inputs:
Grey insulator:
Red->Red
Green->Red
White->Grey
Black->Grey​
CarriageFeed Wiring (3).jpg
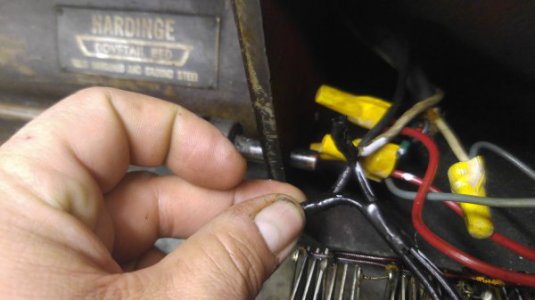
White / Black individual leads:
White->Black (coded as white by me)
Black->Black​
CarriageFeed Wiring (6).jpg

Regards,
Mike
 
Hi Mike
Great project, love the pictures. I had to use Carb Cleaner and brass parts brush on my carriage gears and other raw metal areas with heavy varnish. Caution It will eat paint.
Ron
 
Last edited:
Purple Power and Oil Eater work wonders and does not eat paint.
Orange solvent is also very good and non toxic.
Congrats on the Hardinge. Very cool looking old machine.
 
Oil Eater? first I have heard of it. I will have to get some and try it out, Thanks. If I find any HLV stuff I will pass it on to you.
 
It sounds like you have your head around this project pretty well. I will remind you (and myself and others) of some of the important mindsets of this kind of restoration, to my way of thinking:

This is an very early evolutionary version of that series of innovative and top quality machines. Please don't make it into something it is not. Your machine is tangible, soon to be living, history.

It took many decades for this machine to get to where it is today. Taking weeks of letting a part soak to free something up is trivial if the big picture is kept in mind. There are always other details to work on while you wait. In the same spirit of "first cause no harm", there is absolutely no place for banging and forcing things, temper flares, or ever being in a hurry. Bring it back to life gently, caring for each part, bolt, and nut until it is properly correct. The secret is in the details, getting them right, even if not visible in the finished restoration.

Think long and hard before making ANY changes or modifications to get it running or to get it done. Then think about it some more...

Think even longer and harder yet about making any changes and modifications to make it more "modern." This is an iconic lathe, built before things like DROs were ever dreamed of. Adding one will not only scar the machine, but will also immediately turn it into a "hot rod" and not a historically accurate restoration. I, for one, think that hot rods are often OK for ordinary Chevys and Fords that were produced in huge quantities, and are not the third HLV off the line. Once you hot rod something, it loses much of its history, and there is no real going back...

My ideas, your project. Go with what works for you. I really look forward to following your restoration!
 
Oil Eater? first I have heard of it. I will have to get some and try it out, Thanks. If I find any HLV stuff I will pass it on to you.
I bought some Oil Eater for using in the rehabbing of my 1946-1947 Brown & Sharpe 2L surface grinder. At the suggested concentration, it hardly touched the old grime. At about 8 times the suggested concentration it would start to remove the grime but would also start to soften the old paint, which I was trying to leave in all its funky multi coats and colors glory where possible. So I went back to using parts cleaning solvent, which after soaking for a while would remove most of the grime. I think Oil Eater would likely work better for gunk and grime that is not so old and hardened. It is a water based cleaner.
 
At this point, saving the paint is really the least of my concerns, so thanks for the crud removal advice. I will likely pull this sucker down to bare metal because it seems to have been painted over at one point in time by someone who didn't put a lot of care into the matter, and I don't believe there's enough bondo available in the Northeast to cover the dings and what not in the paint job :rolleyes:.

At present, I'm using Zep industrial purple, as well as a variety of other citrus-based, and solvent-based degreasers which are working well. I'll have to look into oil eater as well. I've carb cleaner as well as "old school" solvents - kerosene, diesel, etc. The whole shebang is being thrown at this one (and will be thrown at the Bridgeport as well.)

A brass wire wheel for my battery drill is in my future; manual scrubbing is ........... tedious.

Mike
 
  • Like
Reactions: JPH
It sounds like you have your head around this project pretty well. I will remind you (and myself and others) of some of the important mindsets of this kind of restoration, to my way of thinking:

This is an very early evolutionary version of that series of innovative and top quality machines. Please don't make it into something it is not. Your machine is tangible, soon to be living, history.

It took many decades for this machine to get to where it is today. Taking weeks of letting a part soak to free something up is trivial if the big picture is kept in mind. There are always other details to work on while you wait. In the same spirit of "first cause no harm", there is absolutely no place for banging and forcing things, temper flares, or ever being in a hurry. Bring it back to life gently, caring for each part, bolt, and nut until it is properly correct. The secret is in the details, getting them right, even if not visible in the finished restoration.

I hear you, Bob. I look at it this way: I haven't had a personal lathe / shop for the past 43 years, 4 or 5 more months without one isn't going to kill me.

Think long and hard before making ANY changes or modifications to get it running or to get it done. Then think about it some more...

Think even longer and harder yet about making any changes and modifications to make it more "modern." This is an iconic lathe, built before things like DROs were ever dreamed of. Adding one will not only scar the machine, but will also immediately turn it into a "hot rod" and not a historically accurate restoration. I, for one, think that hot rods are often OK for ordinary Chevys and Fords that were produced in huge quantities, and are not the third HLV off the line. Once you hot rod something, it loses much of its history, and there is no real going back...

I hear you here too. I'm going to start with keeping it as original as possible. However, it's been modified (as far as I can tell), by others before me, and it seems like there are convenient, existing places to put dro scales and so forth (example - the back-side rail the taper attachment usually goes on. I don't have a taper attachment yet, so no harm in using that slot for a scale until I do. Same goes with what looks to be some 1/4-20 holes on the back and right side of the carriage.

My ideas, your project. Go with what works for you. I really look forward to following your restoration!

Thanks for the advice and enthusiasm!

Regards,
Mike
 
Back
Top