- Joined
- Feb 1, 2015
- Messages
- 9,948
I have a Grizzly G0602 lathe. One of my issues has been the clearance beneath the bed. It makes it difficult to clean chips from the chip tray. Another concern was the inability to access the two lower mounting nuts on the motor.
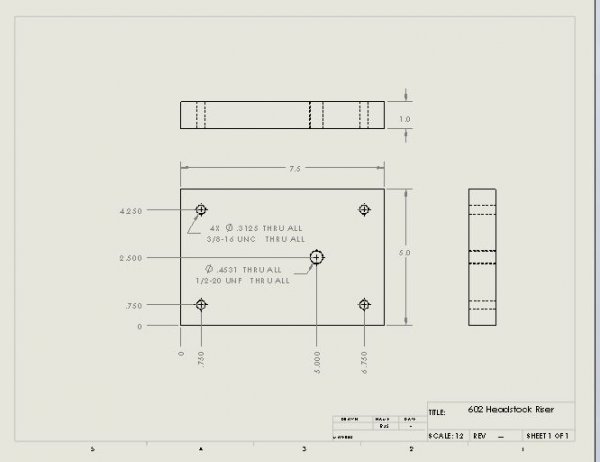
I decided to put two 1" risers under the lathe. My lathe stand has a welded steel frame with a single piece of 7" channel running under the lathe. The lathe bolts through the chip tray and sheet metal skin and through the center of the 3/16" channel web. This scheme is fairly rigid but allows some flexing. I decided to use 5" x 7-1/2" pieces for the riser which fairly well bridges the web. I used four 3/8"-16 bolts on a 3-1/2" x 6" bolt pattern for mounting to the stand. The risers were tapped to receive those bolts. The lathe was fastened to the risers with 1/2" 13 bolts into threaded holes in the risers.
The most difficult part of the project was cutting the blanks from a 10" x 31" - 75 lb. chunk of plate. My oxy-acetylene tanks need refilling. Besides that, an O/A cut leaves a bead of hardened steel at the bottom of the cut which has to be ground away before any machining of the edge. Not having a chop saw, I purchased a 7" cutoff disk for my Craftsman circular saw. It took about 20 minutes to push my way through the 10" of cut but it left a clean edge not requiring further machining. I took the now 22 lb. chunk of steel into the shop and cut it in half by mounting it vertically in my horizontal band saw and cutting from either side. I cleaned up the last edges on the mill but the other three surfaces were acceptable for this use.
The lathe mounting holes were drilled and tapped to match the lathe footprint. The stand mounting holes were drilled 5/16" for tapping but not tapped yet as my plan was to use the riser as a drill guide for drilling the holes in the stand. I unbolted the lathe and using time honored method of levers, lifted the the onto 3" of stacked 2" x 4" cribbing. This allowed me to move the lathe around for access to the riser locations. I bolted the risers to the stand, using the tapped hole and a bolt from the bottom of the stand. I then drilled the eight 5/16" holes through the top of the stand, removed the risers and drilled the eight holes out to 21/64".
I then tapped the eight holes for the 3/8"-16 bolts. The plates were then mounted to the stand, using four 3/8"-16 x 1" bolts and washers. With the risers in place, the lathe was lowered onto them and bolted to the risers with 1/2"-13 x 1" bolts and washers.
Once the lathe was reassembled, I checked my cross feed for perpendicularity to the spindle axis. To do so. I mounted a domed 1/2" bolt and nut in one of the slots in my faceplate at 3-1/2" from the center. I then placed a dial indicator on my cross slide and zeroed it with the domed bolt nearest the front and horizontal with the lathe centerline. I then rotated the faceplate 180º and moved the cross slide to intersect. I measured the difference at .00035". Since I was planning some more work on the stand, I decided to leave it at that. I then mounted a 1" bar in the chuck and, using Rollie's Dad's Method, measured the taper at .00035" in 10" The taper error was in the same direction as the perpendicularity error which told me that my headstock was out by .00005"/" (.00035/7) and my taper error attributable to bed twist was .000015"/". This is good news as it indicates that the lathe will need a slight tweak if the headstock and little, if any, shimming.
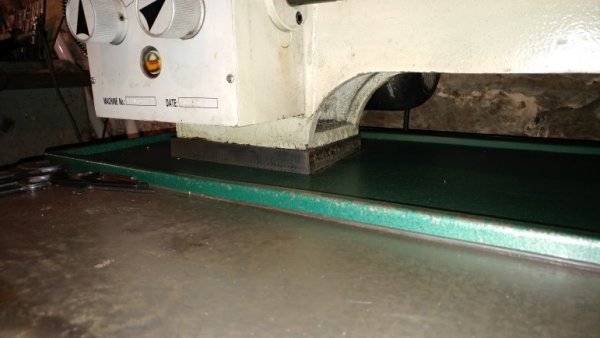
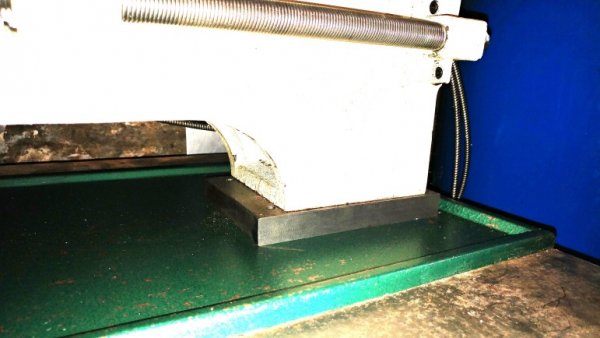
I can now access the motor mounting nuts with a 1/4" drive and wobble extension, although it is still tight. I can easily get under the bed to brush out chips or retrieve lost parts now. Finally, the plate provides an excellent surface for mounting the lathe.
No picture of the actual risers. I dropped my smart phone before transferring them and totally trashed it. Here is a drawing of the riser and photos of the final install.
