Fly cutter fab...before I jump in.

GunsOfNavarone

Registered
Registered
Joined
Jun 26, 2018
Messages
1,733
I haven't started yet, i am posting in this category as I am sure many of you have already made one. I've done a lot of searching in regards to cutter angle on the fly cutter, how big of a circle should i shoot for being able to surface in one pass? Im sure it will come up, this is for a PM 737 (1 hp) seems like blade should be 30 to 60 degrees in relation to material.
There are so many different designs, I just dont know what is practical with my machine's capabilities (or mine for that matter) I like the style where a bar passes through the flycutter and by adjusting the bar in/out, you greatly change the diameter of the cut.I
Getting into the details about actual cutter and all its angles is a whole other Oprah...I will be going HSS over indexable carbide.
Anyway, any incite into this project before I jump in would be greatly appreciated.
 
  • Like
Reactions: tjb
Actually, the timing on your post is interesting. I recently studied a thread started by Nel957 on building a fly cutter. Last week, I made one based on a response in that thread - a two-part video posted by jdedmon91. I had an insert holder that was getting next to no use, so his video was quite helpful. Here's a link to that thread:

https://www.hobby-machinist.com/threads/one-mow-flycutter.68247/#post-618186

The cutter works very satisfactorily, but there was one feature of the build that I modified this morning. If all goes well, I plan on posting some photos tomorrow, along with an APB-style question on my modification. Not exactly sure where/how I'll post that, but I'll try to forward a link to you when I do.

Regards,
Terry
 
Yup, I watched Jim's two part videos. My issues are, i am not nearly as skilled as Jim is. There are a lot of "whoa! Slow down there buddy, you lost me!" Someone in that same thread also suggested it. ..perhaps a bit more cutter angle. I'll take a look at your thread too. It would be super easy to just buy one, you can get deals that almost equal what it will cost me in materials, but I'll never learn that way.
 
Yup, I watched Jim's two part videos. My issues are, i am not nearly as skilled as Jim is. There are a lot of "whoa! Slow down there buddy, you lost me!" Someone in that same thread also suggested it. ..perhaps a bit more cutter angle. I'll take a look at your thread too. It would be super easy to just buy one, you can get deals that almost equal what it will cost me in materials, but I'll never learn that way.
Actually, 'a bit more cutter angle' is the focus of my modification. The cutter works great, but I could see after the first use a little more angle would have been an advantage. Gotta run for now, but will post more on how I modified later today (hopefully).

Also, the cutter is not that complicated to make. The tool holder I used is 5/8" square, so using a 5/8" end mill all but eliminated guessing on milling the slot. The biggest challenge was turning the shaft. That had to be fairly precise, so it was slow-going, but it turned out okay.

More later.

Regards,
Terry
 
Hi Guys,

Fly cutters are easy to make and don't require any great precision !

I've made many, some for very specific jobs such as cutting dovetails and grooving.
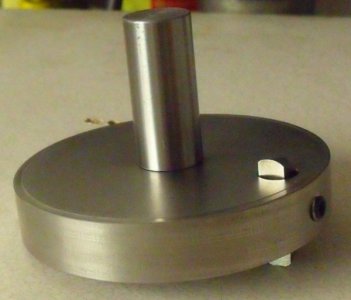
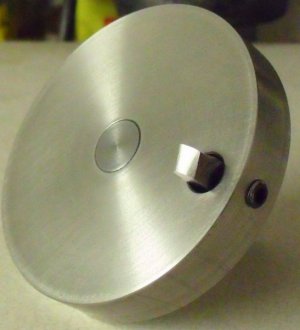
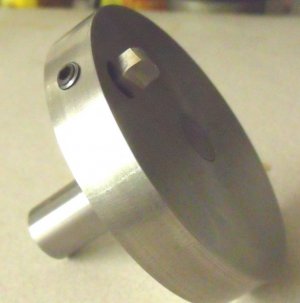
here are some pictures of mine.

New_Flycutter-1.JPGNew_Flycutter-2.JPGNew_Flycutter-3.JPG
This one was a 20 mm diameter shaft, a 75 mm by 20 mm thick disc. using a piece of 6 mm square HSS M42, held by a single grubscrew. The shaft is a press fit into the disc.

Less than an hour to make.

2nd_Tool-03.JPG
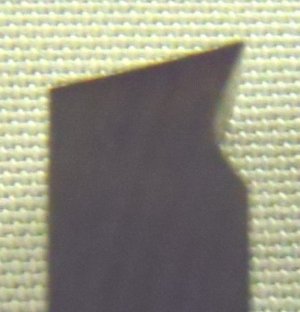
Unfortunately a poor picture of the tool bit cross section. But it gives an idea of the cutting edge.
This was used to surface a mild steel plate.

Body-01.JPGBody-02.JPGBody-03.JPG
On this one, again using a 20 mm shaft, but threaded, because I thought that the side forces with an intermittent interrupted cut might cause the shaft to loosen.

Again using 8 mm square M42 HSS. I made this to put a slot in the end of a mild steel bar.
The cutter held by two M4 hex grub screws.
 
The other day I was scrounging around looking for something and discovered a NOS Jacobs chuck (made in Sheffield England) so I was about to order an MT2 to 1/2" x 20 threaded arbor to match it to my mill. Now, I think I'll order a few of those arbors so I can throw together a special purpose fly cutter on a whim.

@BaronJ, thanks for the inspiration!
 
Hi Meta key,

You might be better off with blank end arbors, if you are going to put a disc fly cutter on one.
The blank ends are soft and turn and thread easily.

I have several MT2 ones that I've made various tools from.
 
You might be better off with blank end arbors, if you are going to put a disc fly cutter on one. The blank ends are soft and turn and thread easily.
I have several MT2 ones that I've made various tools from.

OK, then I think I'll just get a few of each. They're so inexpensive there's no reason not to have a few laying around!

I really like your fly cutters.. Good thinking.
 
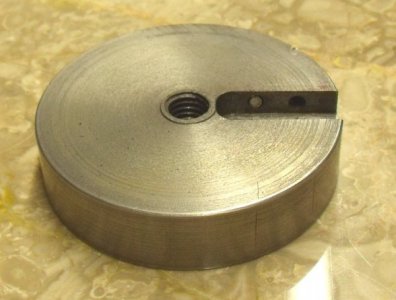
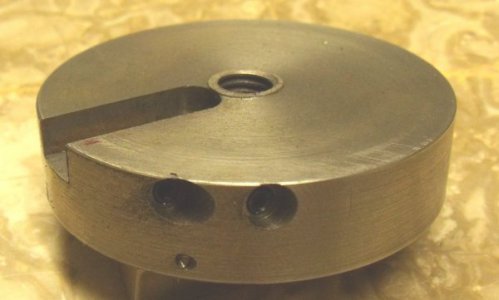
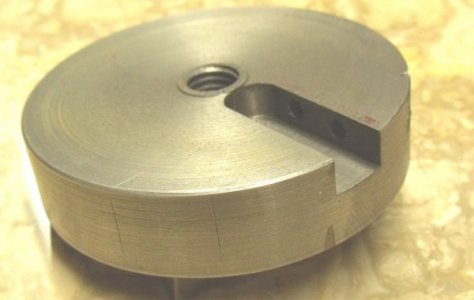
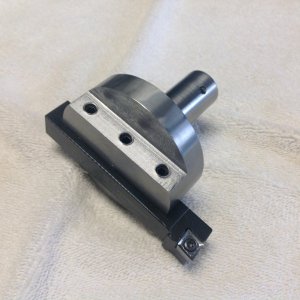
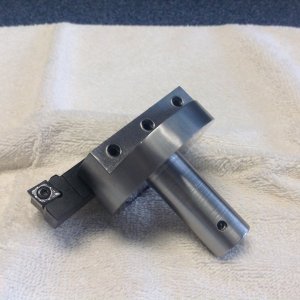
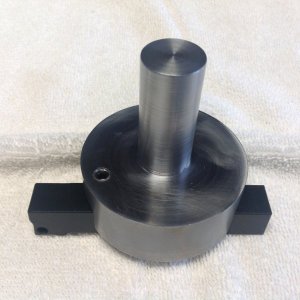
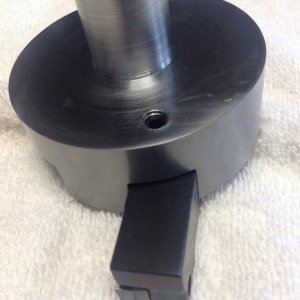
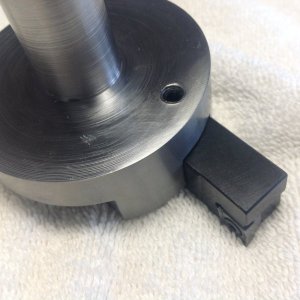
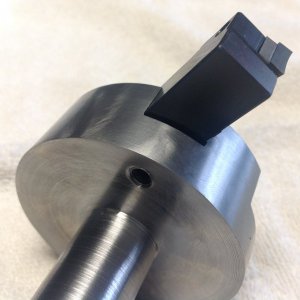
Here are some photos of the fly cutter I made last week. As mentioned in a previous post on this thread, I based it on a 2-part video by jdedmon91 (Jim) on a thread started by Nel957 (link cited above). I started with a piece of scrap 3" solid round and milled it down pretty much according to Jim's video. About 2" of the total length is milled down to 7/8" diameter for the shaft, and the remaining 1" is milled to 2.75" diameter for the cutter. (The little hole in the shaft was in the scrap I started with. The shaft is too long, and when I mill it down, that hole will be gone.)

You'll notice there are three set screws to secure the tool holder as described in Jim's video. The cutter works great, and I'm very pleased with the results. However, after using it a little, it occurred to me that it probably would have been better for the slot to be set at an angle instead of at parallel to the face of the cutter. I contemplated making another one, but then I got the idea to put a set screw on the insert end to produce an adjustable angle. It's a little difficult to tell from the photos, but that's what's on the back face of the cutter. You can tell (a little) from the last photo that the set screw acts as a stop on the tool holder and is adjusted to produce a very slight angle. The beauty of the set screw is that it allows the holder to be set at any desired angle within a given range. I used it as you see it, and it worked fine like a charm.

Here's a question. Do any of our seasoned veterans see anything wrong or unsafe with this approach? Obviously, I wouldn't be inclined to set too steep of an angle, but for a slight amount, it seems to work.

Thanks for any comments.

Regards,
Terry

P.S.: Guns, it's not that hard to make. And if you mess up, you're only out a small amount stock.

IMG_1467.JPGIMG_1468.JPGIMG_1469.JPGIMG_1470.JPGIMG_1471.JPGIMG_1472.JPG
 
Forgot to mention something: All four set screws in my post above are 1/4" - 28.

Regards,
Terry
 
Back
Top