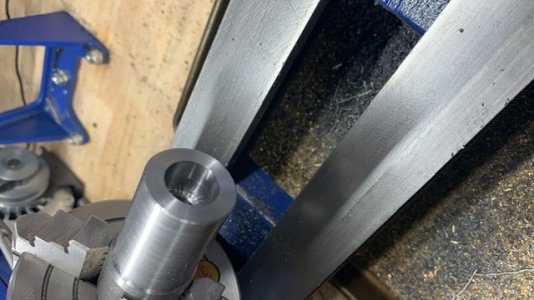
First cuts - cutting a taper

I'll bite, what is the fish method?
The tool which is used to check whether your threading tool (or threads) are at 60 degrees is called a fish. It is only about 1.5 inches long, and is typically about 1/16th thick. With the 60 degree V slot on one end, and a point on the other, looks a bit like a fish.

You put the fish up against the side of a rod which is chucked up in the lathe, you crank your cross feed towards the rod until it presses against the
fish. If your tool is set too low, it will make the top of the fish tilt back towards you. If your tool is too high, the top will tilt away from you. If your tool height is spot on, the fish will remain perfectly vertical.

In this video, the demonstrator uses a small steel rule in the same fashion, rather than a fish, but the results are the same.

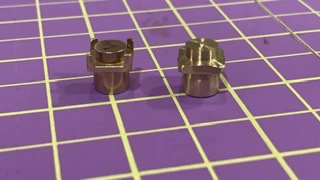
 
So I decided to come back to parting later. I did everything people said but not great results. I’ll sleep on it and prob hone the parting tool a lot more.


However, applying the advice given I did a few things. I made a rh and lh brass tool and decided to try to turn to dimensions. As practice. I figure turning with a purpose vs just making chips would be better.

7DEF6E7C-F4DB-41B2-8312-D8831A8FB5C8.jpeg

It’s not perfect but I get to practice finding a dimension. The diameters are within 001. The lengths are not perfect. I have to practice ways to plunge into the bar on the other side of a shoulder. Without fighting the tool.

I also cut off a 4” length of 1-3/8 12L14. And chucked it up, and turned it to a diameter 1.250 and then decided to bore to a diameter shooting for .8700 ID. I’m only to .726 right now. But I’m having to figure out how to track dimension as I bore. I got off with the dial. So this exercise is teaching me some things.

Had to slow the machine down from the brass.

Had to figure out how to set up my drill chuck and step thru the drills. If I go too big too fast, the chuck lets go in the taper. I learned that. Lol.

Just a lot of fooling around with bit and set up and feeling when I’m fighting and when it goes easy and figuring out why.

6E4F07FD-184E-4C16-92DF-60B3FB294DA7.jpeg

Hopeful the pictures come thru.

I’m thinking I’ll turn this steel part into a thread protector eventually. So I’m shooting for dimensions that would allow a 1-8 thread. But not ready to thread yet.
 
So I decided to come back to parting later. I did everything people said but not great results. I’ll sleep on it and prob hone the parting tool a lot more.


However, applying the advice given I did a few things. I made a rh and lh brass tool and decided to try to turn to dimensions. As practice. I figure turning with a purpose vs just making chips would be better.

View attachment 345511

It’s not perfect but I get to practice finding a dimension. The diameters are within 001. The lengths are not perfect. I have to practice ways to plunge into the bar on the other side of a shoulder. Without fighting the tool.

I also cut off a 4” length of 1-3/8 12L14. And chucked it up, and turned it to a diameter 1.250 and then decided to bore to a diameter shooting for .8700 ID. I’m only to .726 right now. But I’m having to figure out how to track dimension as I bore. I got off with the dial. So this exercise is teaching me some things.

Had to slow the machine down from the brass.

Had to figure out how to set up my drill chuck and step thru the drills. If I go too big too fast, the chuck lets go in the taper. I learned that. Lol.

Just a lot of fooling around with bit and set up and feeling when I’m fighting and when it goes easy and figuring out why.

View attachment 345514

Hopeful the pictures come thru.

I’m thinking I’ll turn this steel part into a thread protector eventually. So I’m shooting for dimensions that would allow a 1-8 thread. But not ready to thread yet.

I know you are excited and having a blast, but SLOW DOWN. Not the machine, you.
Pick one thing to learn how to do and just work on that one thing until you understand it, not just get one good enough looking part but understand what all the different things that matter are and what they do.
Make a simple drawing with dimensions and make that part.

Since most parts are started by facing, that is a good operation to learn first.
Experiment with different speeds, feeds and RPM Depth of cut, cutter geometry. Learn to read the tiny teat of material that is left at the very center of to face. It is trying to tell you something.If it is there and the tool went under it without removing all of it, you tool was to low. If as you get the center of the cut and the teat breaks off it means your cutter is ti high or dull. It should be cut off and leave very close to nothing behind.If you have a tip radius on the cutter like you should you will be able to see that last tiny bit of metal get cut from the face of the part.
Don't use bad material, Know what material you are working with, Not just that it is AL or steel, but what alloy, it makes a big difference. There are some alloys that even a pro on a million dollar machine with the best cutting tools will have a hard time getting a good finish.
As mentioned above since you are a beginner start with things that are easy, 6061-T6 Aluminum, 12L14 steel, most any brass. If you get a bad finish with any of these you can be sure it is something you did wrong and we can help to figure it out.

Getting one part that looks good not not mean you have it figured out.
 
Last edited:
so I have new question. Have been inspecting my headstock morse taper. MT2. I have found it has about 10 mils TIR. I put the DTI on my carriage and slowly ran it in the MT deep to see what I'd find, and about 1/2" - 3/4" in its about 1 mil and then its consistent at about that one mil. The MT is also marked up pretty good in that that first 3/4". I did this with the lathe running on back gears at slowest speed.

What is the best way to true this up?

I've read several topics about using sand paper, but im not sure that would sand be a precision solution unless I came up with a way to mount a MT with sand paper in line on center. there are not high spot burrs i can feel with my finger, but there are scratches and slight grooving.

I've also read about using a reaming which turn out to be a do it/ don't do it kind of answer.

ideas?
 
First of all, checking run out under power essentially tells you nothing. It is difficult to separate bearing run out from irregularities in the spindle taper from friction of the indicator tip so identifying a root cause of run out is nearly impossible. You need to do a static run out check in an area where the spindle taper is smooth and intact to assess the spindle bearing run out. Checking run out of a damaged spindle taper provides no useful info; you already know the taper is messed up and the decision there is how you are going to recondition it.

If the spindle is available new then I would just replace it. If it is not available new then you can remove it and send it out to have it accurately reground. If that is not an option then you can try using a MT reamer. Do NOT use sandpaper because you cannot sand it accurately enough. You can also just leave it alone and use external chucks to mount work holding devices.
 
I am a beginner at this too but in the pictures it looks like the tool should be ground so the top point sticks out more. Does the cutting tool under the top point rub the shaft you are cutting? Also it looks like the sharp point of the cutter may have broken away. Not much help but I am trying.
Have a good day
Ray
 
Back
Top