Finding The Center Of A Boss On A Small Casting

Make a pod so that the flat bottom of the cleaned up casting fits snugly into it. Noting the X & Y dialings as you make the pod. Strap/clamp the casting into the pod and make the holes. Another and better way would be to use an optical center locator mounted in the spindle. But not everybody has one of those in there HM shop…Good Luck, Dave
 
Dear All,
A super accurate center is not required. It can probably be off a 64th or so and still look OK. The big deal is the distance between holes. Therefore I tried Ebel's technique first.

The difficulty with that technique is the fillet on the casting alters the distance the calipers move towards the center as I wiggle. But, with four passes I had an area of lines defining a center perhaps .05 across. Using my +2.75 reading glasses, I then lightly punched in the middle of that area. It seemed close, so I went ahead and drilled both ends. It actually turned out pretty well.

I think I will try the edge finding method on the next piece.

Dave, please explain better your pod process. What is a pod? I probably should know that. Please excuse my ignorance. I am assuming it is not an alien pod. Which is would be great, as I have no alien pods (Cocoons or Alien variety).

Thank you all, even if not mentioned by name, for your ideas and help.

Cheers,

Tom
 
There was a YouTube video dealing with finding a center as you are trying to do. A laser pointer was mounted in the spindle and the mill started at low rpm. I does not need to be centered; inf act it works better if it is slightly off center. The laser will light up a small circle on your workpiece and you can move the table until the circle is centered on the boss. The spindle is now properly centered. It helps to have a laser with adjustable focus. Most have some sort of adjustment if you can get to it. It may mean removing the cover to access it.
Refinements on the method would include providing for an adjustable circle diameter. My pointer is 1/2" o.d. and my boring head uses 1/2" boring bars so I can mount the laser in the boring head and adjust the diameter to match the boss diameter. It provides fairly accurate centering even on irregular bosses as you would have with a casting.
Unfortunately the pictures I took do not accurately show what is seen because the laser appears brighter and the camera can't capture a full circle.
 
I was going to add fractional dimensions usually are +/- 1/64th of a inch. If the casting looks as good as the picture you shouldn't have any problems.

I don't know if you are using a milling machine or drill press. I will assume a drill press for the following. If it was my project. I would use a sheet of sand-paper about 150 grit on a flat smooth surface so I could sand the bottom surface of the casting so it sits flat on the table. Then take a marker put a dot in the middle of the top surface of the boss. Since it is a small area to work with use a caliper and mark three arcs to find the center. They don't have to be equally spaced on the outside diameter to work. The area in between is the center if they don't cross exactly. Use a small center punch and hammer to prick the center. Set your calipers to the overall distance between the two holes and mark the second hole. Prick punch the second hole. If the centers look good then make the punched marks deeper. You can use a small straight shaft center in the drill chuck to position the center drill. Use a small center-drill, #2 or #3, and drill out the marks. That is how I was taught.

The Best with your steam engine project.
 
...The parts are too small for that approach, at least for me. The large bosses (bossa? bossae?) are about 5/32 in diameter. I like the use of the edge finder to find the punch mark. Neat trick...

LOL, sorry Tom, the scale of that tiny part eluded me. There are as many different ways of locating the center and accurately determining the location of the other holes as there are people that can read your post :) I have no doubt that you'll figure out a way of making it happen !
 
I think I would approach it from the back side as it is flat. Dress the piece out back and sides to final finish, I would center the 1 1/2" dimension then the center from side to side. I don't think it is as critical as you think. I would verify that the threaded holes on your other piece are in fact 1 1/2".....HTH
 
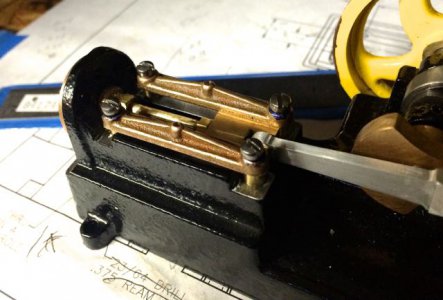
Thank you all for your help and sage advice. I ended up getting close enough for this model by using both Ebel's technique and a wiggler edge finder. Photo below.CrossHeadsInPlace.jpg

If you know this PM model, you may notice the lightweight aluminum connecting rod instead of the original cast bronze. That piece taught me to lock my z axis on the mill. Hence the fully machined part.

Cheers,

Tom
 
These methods are all well and good, but these are carpenter's dimensions. Why overkill the project?
I agree, there is also the hermaphrodite caliper for this sort of work, it has one leg like a inside caliper and the other with a scribing point; bear the caliper leg against the boss diameter, adjust the scriber to approximate center, scribe a line and move the caliper leg around the part in 4 positions and scribe lines; their junction will be the center.
 
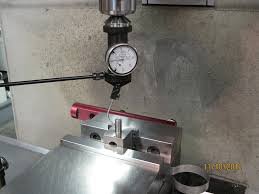
Have any of ya'll ever used a coaxial indicator? For finding center of round stock, I don't know of any quicker method. Just always remember to put your gear box on a very low speed or you'll likely damage it. I've had one of these for several years and it's my go to instrument for quick centering in the mill. Here's a stock photo that I found of one.coax.jpg
 
Back
Top