Enco Mill - motor takes a few tries to get to full speed

Drill and tap the end of the pulley for a draw bolt?
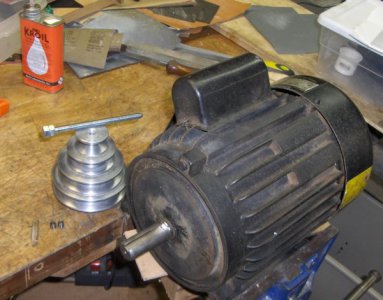
Couple years ago I had to remove the pulley from my (Grizzly RF-30 clone) mill motor. I drilled and tapped the pulley, fashioned a suitably long draw bolt out of a piece of handy rod and two nuts. IIRC, the drill depth was longer than my tap, so I had to counterbore in a short distance, to get the tap to thread to the end of the closed section of the pulley. Note the two setscrews and the key on the bench next to the pulley. Of course, once you've drilled through the closed section, you might want to shortcut the process by squirting in some Kroil or other penetrating lubricant. Still a good idea to thread the hole ... for use of the draw screw some time in the future.
kHPIM3801.jpg
 
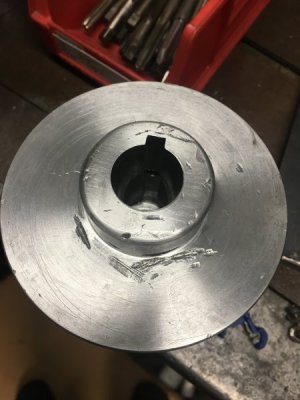
Got the pulley off! Some low heat and some prying with a wooden dowel as a lever.

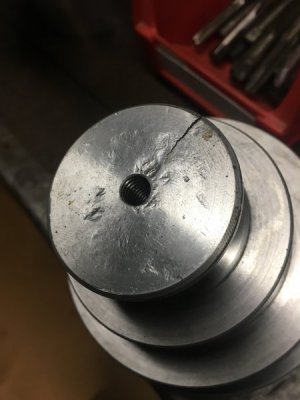
Evidence of a previous frustrated hammer mechanic was visible. I have 1” of solid aluminum at the closed end of the pulley, so I put it on the lathe and drilled and tapped it for 5/16-18. Hopefully next time I can remove the pulley much easier.

D4FEDE8F-3E33-4CFA-9DD2-AAECF4590F33.jpeg

699FB7F9-1094-4D9D-94F4-E281FA0D1490.jpeg

33F0098A-D102-4E0B-97FC-5D3D03F4F701.jpeg

5FFD5A74-BF2D-4D9C-B220-FFF096AAD4D9.jpeg
 
Last edited:
HMAN, I barely made it through with the taps I had. I started with a regular starter tap, and switched to a plug tap. Seemed to buy me the extra turn or two that I needed.

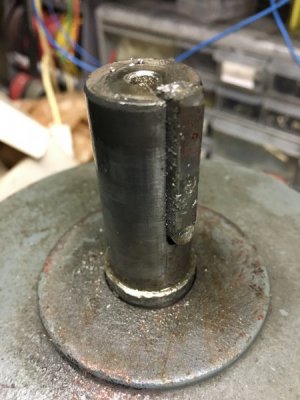
Should I be concerned about the crack at the end of the pulley? (Wasn’t me - it was already there...)
 
I did pop the motor open and inspect the centrifugal switch. It seemed fine, and the contacts look ok.
 
hman, does your motor have a plastic "fan" at the bottom, underneath the cover? Wondering if that's even needed, I can't imagine it moves enough air to provide any cooling. Mine is in rough shape - I'd replace it if I knew it does any good.

-Tom
 
forty niner, that would probably work. I have since removed the pulley, but I like that idea. I could tap it futher ONTO the shaft, so clearly the light impact of a slide hammer would have probably worked to get it off as well. Just finding a way to grab on to such a long part would have been the challenging part.
 
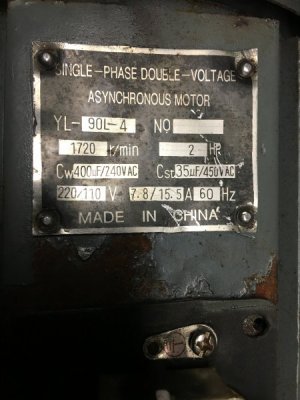
BTW, every darn nut and bolt on this Chinese motor is metric. Just venting here...so frustrating to reach for a replacement screw/bolt, etc, and remember...metric. I don't have a metric hardware stock. Clearly that's something I should be looking to acquire.
 
One more question - for anyone with an RF30 or clone...

How to best mount the motor? Do you first mount the swinging bracket and then bolt the motor to the bracket? Or bolt the motor to the bracket first, and mount the assembly? Motor is damn heavy, at least for me.
 
HMAN, <snip> Should I be concerned about the crack at the end of the pulley? (Wasn’t me - it was already there...)
I don't know. I'd be worried if the crack happened in line with one of the set screws, or the keyway. I suppose the crack will eventually propogate; not much can be done about it. Maybe somebody else can offer an opinion. Keep an eye on it in any case ... maybe mark how far it's gone, and check occasionally for spreading.

hman, does your motor have a plastic "fan" at the bottom, underneath the cover? Wondering if that's even needed, I can't imagine it moves enough air to provide any cooling. Mine is in rough shape - I'd replace it if I knew it does any good.
I never looked inside the motor. Originally I just had to remove the spindle pulley, so I could modify the belt guard. Added jack screws to it for future removal. Removing the pulley and adding the jack screw was more or less an afterthought - do it while you can. No idea of what's inside the motor, and I've since replaced it with a 3 phase (and VFD). PS - I described the process of adding jack screws to the pulleys in an article that was published in the November/December 2017 issue of Home Shop Machinist.

One more question - for anyone with an RF30 or clone...
How to best mount the motor? Do you first mount the swinging bracket and then bolt the motor to the bracket? Or bolt the motor to the bracket first, and mount the assembly? Motor is damn heavy, at least for me.
I cut a suitable length (~44") of 4x4 lumber, screwed plywood plates (10" round at one end, about 8" square at the other - but that's just what I had handy). Set the post upright behind the mill and motor upright on the post. Used the head crank on the mill to align the motor with the bracket.
 
Back
Top