Emco Compact 8 Headstock Shims?

TomKro

Active User
H-M Lifetime Diamond Member
Joined
Dec 27, 2012
Messages
344
A fellow was unloading an estate north of Philadelphia and selling an Emco Compact 8 with numerous accessories, so I placed a deposit and took my chances.

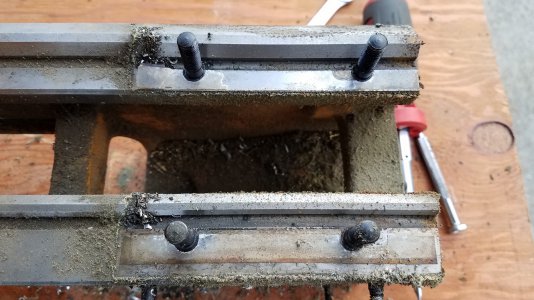
I had no helpers at home, so I had to break it down in pieces to get it in the house. Below the headstock there was what appeared to be waxed paper shims between the bed and headstock castings.
Compact8_PaperShims_resized.jpg

Is the paper placed there just to keep the parts from rusting together? One was torn on disassembly, and the other scraped off in pieces.

They measured out at about 0.003 inch. I have some Kapton tape about the same size. Any issues with using this tape? I'm guessing it will scrape off OK if it becomes a problem.

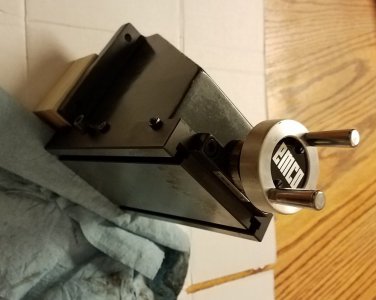
The Compact 8 is a nice little bench top machine. It came with a vertical milling slide that I thought was broken. Turns out it was frozen up near the dial with dried oil. Never been used, I guess.

Happy New Year!

TomKro
 
I'm going to bet they used Onion Skin, a cotton-bearing paper of precision thickness. It is used as a precision shim material in high end equipment. You can still get it on ebay, although getting harder and harder to find.
 
That's interesting.

I can't believe the final height is critical for this application, although I can see how uniform thickness would be important.

Maybe easier to work with and lower cost compared to brass?
 
Your lathe was built to the European DIN8606 toolmaker's standard for normal accuracy and I suspect that they shimmed to meet that standard. Onion skin is useful because finding steel or brass shims in the tenths thickness is not easy. Onion skin does not break down with exposure to oil and it does not compress and lose thickness as you would expect paper to do.

As for how important it is to re-do the shims to the factory thickness, that's your call. If it was me, I would use a depth gauge to figure out what the original shim thickness was and use Onion skin to replace it with the same.
 
Those shims will likely be to align the headstock vertically with tailstock.
 
Good point on the head stock / tail stock alignment. I still don't quite understand why the shims are only on the horizontal surface and not some other size placed on the "V".

Luckily, the machine comes apart pretty easy. If it doesn't line up with the Kapton tape, I'll have to try the onion skin per Mikey's recommendation.

At least the vertical slide cleaned up nicely.
VerticalSlide_cropped_33P.jpg

I also managed to perform final assembly on the kitchen table without any comment from my wife. 2020 is starting out good.

TomKro
 
Vertical alignment is the easy one. Next is aligning the headstock to ways, not so easy. That is why the shims are not on the V's, so you can shift the head.
Congrats on buying a real lathe, Emco's are excellent.
 
The headstock on these lathes doesn't use the V-s for alignment.
It rests on the flats allowing a bit of lateral movement for alignment and then bolted down.
 
Well that ain't good news. Double confirmation that I don't know what I'm doing. Now I'm not quite clear on how to properly line things up.

I assumed the spindle bearings was lined up with the V-way, and all I had to worry about was tail stock height and tail stock lateral position.
Yes, I have made poor assumptions in the past.

This machine came with a collet chuck, so maybe I need to find suitable ground bar and see where everything sits prior to bolting on the control panel, which covers access to the rear head stock tie down nuts.

I don't have the carriage cleaned up yet. Once I get that re-assembled, maybe I'll try to grip a ground bar in the collet and indicate off the carriage to see which way to adjust the head stock.

I do appreciate the alignment info. Probably saved me at least one dis-assembly / re-assembly cycle. Thanks for the assist.

TomKro
 
You should probably invest in one of those test bars, having a taper that matches your spindle, like this:

Then put a DTI on the carriage and check across the front of the test bar. Reposition headstock as needed to zero out and make spindle parallel to ways horizontally.

Check across the top of the bar to see if spindle is parallel to bed vertically. If not you might need to add shims under one end of the headstock.

There is usually a center in each end of the test bar that you can then use to check the tailstock location (after headstock is verified).

Those "shims" might also just be there to add some friction between the headstock and bed.
 
Back
Top