Drilling errors and solutions

Hi all,

hope I'm in the right forum - this is barely machining, but I need a machinist's mindset for advice.
I am the metalworker for a small custom furniture shop, and lately we are making a lot more designs that rely on bolt connections rather than welding.

I am able to finish the projects, but I can't get the drilling accurate enough to make the parts interchangeable- my most recent example is that I had to make a set of three conference tables. Since the parts couldn't be interchangeable (misalignment by 1/32 here and there), I had to mark every individual piece and mark its orientation, which I felt was sort of a waste of time, a brain cramp to not mix up, and will make installation a little less straightforward for the install team.

Basically, I'm asking all for help, ideas, and brainstorming on how to standardize my drilling process to be a little less custom and individual, so that I have to mark every side of everything every time. But who knows, maybe this is just how things are and I just have to get used to it?

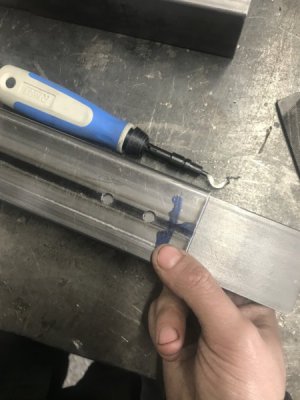
I'm attaching a photo of a perfect example of my drill bit not catching my center punch mark, and drilling misaligned holes. Why?! It's gotta be something obvious that I'm missing? maybe I have to sharpen up those centerpunches? Do I really have to make a jig for almost everything? I know to centerpunch for the drill bit to catch, but I still have a hard time making that drill bit catch instead of slide around the punched dimple. Maybe I'm not punching a big enough dimple? I've read that people will start their holes at 1/4" but it seems maybe I have to start even smaller to end at an accurate enough 1/4" hole.

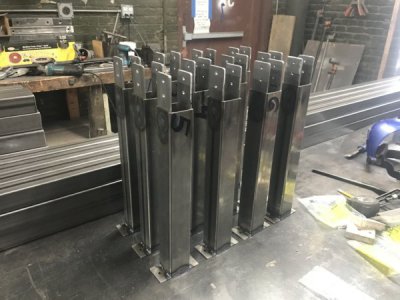
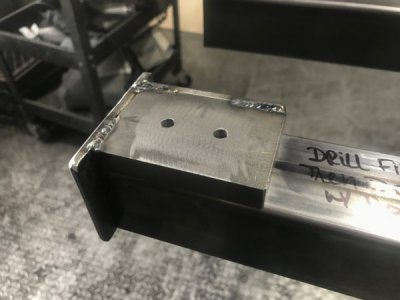
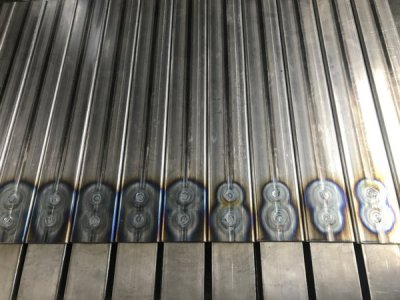
I'm also attaching 2 photos of the conference table legs I was working on --- I used a steel jig I welded together to mark the holes on the legs, and then I used the line up of the legs as a jig to mark the holes on the long support runners. Maybe projects like this have to end up being very individual, steel warps and bows and is never perfect to begin with. Or maybe I should have enlarged all holes on the runners by 1/16" or so"? During the build, I resisted enlarging all holes, only enlarging when I had to, because the tighter the hole, the better the table pieces fall into square. What do you think? I feel like there must be an easier way that I haven't thought of.

Thanks so much to all who share any thoughts! It's really appreciated, I promise to come back to the forum and leave my own advice where I can in return.
Consider using spotting drills to start your holes, another solution is centering drills. A huge variety is available @ MSC. Both are short and don't tend to walk. I often use screw machine cobalt drills because they are very stiff and don't flex. Like someone said 135 degree points also don't walk as bad.
 
hope I'm in the right forum - this is barely machining, but I need a machinist's mindset for advice./QUOTE]

Kaylee Frye,
Welcome to HM.
Glad you are here!
One of our many strengths is the diversity of opinion. Moreover, we value the diversity of opinion.
I will not weigh in on your original question, as others have with eloquence and accuracy.
However, I hope that you will check in frequently and provide your insight and perspective.
Thank you for being here.

Daryl
MN
 
There was a great vid by Jon on his NYCNC YouTube about accurately laying out. Even though for the last 10yrs of my wage slave tour was metal fabrication, this laying out then drilling holes was my nemesis.

What Jon showed was how using a trisquare and the scribe to lay out your line accurately, then using an auto punch by feeling the scores made with the scribe. I could now get the absolute center of my scribe lines, then like has been mentioned come back with a good sharp center punch. The other thing was using a two step 1/4" drill to start the hole. But all of this is moot if you are not at least using a drill press because it's impossible to stay totally straight by hand. YMMV.
 
I can't drill for diddly by hand. I find that I simply can't figure out how to drill perpendicular to the workpiece no matter how hard I try.

I solved this by getting a mill.

Not ideal for your situation, I suspect. As an alternative, a small mag drill will help quite a bit. You can mount it on a plate with some additional clamps for the sections you're drilling and have, essentially, a portable drill press that will drill straight holes.

Stub length, good quality split point drills, plus a spot drill will help with the point wandering if the center punch is shallow. Actually, with a spot drill, stub length drill, and a mag base you don't need to center punch at all.
 
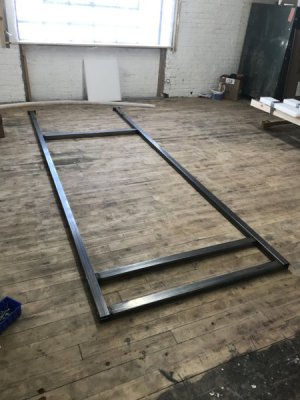
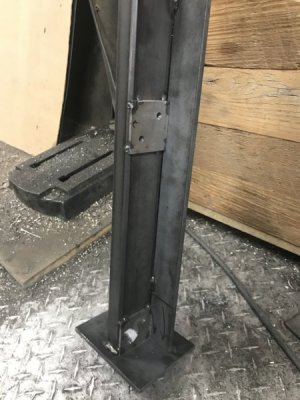
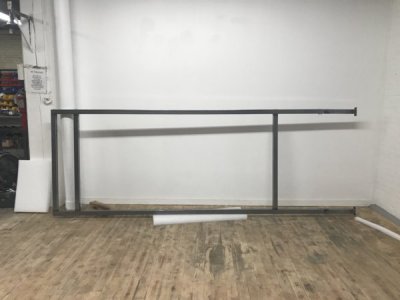
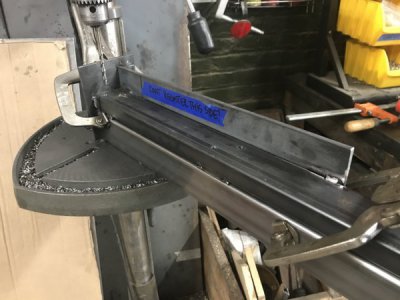
Thank you all for all this input, it's really opened up the world of drill accuracy for me! I went into this project now confident I was not wasting my work time building jigs. I was able to weld up some decent enough jigs, and if anything was inaccurate- at least it was all equally and very consistently inaccurate! I also strategically enlarged holes by just 1/64 and 9/32 here and there to make the project more easily put together in the end. I'll be working on another set of the same tables I pictured above soon, so I'll also try out on the pair of holes to keep one tight and the other enlarged and see if that also standardizes and eases the assembly even more. I bought a handful of different types of the drill bits you guys mentioned to experiment with as well, and already I do notice the difference in wandering. I'm attaching some pics of the jigs I made and the resulting project which is a big ol' rectangle to provide as a wall divider frame in an office. Thanks everyone, I would have been so stressed on this one without your support.

IMG_3758.JPG

IMG_3727.JPG

IMG_3746.JPG

IMG_3748.JPG

IMG_4086.JPG

IMG_4093.JPG

IMG_4103.JPG

IMG_4135.JPG
 
Kaylee, thanks for the update and seems like you are getting better repeatability.

David
 
Good job. Now that you have a toe hold in jigs I guarantee you will never go back. The more you make jigs the more you can design them to be reusable for other projects. And the quicker you can make them and see how much time they save. We also had a huge jig table that had 2 2x8" channel iron that could be moved on the table bed w/legs. I used to make a LOT of conveyer's for fruit packing and if they weren't square, the belts wouldn't track. We used that jig table for everything......wish I had that old table still sometimes.

The next level is like an RF-30 mill/drill(because they are cheap) with a cheap Igaging DRO. I'm still wondering why I waited so long to do this upgrade because my level of accuracy has now gone to scary perfect. And after these years of wishing for better but just thinking it was my lack of skill.

Good luck, onward and upward.
 
Larger holes are sloppy...

Our building "kit" uses 5/8 bolts and the manufacturer pre punches holes at 11/16 so easier to assemble but pain to align... barn style too many parts to align....

But it does help.

Dewalt sells a drill index with 2 step or piloted bits that work well.

For any "production" environment such as yours where portable drilling is the process jigs or fixtures are a must.

Also male and female help so you can drill the part and place to exact match.

To further define the outcome add guides such that the fixture is held in alignment to part.

Take additional time to make it so the wife can do it and results will be worth the effort.

Having holes NOT in a straightline may be stronger bond so take time to make the jig and the hole count determines if bushings needed.

Another thought is if you have many different parts but could use a standard bolt pattern then make a drill guide with bolt battery then fixtures to apply it to different parts.
 
What you are doing wrong is not using a spotting drill.
 
If you where to add drill bushings to you jig, you will have consistent results for a long time. I been using the same drill bushing on my jigs since 2003 with thousands of holes drilled. Drill bushings also help when hand drilling.
 
Back
Top