-
Welcome back Guest! Did you know you can mentor other members here at H-M? If not, please check out our Relaunch of Hobby Machinist Mentoring Program!
You are using an out of date browser. It may not display this or other websites correctly.
You should upgrade or use an alternative browser.
You should upgrade or use an alternative browser.
Delta-Rockwell 6x48 Belt Sander Rebuild
- Thread starter David
- Start date
After working on the Rockewll sander I discovered several things. The motor is a Westinghouse 3/4hp with a double shaft. The motor was rebuilt this past month and I had new bearings installed as well as giving it a thorough cleaning. It was full of sawdust. I did ruin the pulley when I removed it from the motor with a gear puller. Now the sander works just fine. It has new sanding belts, rebuilt motor and a new drive belt. All I need to do is to repaint it and submit the photos.
- Joined
- Mar 14, 2013
- Messages
- 736
After working on the Rockewll sander I discovered several things. The motor is a Westinghouse 3/4hp with a double shaft. The motor was rebuilt this past month and I had new bearings installed as well as giving it a thorough cleaning. It was full of sawdust. I did ruin the pulley when I removed it from the motor with a gear puller. Now the sander works just fine. It has new sanding belts, rebuilt motor and a new drive belt. All I need to do is to repaint it and submit the photos.
And that's the end of that.
How about the pictures,or isn't it done yet?
Thanks,
Tony
The sander painting was placed on the back burner because my truck had major problems with the brakes. I had to replace the entire emergency brake system and the brake booster and a new vacuum pump. Then the spring shackles got bent when I got a load of stone. Soon I hope to get back to the sander.
- Joined
- Mar 14, 2013
- Messages
- 736
The sander painting was placed on the back burner because my truck had major problems with the brakes. I had to replace the entire emergency brake system and the brake booster and a new vacuum pump. Then the spring shackles got bent when I got a load of stone. Soon I hope to get back to the sander.
That sucks.
OK let us know,
Where did you get your lower bearings, looks like part numbers in MRC
204 FSF and 205 FSF
Thanks,
Tony
- Joined
- Mar 14, 2013
- Messages
- 736
The sander painting was placed on the back burner because my truck had major problems with the brakes. I had to replace the entire emergency brake system and the brake booster and a new vacuum pump. Then the spring shackles got bent when I got a load of stone. Soon I hope to get back to the sander.
I just realized your from New Ken.PA.
I used to live in Pgh. Went to school in the south hills, lived In Imperial for 10 years before I moved down this way.
There are a lot of people on this group that are close by.
I am working on a Rockwell Delta 6 X 48 sander. I guess it is from the 1940's. It has a 3/4 hp Westinghouse motor on it. Right now it runs on 120v but it can be changed to 240v. Everything is there. I just bought new belts from Grainger. As soon as get a new belt, I will give it a try. It has an open base with a rod connected to the on/ off switch. Does anyone have an idea what the belt length should be?
Woodman
Hi Woodman, looking through the posts on Delta-Rockwell belt sanders and seen your request for the length of the belt. If you still need it, I ran across an old drawing that shows 56". I'm going to be restoring a Rockwell, just like yours here as soon as they get it shipped. Good luck with your rebuild. P.S. just found another drawing on an old Delta parts list and it shows 57-1/2" in circumference, but the p/n is 560 ?
I used a 58" belt that I got from NAPA. It seems to work just fine. I have sanded a few wooden pieces since I overhauled the sander. The top cover had 2 gouges in it so I filled them with epoxy. Unfortunately the glue remained sticky so I must remove it and start over again.
- Joined
- Mar 14, 2013
- Messages
- 736
that is correct. It's called a slip fit. once the bearings are pressed in and the shaft installed, the nut installed on the pulley side and tightened, and the spacer installed on the drum side, and the lower drum slid on, and the left handed nut tightened up, the spacer will tighten up to the bearing race on the drum side, and the nut on the pulley side.if memory serves, bearings are suppose to be tight in the housing and "loose " on the shaft. i would install new sealed bearings leave the shaft alone. unless its easy for you to make a new one.
That will lock the inner races to the shaft.
- - - Updated - - -
Parts come up on eBay every so often. That upper yoke is so fragile that someone is making a reprduction one, and it is quite spendy. Delta's website recommends cutting the shaft when replacing bearings on the upper yoke.( Might be because they still sell the shaft and not the yoke:rofl. I ended up buying a second machine for parts, feel free to hit me up for anything you might need.
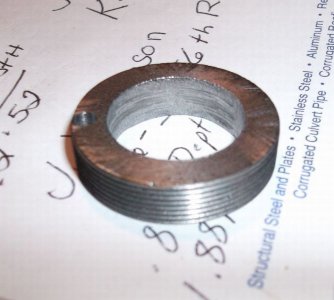
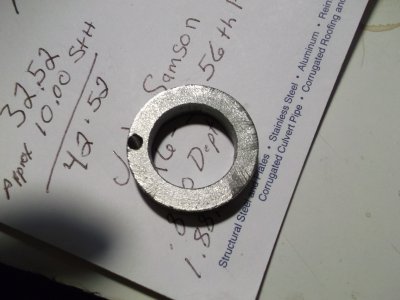
heck, I should have asked you, I needed the spanner nut that holds the top bearing in the yoke, but I ended up making one.


