Custom keypad for Mach3 (Mill) and Touchscreen questions

This sounds a little bit like the control panel I used to control my power feed for a while. I used 8 momentary push buttons and an arduino to control it. I have been planning for a while to use the same principle to control my CNC mill. You just connect the arduino to the computer via usb, and the buttons each get an input pin for the arduino and they are grounded to the arduino. Then a simple program monitors the buttons and send the computer keyboard shortcuts when they are pressed, the same way a keyboard would. I use linuxCNC where everything has a shortcut, and the program can be modified to change the function of each button very easily. The buttons are cheap, ill include a link, and one arduino mega can support 54 buttons so it could support a very large keypad.

ag3ZjUk.jpg


http://www.ebay.com/itm/10-Pcs-Latc...139811&hash=item2813b2920d:g:MlkAAOSwwpdW4ck~
 
That's a cool approach. I've never played with the arduino platform, but I understand it's oriented toward controlling things more than the Raspberry Pi is. I have a Pi 2, but haven't gone anything useful with it.

The ergonomics on these things matters, and I think the Rumblepad is a bit too big and chunky. I'm only using about half of the buttons on the thing: the right side buttons (1-4), the front edge buttons for up/down and one of the four slim rectangles on top of the thing for the <CTL> button.

Still, it's a nice improvement over using the PC keyboard and it's good enough for now.
 
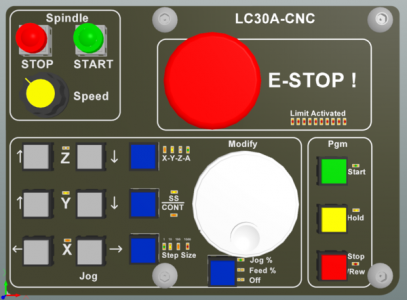
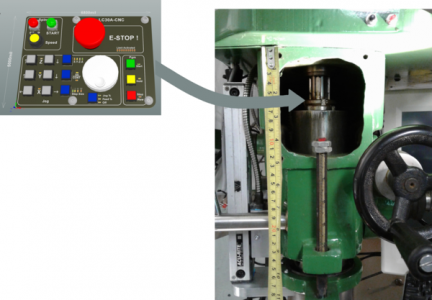
My work in progress (concept at this point), please feel free to critique.

B-Bar zoomed.png
 
5" x 6.8" , I want decent size buttons for ease of use. I'm going to change the middle blue button to include MPG.
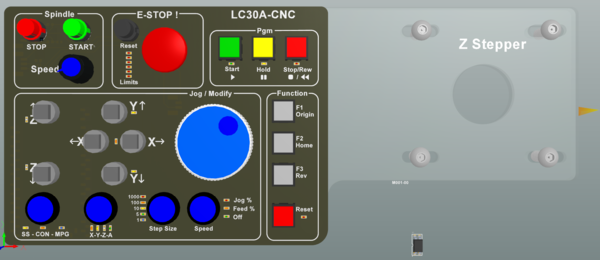
B-Bar.png
 
I personally like to have the X and Y Jog buttons in a "+" pattern that matches the direction of the Part Movement. It's more a mental thing for me, so I don't need to convert in my head. Other than that I like your Layout.

(I tired to show the layout in ASCII, but the forum software is too smart and eliminates the extra spaces.)
 
Last edited:
I personally like to have the X and Y Jog buttons in a "+" pattern that matches the direction of the Part Movement. It's more a mental thing for me, so I don't need to cover in my head. Other than that I like your Layout.

(I tired to show the layout in ASCII, but the forum software is too smart and eliminates the extra spaces.)

I use the 4 arrow keys on my PC keyboard for that reason. The Up/Down for Y are in the middle, Left/Right for X on either side. Same basic idea. On my game controller, it's four numbered buttons in a "+" pattern, and then Z up down is on the top edge. I have accidentally bumped a button, but unless you use two key presses to do anything, that's probably unavoidable.
 
I use the jog wheel to .. well Jog. but to make it easy on me. I use an X-Key programmable button bar that has 4 dedicated buttons for the jog increment. I have them set to 0.1 ; 0.01 ; 0.001 ; 0.0002. the pendent I have has a switch for X, Y, Z, and Feed rate. I find that this covers most of what I need for zeroing and the nice thing about the X-Key buttons is that I can program more custom key strokes when I decide what I want to short-cut. Like setting Z with the 2" offset of my setter tool.
 
Getting closer.........

After researching boards that will give me more I/O, the Pokeys57E and UC300ETH seem like the best candidates. I decided to go with the Pokeys based on the small size, low cost and positive comments. I sent a few questions via the tech link on the Polabs website and received a quick and detailed response. I then placed an order and the board was shipped within the hour with DHL tracking. So A++ service. The board arrived in Toronto the next day, WOW!

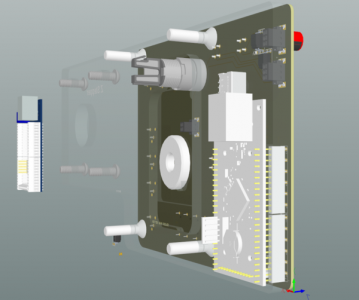
I ordered the version without connectors and will mate the 57E directly to the back of the PCB as shown below to eliminate the wiring.

I will bet the moment I start using this thing I will want another button or two, hopefully the three function buttons will cover what ever I have overlooked.

LC30A-CNC.png

LC30A-CNC-back.png
 
I like that keypad layout better, for whatever that's worth. The X/Y layout with Z along side makes sense. I use a rotary axis, so I'd need A also, but maybe that's just me.
 
Back
Top