You can check run out on a 3-jaw chuck but I'm not sure its worth the trouble since most will have some run out and unless you have an Adjust-tru type chuck you can't do much about it. In addition, anything you turn in the chuck will be on the exact centerline of the spindle unless you take it out of the chuck and then try to re-chuck it.
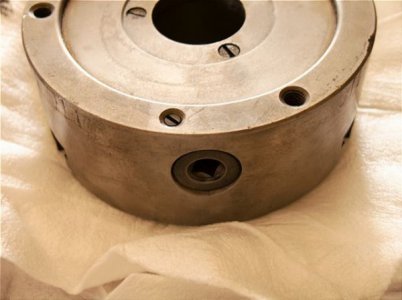
As for taking the chuck apart to clean it, it would help to post a pic so we can see what the chuck looks like. In general, you will wind out and remove each jaw and then remove the screws on the back rim of the chuck just to one side of the chuck key socket; these are shoulder screws that hold the pinion gears in place. Remove all three and set aside.
Next remove the three screws that hold the front and rear halves of the chuck together. These screws surround the center hole of the chuck.
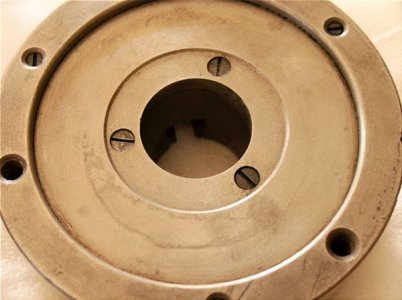
The back usually comes off easily but if the chuck is old and hasn't been maintained then it may be a bit stuck. Tap the back of the chuck against a wooden block or your work bench and the rear plate will come off.
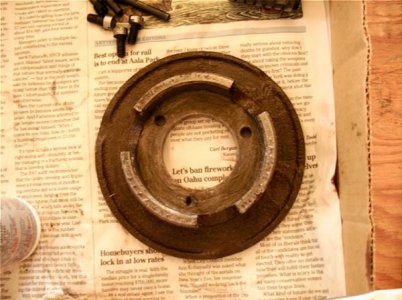
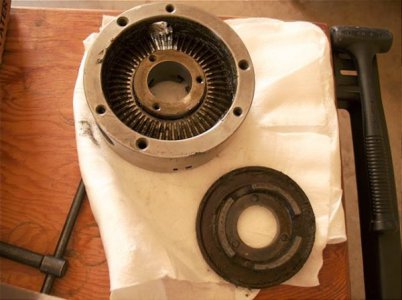
Then use a hardwood dowel that you can pass into the jaw slots from the front. Tap evenly in each of the slots to knock the scroll loose.
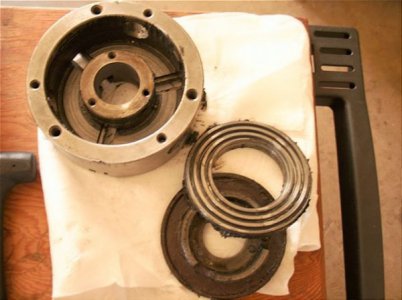
The chuck is now completely apart. Clean all parts and inspect.
Most chuck makers recommend grease for lubricant but most of us users don't do that. We use oil to lube the jaws and jaw slots and grease is used only on the scroll and pinion gears. I use SuperLube oil and grease for these jobs as it does not harden and cake with age.
Okay, assembly is just the reverse of the above. Oil the jaws and the slots they ride in on the front half of the chuck and set aside. I lightly oil the inside of the chuck to prevent rust. Now oil the front of the scroll lightly - you do not need a lot of oil here - and then grease the geared rear of the scroll and insert the scroll into the body of the chuck.
Grease the holes for the nose of each pinion gear that are located on the hub of the chuck body, and then grease each pinion gear. Insert the pinion gears and then replace the rear plate of the chuck. You can re-insert the three body screws and pinion shoulder screws and snug them all; do not overtighten them. At this point your chuck is mostly reassembled.
The three jaws can now be inserted. Note the teeth on the bottom of each jaw is slightly different, with the number one jaw on the far left having teeth closest to the nose of the jaw and the teeth of the number three jaw on the right will be set back the most. The tooth location of the number two is in the middle of these two.
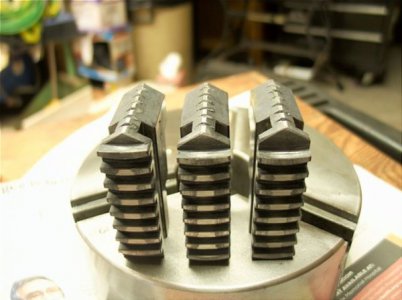
Now, locate the number 1 slot; it will be numbered. Use your chuck key and advance the scroll until the start of the scroll is just visible, then back the scroll up until the thread is just hidden.
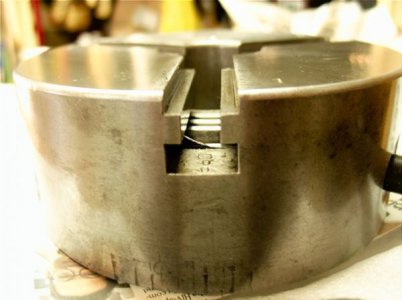
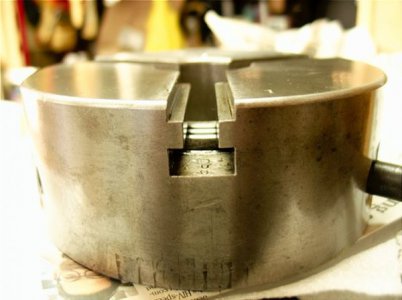
Insert the nose of the number 1 jaw (should also be numbered) into the jaw slot and push it in as far as it will go. Turn the chuck key until the start of the scroll thread is just short of visible in the #2 jaw slot and insert the #2 jaw. Repeat for jaw #3. Note that as you insert each jaw and turn the scroll the inserted jaw will engage the scroll and be drawn in. The reason for the staggered teeth on the jaws is so that when all are in place their tips will be synchronized.
You are now done.
You should perform this maintenance every 3-6 months or if your chuck feels like its sticking due to chips getting caught in the scroll. After you do this a few times it will be a quick job that should not be ignored.
Hope this helps you.
Mike


