-
Welcome back Guest! Did you know you can mentor other members here at H-M? If not, please check out our Relaunch of Hobby Machinist Mentoring Program!
You are using an out of date browser. It may not display this or other websites correctly.
You should upgrade or use an alternative browser.
You should upgrade or use an alternative browser.
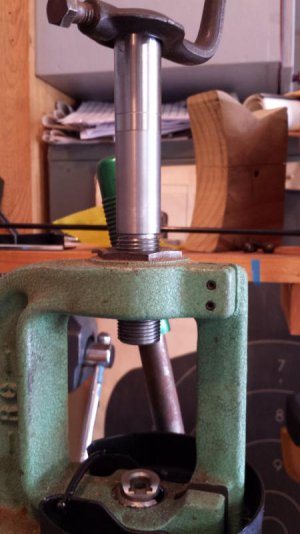
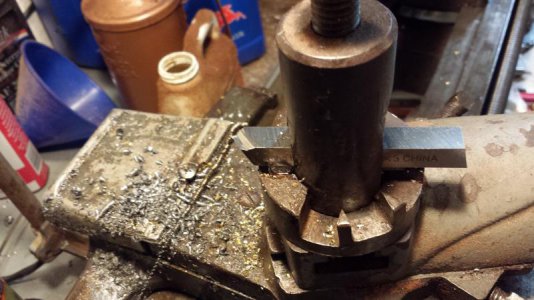
Can I hold a 3/8" HSS bit directly in the lantern toolpost?
- Thread starter cdhknives
- Start date
- Joined
- Apr 12, 2013
- Messages
- 562
Have you tighten the gib on the BACK of the carriage? Lots of people forget that there is one back there to hold the carriage tight against the frt surface of the ways.
Pierre
Yes. Also, the compound is almost too tight...very stiff to turn the crank. I thought I had done the cross slide too but I could see it moving...so either I didn't or something worked loose.
- Joined
- Dec 20, 2012
- Messages
- 9,422
Okay, assuming you tightened up all the gibs and are keeping bit overhang at the minimum then it comes down to your lathe tool and cutting conditions. I don't use W-1 (prefer O-1) but I have a few suggestions you might try.
1) I suggest grinding a finishing tool. I know you need to face with it but it will work for that, too. Keep the side relief angle at about 10 degrees and the end relief angle about 10 degrees. I would boost side rake to about 14-15 degrees to improve chip clearance and keep cutting temps lower. I would also increase back rake to about 10 degrees to put more of the cutting force at the tip - this will help when you are trying to size that rod. I would keep the nose radius between 1/64-1/32" max. Hone the tool before use.
2) When facing the end align the side cutting edge so that the cutting is done just behind the nose radius and feed in with the cross-slide feed. Turning speed for 7/8" W-1 works out to about 785 RPM but that may be a bit fast. You will need to figure out what works for your lathe but on mine I would start at 350 and go up as tolerated.
3) For finish cuts I tend to go much faster than recommended - tool steels finish super-nice at speeds above 1800+. This is with very light cuts in the 0.002" range.
Hope this helps.
- Joined
- Jan 28, 2011
- Messages
- 3,584
Mikey hit all the points that I could think of at this time. Sharp tool, smaller tip radius to lower the cutting pressure, smaller and finer feeds will help you a ton.
When you go to cut that 7/8" thread, you will have to take light cuts with a very sharp tool. Use lots of lube as well. Everybody says that! It can be done even on an Atlas. I cut 12 tpi square threads for my second Savage 99 barrel, with my hand ground tool and that was sketchy, as at the time it was early in my experience with this lathe.
Make sure that the top compound gib is the full lenght and properly adjusted front to back. Mine came with a short gib and this gave me fits until I looked at it.
Same for the crossfeed slide. Sometimes the gib screws are not evenly adjusted or the tips are not in their locating holes on the gib strips.
The brass feedscrew nut is not a problem as you have to take up the backlash anyways.
How is the lathe bolted down? On a solid and strong bench that can not twist as the bed tries to move around under load?
Check the bearing plates under the carriage frt and back for excessive space. Can you lift the carriage up off the ways at the frt or back? May require reduction in the shim stack. If it is still there! I had issues here as the ways were worn in the first 6" , and if I tighten for that area as the carriage moved to the tailstock, the carriage would tighten up to near jamming. I ended up using belleville washers on the bearing plate bolts, to allow some give in the bearing plate to underside of the ways. This step will help more for chatter.
Getting further in, remove the top slide and check that the dovetails are not worn excessively towards the front. Use a straight edge to check and measure across from end to end to see the difference in width. You can fix this but takes a bit of time and finese(sp). Do the same for the crossfeed dovetail as well if you still are having issues but usually it is the top slide that has the most wear.
That is all I have for now. Bed is calling.
Pierre
- Joined
- Jul 26, 2011
- Messages
- 4,142
Your tool is ground all wrong. Large radii like shown are begging for chatter. There is no top rake or chip breaker groove. Get a lathe book and study how cutters are ground for the best results. You need to be really careful to grind tools for a light lathe like an Atlas. I had one! I know!!
It is necessary to remember that those chips have to have some place to EASILY go,not to just be crammed straight down on a flat surface. That makes it much harder to cut easily. The radius of the cutting portion should be just large enough to span the distance between the successive lathe cuts you make as the tool is power fed along the cylinder you are turning. A tool with a 1/64" radius is plenty large enough to span fine feed cuts(so you aren't just making a very fine thread,but instead generating a smooth surface.) A chip breaker groove very near the cutting edge will curl chips so tight,they break off in short pieces shaped like 6's or 9's. The chip breaker groove needs to be pretty narrow,as if it was ground with a 1/16" cut off wheel,or the corner of a sharp edged grinding wheel.
I say the chip breaker groove should be very near the cutting edge because a "false edge" of impacted steel will soon build up,forming the actual cutting edge.
Last edited:
- Joined
- Apr 12, 2013
- Messages
- 562
Yes I know about the bit...as stated above I was in the middle of grinding it and threw it on the machine for the picture...might as well see if it was a bad idea before spending much more time working on it.
It worked (with a properly ground bit), but really left me with a lot of unusable stock because I couldn't get close to the dog. I was hoping to get 2 dies from this piece of stock but it didn't happen!
I cut my first threads too. They are tight, but the surface finish is a bit rough.


It worked (with a properly ground bit), but really left me with a lot of unusable stock because I couldn't get close to the dog. I was hoping to get 2 dies from this piece of stock but it didn't happen!
I cut my first threads too. They are tight, but the surface finish is a bit rough.


- Joined
- Jul 26, 2011
- Messages
- 4,142
Still a peculiar looking bit. I encourage you to buy "how to run a lathe" or the Atlas handbook. They have pictures of how bits should look,though they are outdated and do not include chip breakers. I am too tied up right now to post pictures. Maybe someone else could.
- Joined
- Jan 28, 2011
- Messages
- 3,584
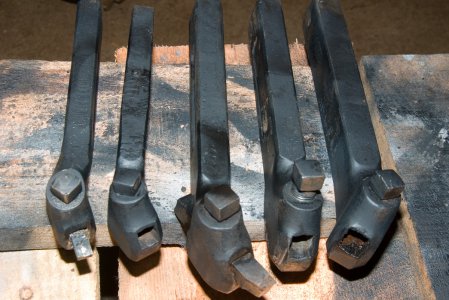
In the parts, bits and pieces that came with the lathe, did you see any tool holders? Such as shown in the first picture.
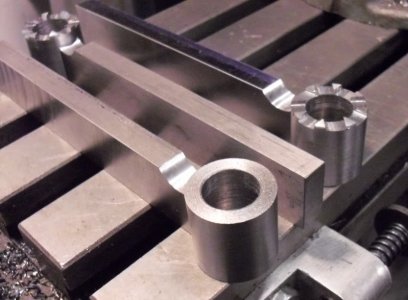
What you need is an offset holder that twist to the right. There are also an adjustable end type that is the same as your tool holder but sized smaller. Usually for 1/4" tools. That is shown in the second picture. That way you can get closer to the chuck end of your work. You can also grind a HSS tool blank to accomplish the same thing. Basicly you would grind a shape similar to a boring bar but with the cutting tip facing in instead of out, if that makes any sense. The older Machinery's Handbooks have drawings show these special shape tools.
Pierre


- Joined
- Apr 12, 2013
- Messages
- 562
I have a bunch of tool holders and have been using them for aluminum and wood, but when I see the top of the lantern flexing 1/8"+ at the start of a .005" cut into W1 steel drill rod I started looking for ways to stiffen the whole thing up. Hence the start of this thread.
The bit I ground cuts nice long (got one over 6') springs about 1/8" in diameter on light cuts (.002"). It has 15 degrees of relief under the nose and about 15 degrees rake from the left edge. Since I'm grinding it by hand on my belt grinder it gets dang hot (yes I dunk it in water periodically) so I only ground a little behind the edge...no reason I saw to grind the whole top face back to get edge rake. The front vee is about 90 degrees with a slight roundover taking off the point. Finally it gets honed to near shaving sharp on a 600 grit diamond stone.
The bit I ground cuts nice long (got one over 6') springs about 1/8" in diameter on light cuts (.002"). It has 15 degrees of relief under the nose and about 15 degrees rake from the left edge. Since I'm grinding it by hand on my belt grinder it gets dang hot (yes I dunk it in water periodically) so I only ground a little behind the edge...no reason I saw to grind the whole top face back to get edge rake. The front vee is about 90 degrees with a slight roundover taking off the point. Finally it gets honed to near shaving sharp on a 600 grit diamond stone.

